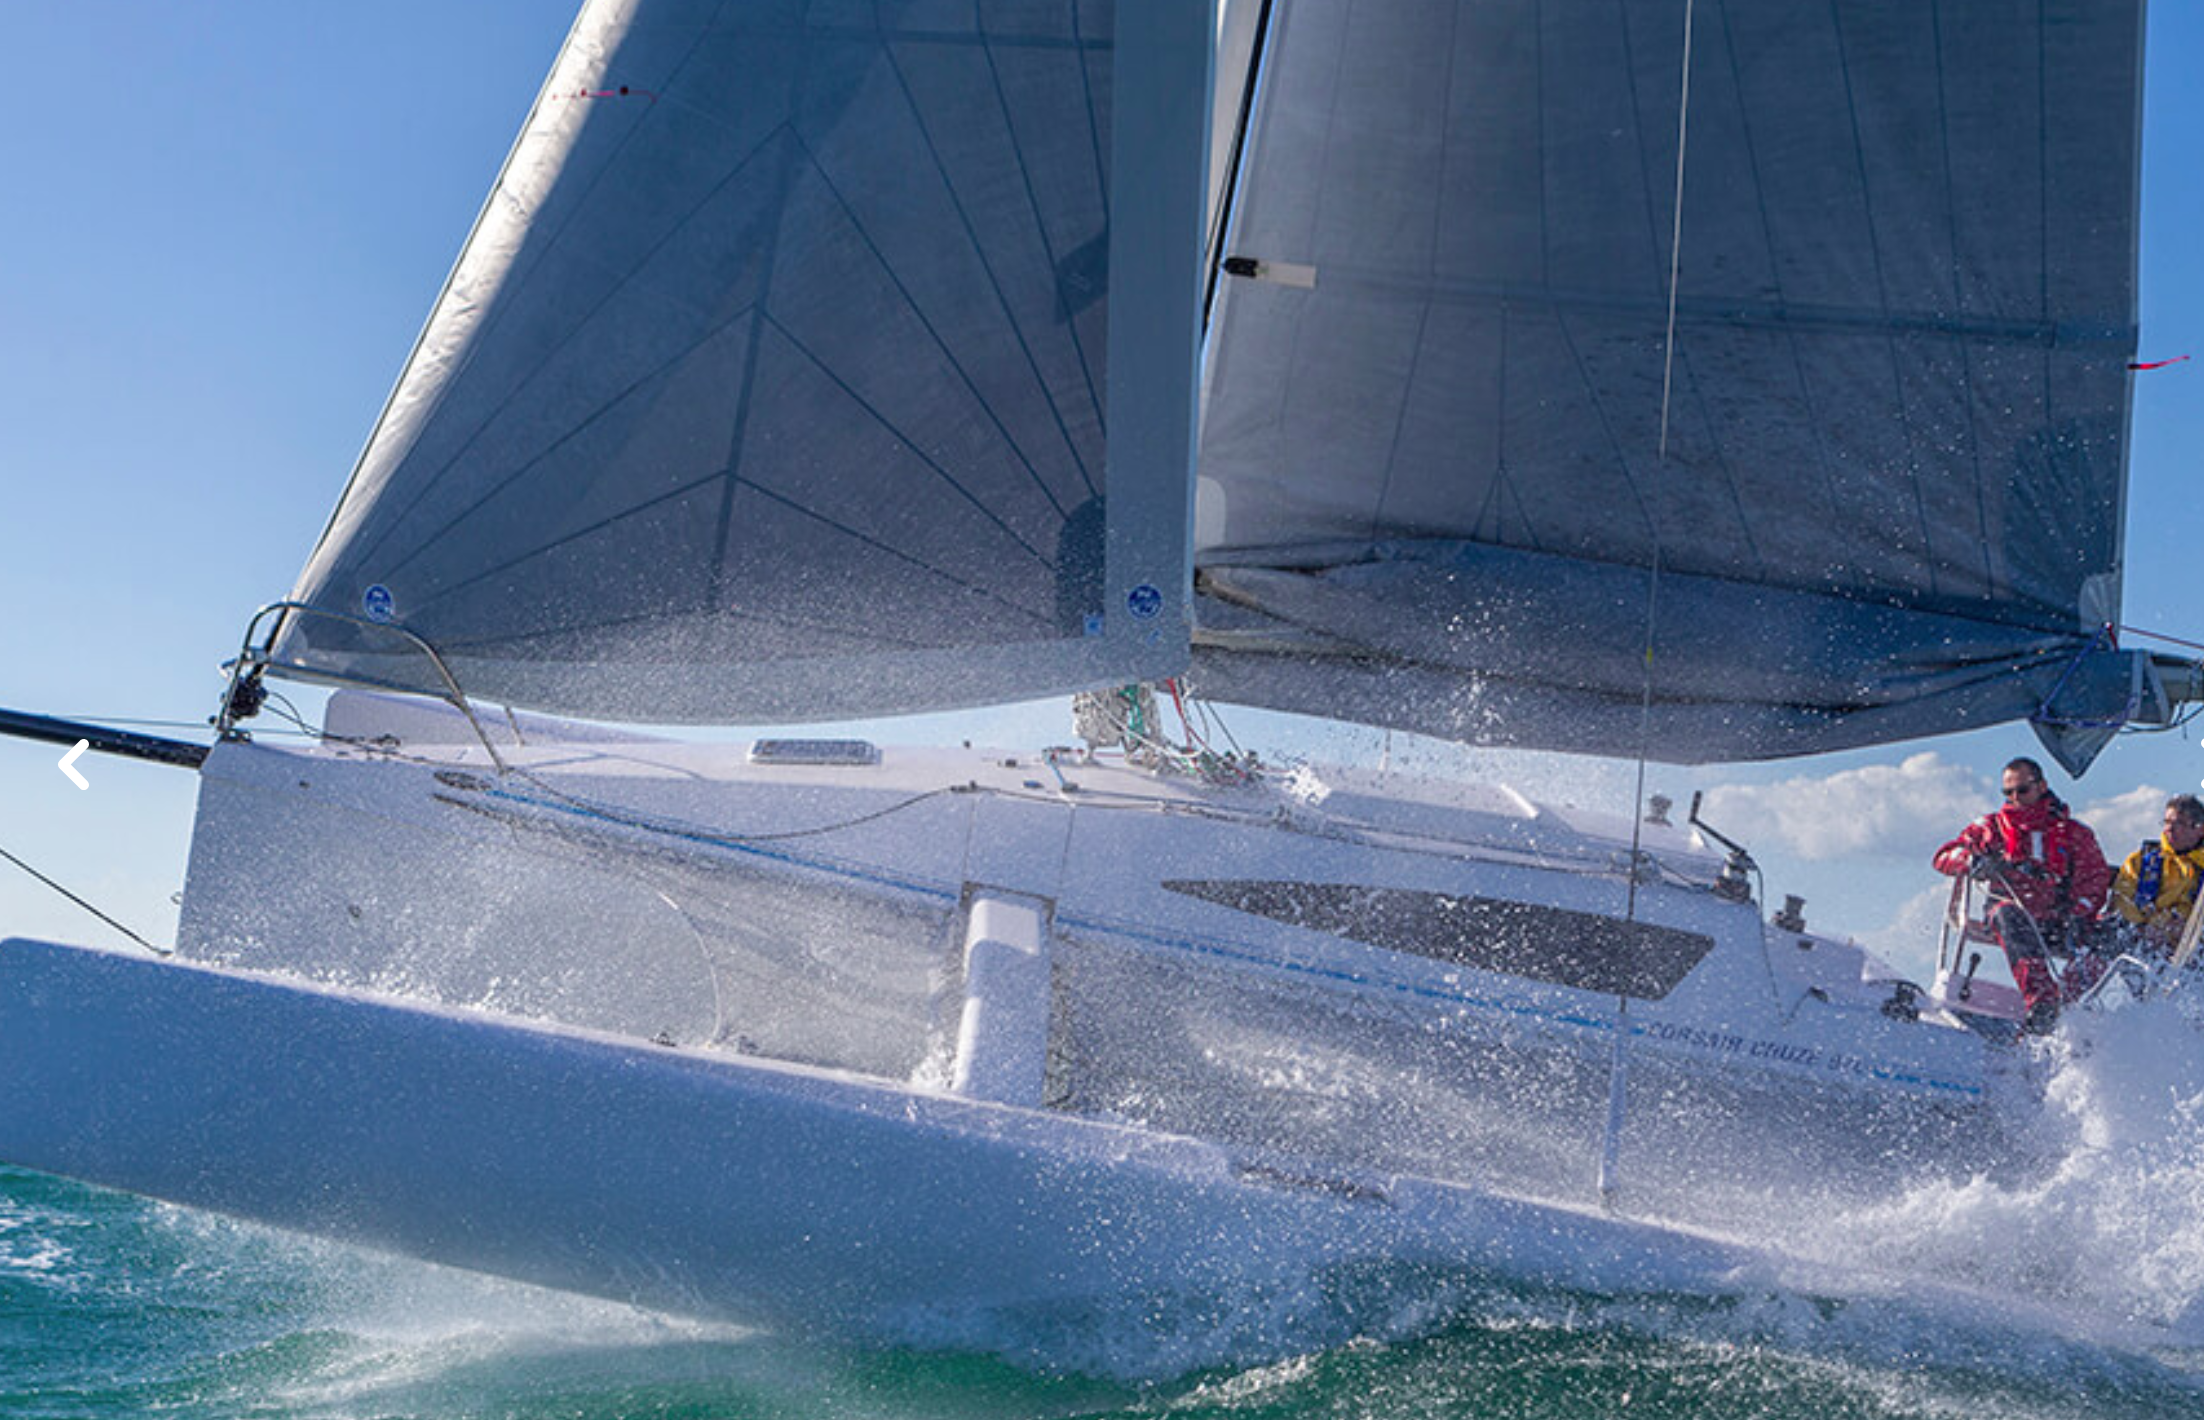
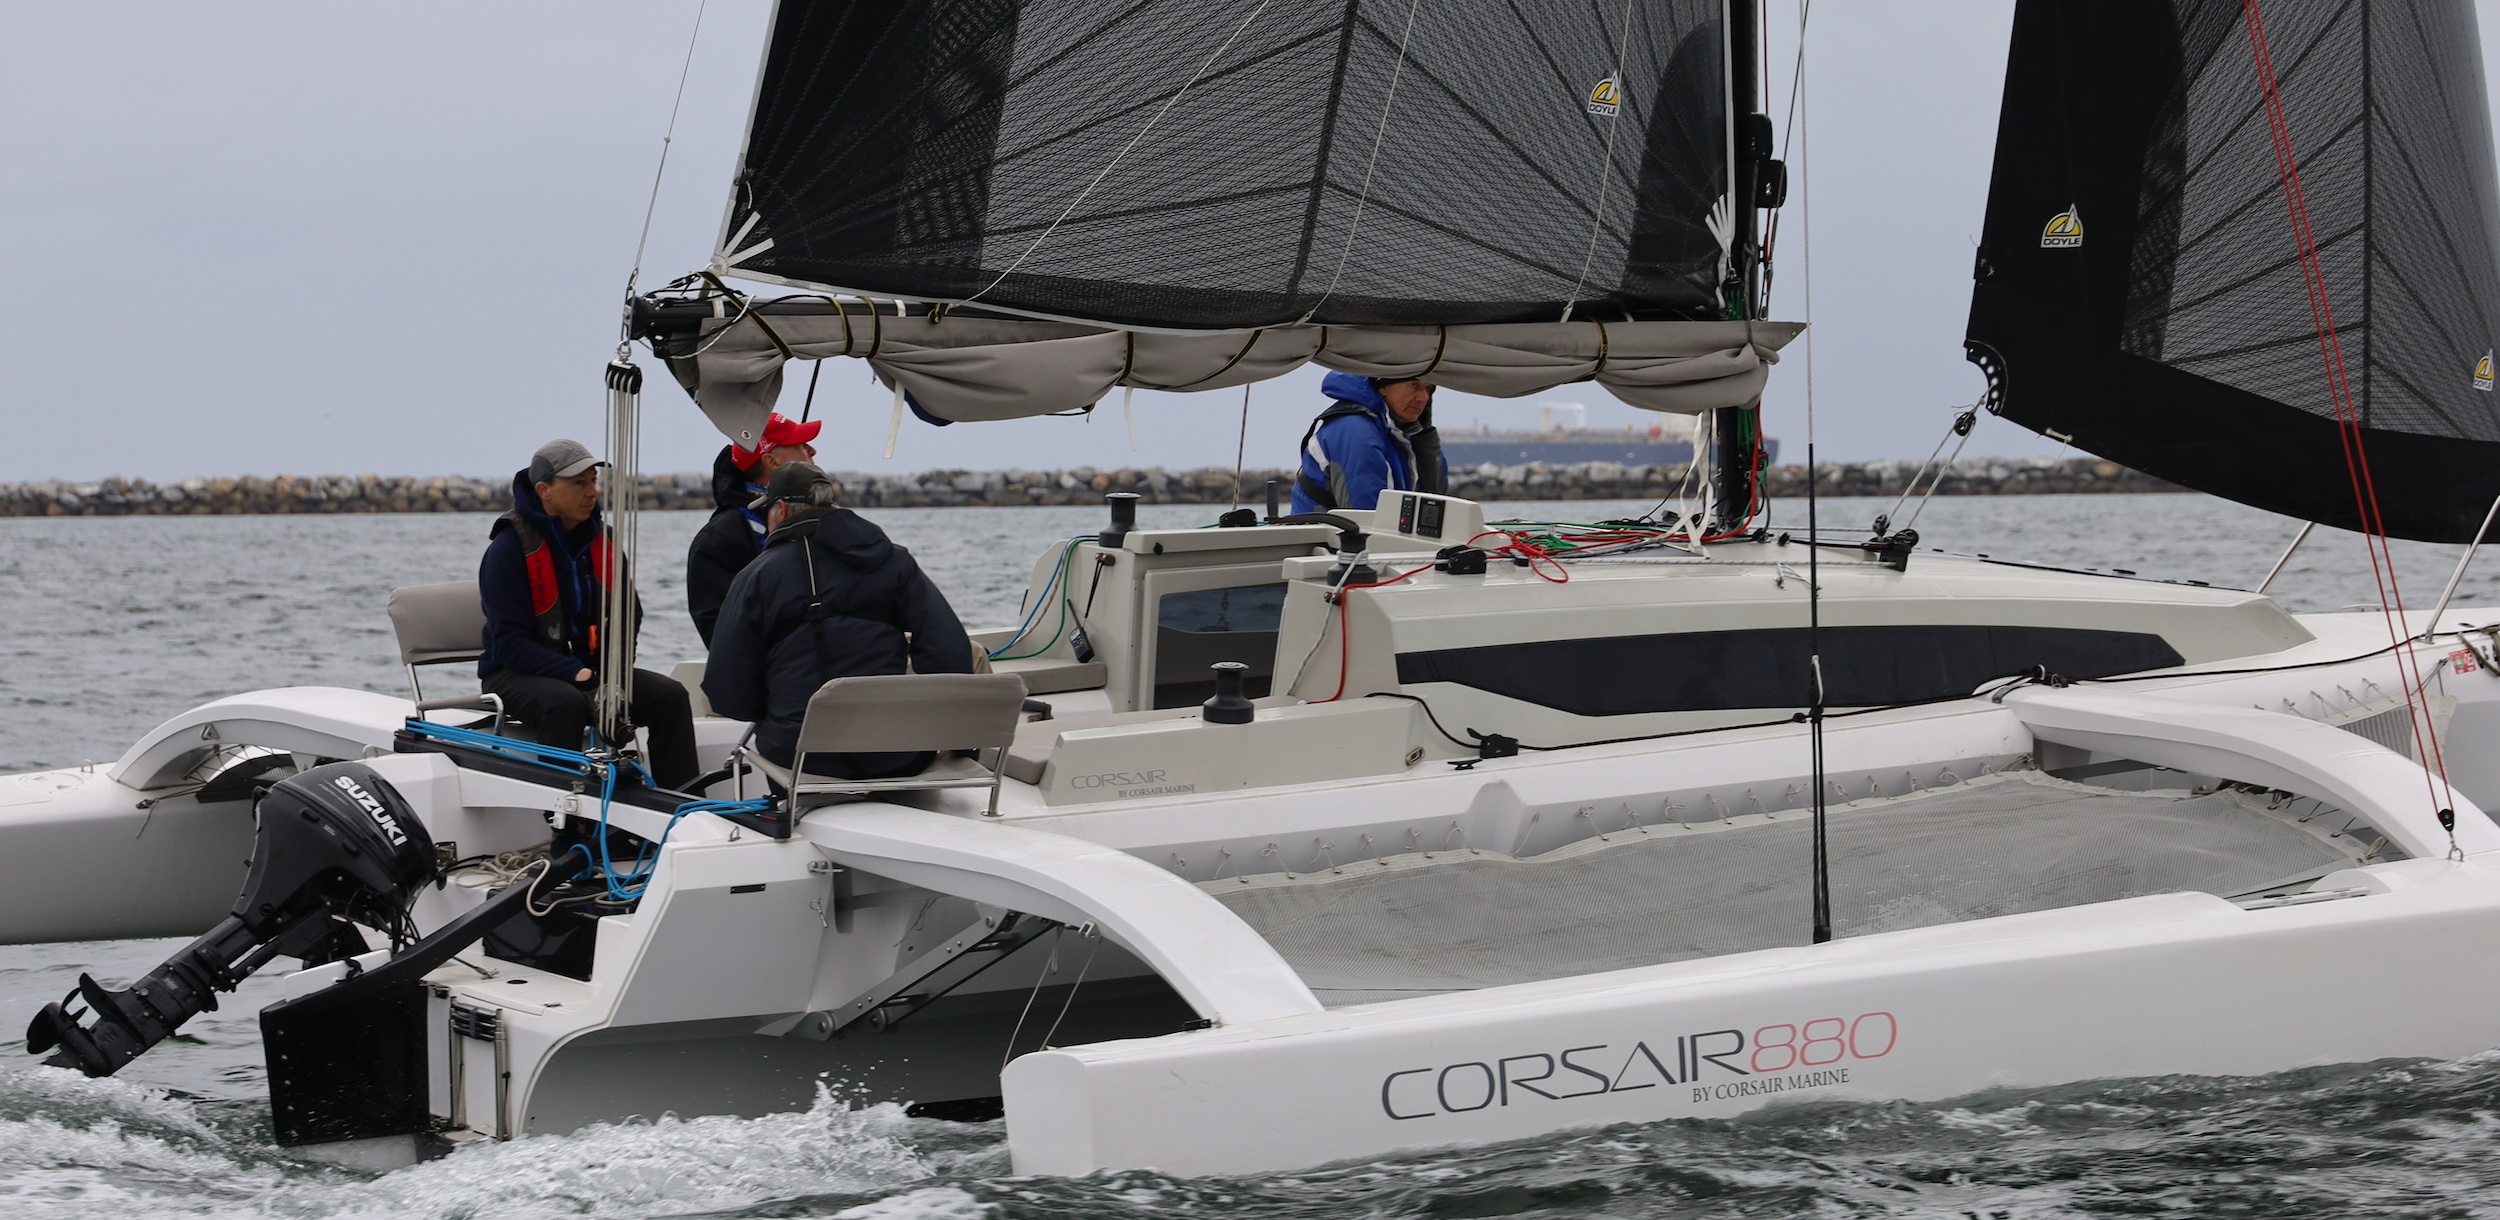
Another fantastic Corsair 880 training event!

All had a great time!
Participants came from Alaska, Canada, Washington, Colorado, Arizona, and California. Despite the weather, everyone came prepared for anything. It rained and rained and the wind blew! The Corsair 880’s handled oh so well. We were hitting speeds up to 18 knots! What a great environment for training.

Our participants had 2 days of training on and off the water, covering the “essentials” of trimaran sailing. Docking, safety procedures, sail management, sail trim, boat handling downwind sailing techniques, and spinnaker handling were the primary focus.

At this April event, we had 3 new Corsair 880s. These trimarans were owned by local skippers in the Corsair community. BIG THANK YOU for allowing everyone to train on your trimarans.

What a freakin’ blast you guys. Last weekend was chock full of nuts and nuggets of insights about the 880 and sailing in fresh breezes on trimarans in general. Thank you so much for organizing this event.
— Brian/Alaska

Our trainers certainly had their work cut out for them!

event trainers

Richard Allen / Founder 180 Marine / Trimaran Racer
Richard has raced and sailed Corsair trimarans for 28 years. He knows these boats inside and out. Richard is a natural teacher and loves to share his extensive knowledge.

Scott Klodowski / Trimaran Racer / World Cruiser
As a valued team leader at 180 Marine, Scott is multitalented and highly knowledgeable on trimarans. He has sailed, raced, and rigged high-performance race boats up to a Gunboat 62, a Nigel Irens 63, Nacra 5.8, a Corsair 880 and 37, and a Reynolds 33.

Bill Edwards / Trimaran Racer / World Cruiser
Over this past year, Bill has been sailing around the Pacific on his Seawind 1160. Bill has owned and raced many (many) Corsair trimarans.

Sailing in “Hurricane Alley” - San Pedro, California. Located at the southern end of the Palos Verdes Peninsula at the end of Los Angeles, San Pedro Bay was first used by Spanish ships starting in the 1540s. Along its waterfront are shipyards, dry docks, fish canneries, and oil refineries, as well as a memorial to the merchant marines. Los Angeles Air Force Base and Cabrillo Beach are on Point Fermin at the peninsula’s southern tip. Built in 1874, the Point Fermin Lighthouse was the first navigational light into the San Pedro Bay.


2024 FUTURE EVENTS

MAY DEMO DAY ON A CORSAIR 880
Date: May 25th (one day)
Location: Long Beach, California
Cost: $598 per person
Contact:
taylor@180marine to reserve your spot
Only 4 spots available for this exclusive experience.


AUGUST DEMO DAYS ON A CORSAIR 880
Date: August 23, 24, 25 (3 days)
Location: Long Beach, California
Cost: $1,198 per person
Contact:
taylor@180marine to reserve your spot
Only 10 spots available for this exclusive experience.


CORSAIR 880 FOR SALE / ARRIVING AUGUST 2024
View Details >>

2024 Registration is open

The Newport to Ensenada International Yacht Race is open for registration for the April 26 – 28, 2024 annual classic. Once again race organizer, Newport Ocean Sailing Association (NOSA), will offer two race courses to either Ensenada or San Diego. Registration and Notice of Races are available at on Regatta Network.

The Newport to Ensenada Race is one of the oldest annual sailing competitions that takes place between Newport Beach, California, in the United States, and Ensenada, Baja California, in Mexico. It has been one of the largest international yacht races in the world and still attracts participants from all around the globe. 

Last year, Rich Festas’ 46-foot Rogers Groundhog Day won the top three trophies in the 75th Newport to Ensenada International Yacht Race. One of seven in the competitive Ultra-Light A-Class, Groundhog Day, crossed the finish line at 17hr 36mn 13s, more than 2 hours and 34 minutes faster than class competitors ITS OK and Staghound that finished just one minute and eight seconds apart. 

The Ensenada race covers a distance of approximately 125 nautical miles and is open to a wide range of sailboats, from small cruisers to larger racing yachts. The course to San Diego covers 90 miles. There are trophies for multi-hulls, double-handed, cruising class, all female crews as well as PHRF and ORR classes. This spring classic offers participants a challenging and exciting overnight offshore sailing experience.

Despite sailing 101 nm farther than the fastest Maxi yachts, Taniwha, the 32-foot New Zealand-built Farrier design, clocked a time of 17h 46m 49s and finished 10 minutes and 36 seconds behind Groundhog Day. 

The time was good enough for owner Jerry Fiat and his 21-year-old helmsman Peter Sangmeister to take home four trophies: The ORCA A Trophy for best in the ORCA A-Class, the President of NOSA Trophy for Best Corrected – ORCA, the Alice Pursell Trophy for the Best Elapsed Time – ORCA, and the Stein-Cross Trophy – for the first trimaran.

The race has a rich history dating back to 1948 and has become a celebrated event in the west coast sailing community. The largest fleet was in the mid ’80 with over 600 yachts. This year the organizers are expecting around 200 competitors between the two race courses. It combines the thrill of competition with the beautiful coastal scenery of Southern California and Mexico.

Whether you're a seasoned sailor or a spectator, the Newport to Ensenada Yacht Race is an event worth experiencing. It showcases the skill and dedication of sailors while providing an opportunity to enjoy the camaraderie and adventure of offshore racing.

Sarasota Bay Multihull Regatta / March 15-17, 2024

Sarasota Sailing Squadron is once again hosting the SBMR Regatta/Corsair Regionals for 2024, which will be held March 15- 17, 2024. We look forward to your unique boats flying on the bay with your favorite PRO. There will be lots of racing! Registration is now open on Regatta Network. Watch for a couple of new Corsair 880 Sport entries! It’s going to be a fun race!

Sarasota Sailing Squad
Sarasota Bay Multihull Regatta
Sarasoata Bay Multihull Regatta
Corsair trimaran
Corsair trimaran
Corsair trimaran
Corsair trimaran Pulse 600
Corsair trimarans

2024 Newport to Ensenada International Yacht Race

Check out all-night racing seminars throughout Southern California. These seminars are taught by past winners, expert sailors, and safety specialists.

About the N2E Race:  The Newport to Ensenada International Yacht Race is in its 76th year. While the length of the course has rarely changed, the wind conditions and premier level of racing competition have constantly improved with faster designs, better sail materials, and improved electronics to monitor increased performance. The organizing authority, NOSA, is grateful to its sponsors for their ongoing support- The City of Newport Beach, Ullman Sails, B&G Electronics, Boatswains Locker, The Coral Hotel & Marina, Gladstone Restaurants, and all the yachts clubs who support the race with volunteers and committee boats.

The Newport Ocean Sailing Association (NOSA) and Ullman Sails are excited to present a new series of racing seminars designed to improve your overnight racing skills and share updated information on this year’s 76th Annual Newport to Ensenada Race events. Seminars will be held at the following SoCal locations

  • LA Area      Del Rey YC                   February 7 

  • LB Area      Seal Beach YC              February 8

  • DP Area      Dana Point YC        February 15

  • NB Area      Bahia Corinthian YC   February 22

  • SD Area      Silver Gate YC              March 7

Everyone attending the seminars will be eligible to win a new B&G Triton 2 Information System. The winner's name will be drawn at the last seminar in March. All seminars will begin at 7 pm. Please sign up in advance at nosa.org/seminars.  Seminars can be incredibly valuable in enhancing sailboat racing skills and increasing performance, especially when it comes to night racing. Here are a few reasons why:

1. Learning from experts: Seminars often feature experienced sailors and racing professionals who can share their knowledge and techniques specifically tailored to night racing. They offer insights into navigation, tactics, sail trim, and safety measures that are crucial in low-light conditions. All presenters are past winners of the N2E and other prestigious offshore races.

2. Skill development: Seminars provide an opportunity to focus on specific aspects of sailboat racing that are relevant to night racing. You can learn how to optimize your boat's performance in the dark, make effective tactical decisions, and improve your night vision to navigate confidently. Each night will set aside time for Q&A, plus coaching tips for boat owners.

3. Networking and collaboration: Attending seminars allows you to connect with other sailors who share your passion for night racing. You can exchange ideas, discuss strategies, and build relationships that may lead to future partnerships or crewing opportunities.

4. Safety awareness: Night racing can present unique challenges, such as reduced visibility and potential navigation hazards. Seminars often cover safety protocols, equipment requirements, and emergency procedures specific to night racing. This knowledge can help you mitigate risks and ensure a safe and enjoyable experience on the water.

5. Motivation and inspiration: Seminars can be highly motivating, providing you with fresh ideas, strategies, and techniques to improve your racing performance. The energy and enthusiasm of fellow sailors and expert speakers can inspire you to push your limits and strive for excellence in night racing.

 Remember, attending seminars is just one part of the equation. Applying what you learn through practice, experience, and ongoing training is crucial to truly enhance your sailboat racing skills and excel in night racing. The 76th Newport to Ensenada International Yacht Race is accepting registration for the April 26 – 28, 2024 annual classic. Once again, race organizer NOSA will offer two race courses to either Ensenada or San Diego. Registration and Notice of Races are available at www.nosa.org

Whether you're a seasoned sailor or a spectator, the Newport to Ensenada Yacht Race is an event worth experiencing. It showcases the skill and dedication of sailors while providing an opportunity to enjoy the camaraderie and adventure of offshore overnight racing. For more information or to register go to www.nosa.org.

The basics, on setting-up the Corsair 880 trimaran

Is the Corsair 880 trimaran right for you?

Corsair 880 trimaran

Here’s some information on what it takes to get the Corsair 880 ready to sail.

Follow Tula’s Endless Summer. Billy and Sierra are a couple of highly energetic, passionate adventurers who toured around the country with the new Corsair 880 — putting the Corsair 880 through the paces. They had the boat for five months. Tune in and follow these guys for a bit of knowledge and entertainment.

Below is a video that goes into much more detail on the Corsair 880. Check it out!
”The basics on setting-up the Corsair 880 trimaran.”

The Corsair 880 trimaran is designed to be completely safe and comfortable, for people of all skill levels. It features creature comforts such as air conditioning, heating, refrigerators and more. In true Corsair fashion, the generator and air conditioning are removable to reduce excess weight when racing, or reduce trailer weight when on the road. And this is where the Corsair 880 trimaran is the revolutionary boat it promises - all of that comes in a folding, trailerable package well below the trailering weight limit of most passenger cars.

Relaxed cruising: Helming from the protection and comfort of the padded cockpit seats is made possible due to the low heel and stable sailing provided by high volume ama design and a huge unfolded beam.

High speed racing: A 44-foot carbon rig, laminate sails offered on the Corsair SPORT model, combined with the impressive low-rocker hull design deliver class leading performance.


If you're interested in knowing more about the Corsair 880 or the Corsair 880 Sport, we’d love to hear from you.

180 Marine is the leading dealer in the U.S. for Corsair trimarans.

Richard Allen, the Corsair Trimaran Expert

Severe weather and bumpy road conditions can take a toll on any boat and its inventory if unprepared.

highway transporting your Corsair Trimaran

Preparing a Corsair for interstate travel is just as important as preparing it for a blue water delivery. Severe weather and bumpy road conditions can take a toll on any boat and its inventory if unprepared.

Insurance Coverage

The owner of a boat is responsible for her as well as her trailer and potentially any damage either may cause to persons or property during transit. Double check your coverage – especially if a third party will be towing your boat. Confirm commercial transporters carry commercial liability and property damage insurance.

Weight & Gear

Be smart about the gear and weight you’re hauling in the boat. Too much gear is going to increase the chances of damage and will without question add to the weight and fuel costs.

Having weight in the wrong place in the boat can cause the trailer to sway back and forth. The rule of thumb is to have about 10-15% of the GTW (gross trailer weight) on the hitch. If the trailer is swaying, gear can be moved forward inside the boat to help reduce or eliminate this, as can adjusting the height of the drawbar and hitch ball. 

Secure gear as low as possible in the boat – the heaviest items the lowest- just as on the water. 

Any fragile items should be wrapped or removed. Think about the trailer and boat bouncing through potholes and over rough railroad crossings. Could it break? Then wrap it and pack it appropriately.

Prevent chafe and scratches. Any items with sharp edges should be wrapped or otherwise protected from damaging other gear or the boat’s interior.

Empty your tanks! No fuel (if possible, and if transporting into other countries, it may not be allowed), no gray, black, or fresh water either. 

Batteries and outboard motors should be removed or properly secured.

Remove any perishables and any unsealed food. No one wants insects, vermin, or even bears in their boat (it’s possible where we often trailer boats)!

Use quality painters’ tape or bungees to secure doors, cabinets, folding tables, and other large movable bits open or closed if necessary.

Towing a Corsair Trimaran

Secure Openings

Secure all hatches and opening ports, and seal any through hulls or other external openings with colored 3M vinyl tape. Why tempt wasps or other creatures from crawling in there? This tape won’t leave residue if it’s removed within a few days. It’s also great for securing rigging that you don’t want to stow (see next section). Use it “inside out” if you’re planning to leave it wrapped in place for any period of time so the adhesive isn’t left behind on your boat. 

Boat & Systems, Rigging & Foils

Shut off or disconnect batteries, and ensure batteries are strapped down properly. Cover at least the positive terminal securely so no loose metal object can make contact with it. Battery tie-down brackets are often made from plastic and are broken. Also check to ensure the screws are tight. Now is a good time to replace and/or re-bed them if the screw holes are stripped.

Winterize engines and plumbing if it’s that time of year. When in doubt, check the manual for any systems you’re unsure about. 

All stays and shrouds are best removed, coiled, and stowed in the cabin - preferably in a box or old sail bag. Stainless rigging can mar gel coat and it’s often dirty enough to stain fabric cushions. Fiber rigging is fine to be left out on deck as long as it is coiled and secured though it may get unnecessarily filthy if there is any rain during your road trip. 

Masthead instruments (Windex, anemometer, antenna, etc.) removed and stowed. Close or otherwise cover plugs and terminals to prevent water ingress. 

Ensure the mast and boom secured to avoid any chips, scrapes or scratches. The same goes for the floats. Coil your halyards and sheets and secured any of these left on deck to prevent vibration and banging as well as chafing. Stow fenders and dock lines in the cabin, and tie up the nets securely or remove them if the boat will be on its trailer for an extended period. 

Consider sand, gravel, and other road debris. Install mud flaps and chip protection. It’s easier and cheaper to peel off some stretch or shrink wrap (or even masking tape) than making gel coat repairs. 

Properly secure the daggerboard by allowing its weight to be supported by the trailer bunk and then snug the hoisting and lowering lines as applicable. Remove the rudder and cassette and store separately in padded backs on the cabin sole. 

Remove any extra gear, equipment, and electronics from the mast, boom, nets, pulpits, and stanchions as appropriate. 

Finally, secure the boat firmly to the trailer in a minimum of five points of connection, e.g. bow strap plus two ratchet straps or tie-down lines. Please refer to your boat’s owner’s manual. 

Know your Dimensions

Overall height, width, length and approximate all-up weight

Confirm the tow vehicle is up to the task 

Ensure that no more than about 5 feet of mast is extending beyond the transom.

Tires and Wheels 

Spare tire and wheel mounted to trailer?  

Do you have the proper lug wrench and jack to lift the trailer and remove the wheels? 

Is the tread good and air pressure correct per the info on the tire’s sidewall?  Is there any dry rot or signs of damage?

Corsair Trimaran

Trailer  

Bearings inspected and greased? If not, think about the miles since last service. If you’re unsure, check them. It’s a lot easier to do in the driveway deal with a problem on the side of a highway. A failed bearing can destroy an axle and in some cases cause the wheel come off while driving.  

Lights tested?

Brakes tested? 

Is the brake pad thickness OK? 

Lugs torqued to spec?  

Tongue weight OK? Too little and the trailer may sway; too much puts unnecessary wear on the tow vehicle’s suspension.

Safety chains with suitable attachments including emergency break-way when required?

Fine Print

Please read your owner’s manuals for other tips and instructions. We don’t provide any guarantees that this list is all-inclusive or will prevent any problems. It’s just a guide. Use it at your own risk, and call us if we can help answer your questions. 


If you're interested in knowing more about the Corsair 880 or the Corsair 880 Sport contact our USA trimaran expert Richard Allen / info@180marine.com

Richard is a long-standing Corsair trimaran expert with vast experience across all models.

Pricing on the Corsair 880 >>

0 Likes

What's in your life vest?

Rescue swimmer

A U.S. Coast Guard rescue swimmer practices a retrieval during a drill. Despite the skill and courage of USCG personnel, rescue offshore is an iffy proposition.

Photo courtesy of U.S. Coast Guard

Rescuing someone who goes overboard offshore is always a long shot, but new technologies can help. Here is very informative article that could save your life.
Written by Christopher Birch from SAIL

Coast Guard statistics are sobering. In the six-year period from 2016 through 2021, a total of 1,771 souls fell overboard in U.S. waters, and 64% of them perished.

Any discussion of sailor overboard procedure, equipment, and technology must start with an emphasis on prevention. Good nonskid, plentiful handholds, proper use of tethers, physical fitness, and most importantly, situational awareness, are all essential in keeping crew on the inside of the rail.

Unfortunately, sailors still do fall over the side, and it’s important to consider the current state of the technology available for rescuing them. The bad news is that despite advances, the odds are still heavily against rescue if you fall off the boat. The good news is that technologies continue to evolve with the intention of improving those odds.

Modern 406MHz satellite PLB technology includes GPS location embedded in the distress signal, providing precise victim location for rescuers. Newer equipment is also capable of receiving a return link service signal assuring the victim that the emergency message has been received.

The latest addition from ACR Electronics, the ResQLink AIS PLB, for the first time combines 406 PLB and AIS technologies into one unit small enough to fit in an inflatable life vest and activate when the life vest deploys. It—and an equivalent product made by Ocean Signal for the European market—have both recently won prestigious marine industry awards for their advancements.

So, what should you be wearing on or in your life vest? With the reminder that the absolute first line of defense is to not go off the boat in the first place, let’s take a look at these technologies, how they work, and the systems in place to support them.

personal life vest

The ACR ResQLink AIS PLB activates when a person’s life vest inflates.

Photo courtesy of ACR Electronics

Read Entire Article >>


Learn more about the Corsair 880 >>
The Corsair 880 trimaran is designed to be completely safe and comfortable, for people of all skill levels.


If you're interested in knowing more about the Corsair 880 or the Corsair 880 Sport, we’d love to hear from you.

180 Marine is the leading dealer in the U.S. for Corsair trimarans.

Repair on a Farrier trimaran

This was not written for a Corsair trimaran but we think you’ll
find it very helpful information. Enjoy.


Article by Don Gutzmer-GBI Technical Advisor

I received a call from a friend of mine who owns a 2004 Farrier F33RX folding trimaran, the 33′ Nelda Ray. This sailboat is a frequent competitor in regattas on the Great Lakes. The aluminum mast step was compressing the deck and causing laminate failure. I told my friend I’d figure out what went wrong and then fix it so it would never happen again. I’ll outline the process I used to make this successful repair.

Before I started the repair, I covered the boat inside and out with a layer of 5-mil plastic sheeting in order to keep things clean. I left exposed only the areas that needed surface preparation. I used painter’s tape to seal the plastic film along the edges. Working as neatly and cleanly as possible helps me to manage my time and make repairs efficiently.

The first step in this repair was to find out why the laminate had been compressed to the point of failure. To investigate, I removed the aluminum mast brackets from the mast step and examined how the deck was constructed. Using a router with a plunge tip bit cutter, I removed a portion of the deck but left the inner fiberglass skin intact. This made the problem easy to see: the laminate damage occurred because the load was too great for the core.

The deck had been fabricated with a few layers of lightweight fiberglass over high-density foam core, with minimal layers of fiberglass inside of the hull. The high loads from the mast bearing down on the aluminum mast step had compressed the foam core, leading to fatigue damage over the years.

I devised a two-part repair plan that would prevent this failure from reoccurring. The first part required increasing the compression strength of the core. The second part was to strengthen the supporting structure to redistribute loads to the hull.

I began the first phase of the repair by bonding a 5/8″-thick Garolite® G-10 panel (approximately the size I’d removed with the router) in place of the high-density foam core. G-10 is a high-pressure fiberglass laminate that’s manufactured by stacking multiple layers of glass cloth, soaking them in epoxy, and compressing them under heat until the epoxy cures. You might ask “Why use G-10 Garolite® when you could make a fiberglass panel with WEST SYSTEM® Epoxy?” One reason is that I had a time constraint so it was more efficient to order a prefabricated panel. G-10 offered all the attributes I needed for the application, including excellent mechanical properties.

To prevent stress concentrations on the 90-degree angles, I rounded the corners of the G-10 panel and sanded them with 80-grit to prepare for epoxy. For bonding the G-10, I chose Six10® Thickened Epoxy Adhesive because of its gel consistency and toughness when cured. The Six10® was applied to the bottom of the G-10 panel to adhere to the inner fiberglass laminate.

After the Six10® cured, I used a grinder to taper a 12:1 bevel around the perimeter of the outer fiberglass skin on the deck. In order to replace the damaged laminate, I cut five patches of 1708 biaxial fiberglass cloth in graduating sizes. I used WEST SYSTEM® 105 Resin and 206 Slow Hardener® to apply these patches. I made each fiberglass patch ½” smaller in all directions. I wet out the patches with epoxy and applied the largest patch first, followed by four consecutively smaller patches to match the original thickness. I then applied 2-3 fill coats of epoxy.

After the epoxy cured, I sanded the surface smooth with 80-grit. Next, I mixed a fairing compound consisting of WEST SYSTEM® 105/206 thickened with 407 Low-Density filler. Using a plastic spreader, I applied the fairing compound and filled in any low spots. When it cured, I sanded it with 220-grit to prepare for primer. To match the original gray paint on the deck, I carefully mixed black and white paint to reach the correct shade of gray.

Phase two was to reinforce the inside of the hull to redistribute the loads from the aluminum mast brackets. To do this, I would need four more pieces of G-10. Two panels would attach to the underside of the deck on each side of the daggerboard case and the others would adhere vertically to the daggerboard case. Then the panels would be covered with multiple layers of fiberglass cloth.

To prepare the G-10 panels, I ground a taper on one side of all four pieces to minimize stress concentration and allow the fiberglass to transition smoothly onto underside of the deck and the daggerboard case. Using an orbital sander with 80-grit, I also removed the paint from the underside of the deck and the daggerboard case where I planned to bond the G-10 panels.

With Six10 Adhesive, I epoxied a G-10 panel to the underside of the deck on each side of the daggerboard case. I positioned wooden prop sticks to help hold the panels in place until the epoxy cured. The other panels were butted underneath to better transfer the loads from the deck into the daggerboard case. Once that cured, I used Six10 to create a fillet where the two panels butted together.

The final step was applying four layers of 1708 Biaxial Cloth over the panels. Applying witness marks to the fabric with a felt tip pen helped me place it exactly where it belonged. After fairing the surface with epoxy thickened with low-density fillers, I sanded it smooth and painted it with a flat white paint.

Over a three-week period, there were many starts and stops to complete this project. My friend had a tight deadline for an upcoming race. Working evenings to meet the deadline, it took me about 45 hours to complete these repairs. My friend was very happy with the finished repair and said it looked great. He also mentioned, with the aluminum mast step repaired, he could now put on enough tension to properly tune the rig (which he was not able to do before, due to the damage.)

Following my repair, Team Nelda Ray successfully competed with 93 other boats in the 34th Harvest Moon Regatta. This 150-mile race goes from Galveston to Port Aransas, Texas. Nelda Ray’s crew took line honors and was awarded the Mayor’s Trophy. They went on to take 1st place in the Multihull Gold Division of the 53rd Wurstfest Regatta hosted by the Canyon Lake Yacht Club in Texas.

Read this entire article >>

Other informative articles:

Mast lowering on a Corsair 880 Sport >>

Multihulls are getting to the age where they are deemed worthy of restoration! >>

The folding system on a Corsair trimaran takes only minutes >>

Corsair 880 Frequently Asked Questions >>

Corsair 880 Frequently Asked Questions

Let us know how we can help answer any of your questions!

Let us know how we can help answer any of your questions!

Corsair 880 FAQ’s

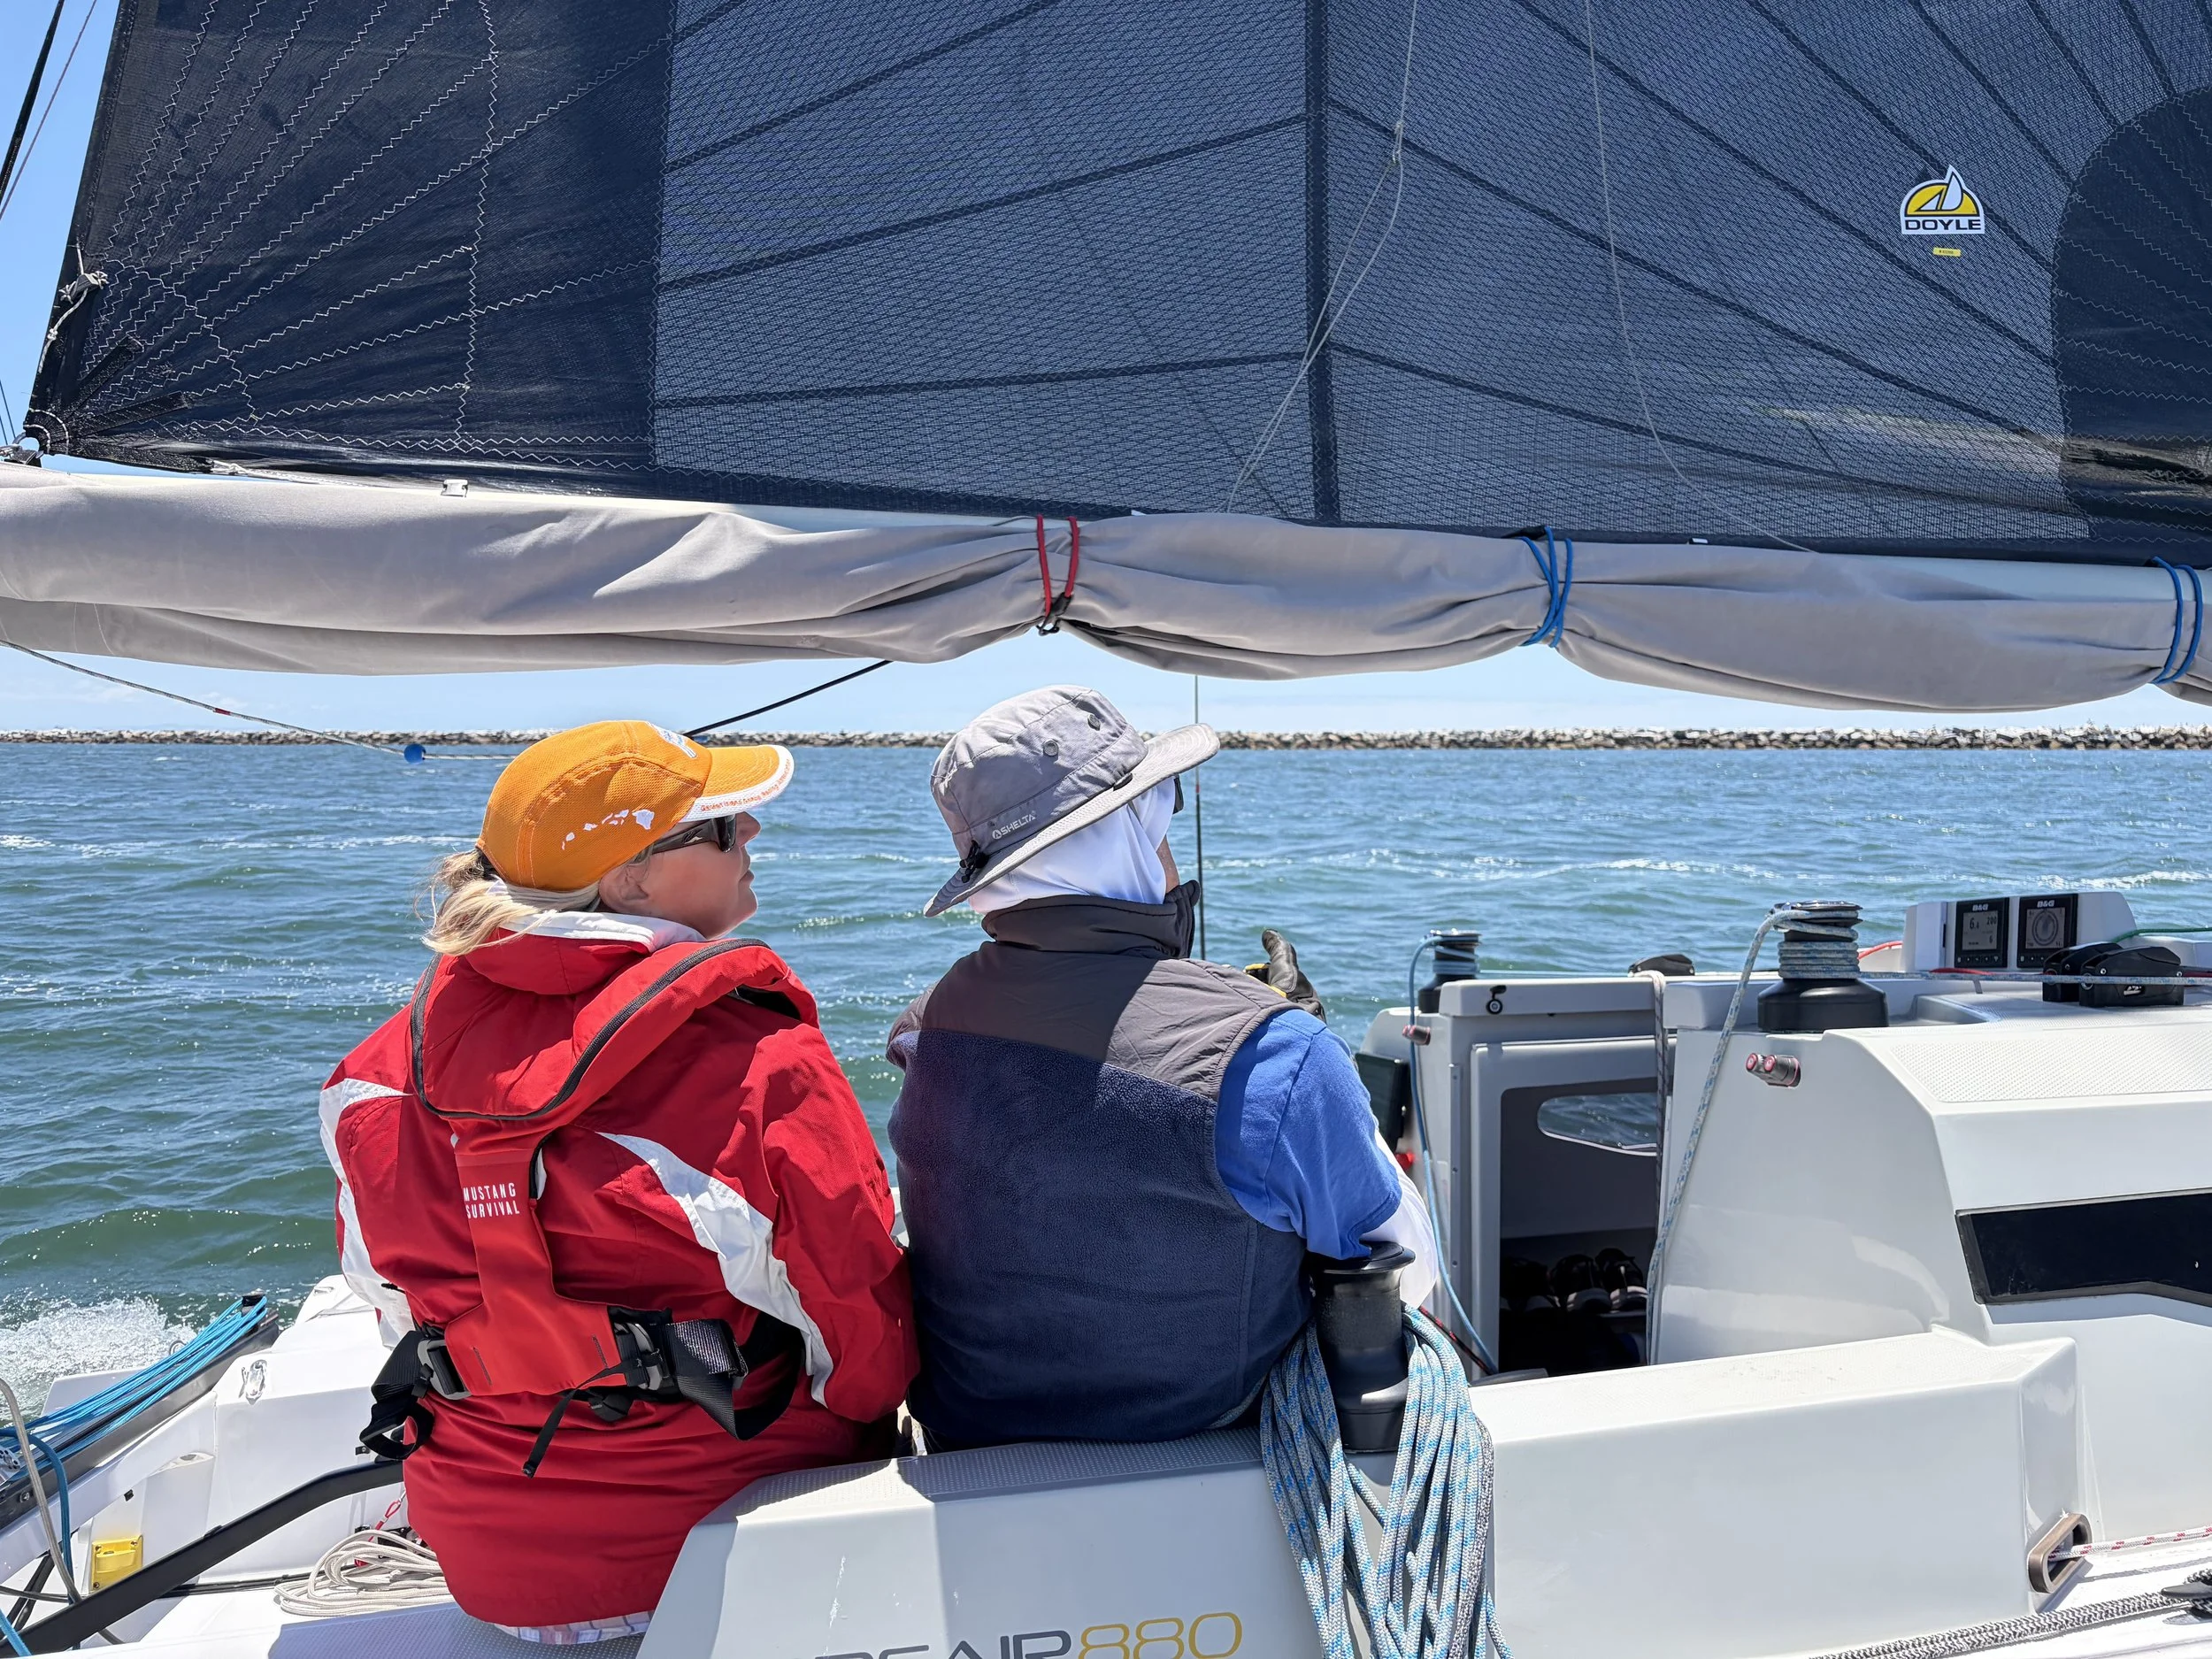
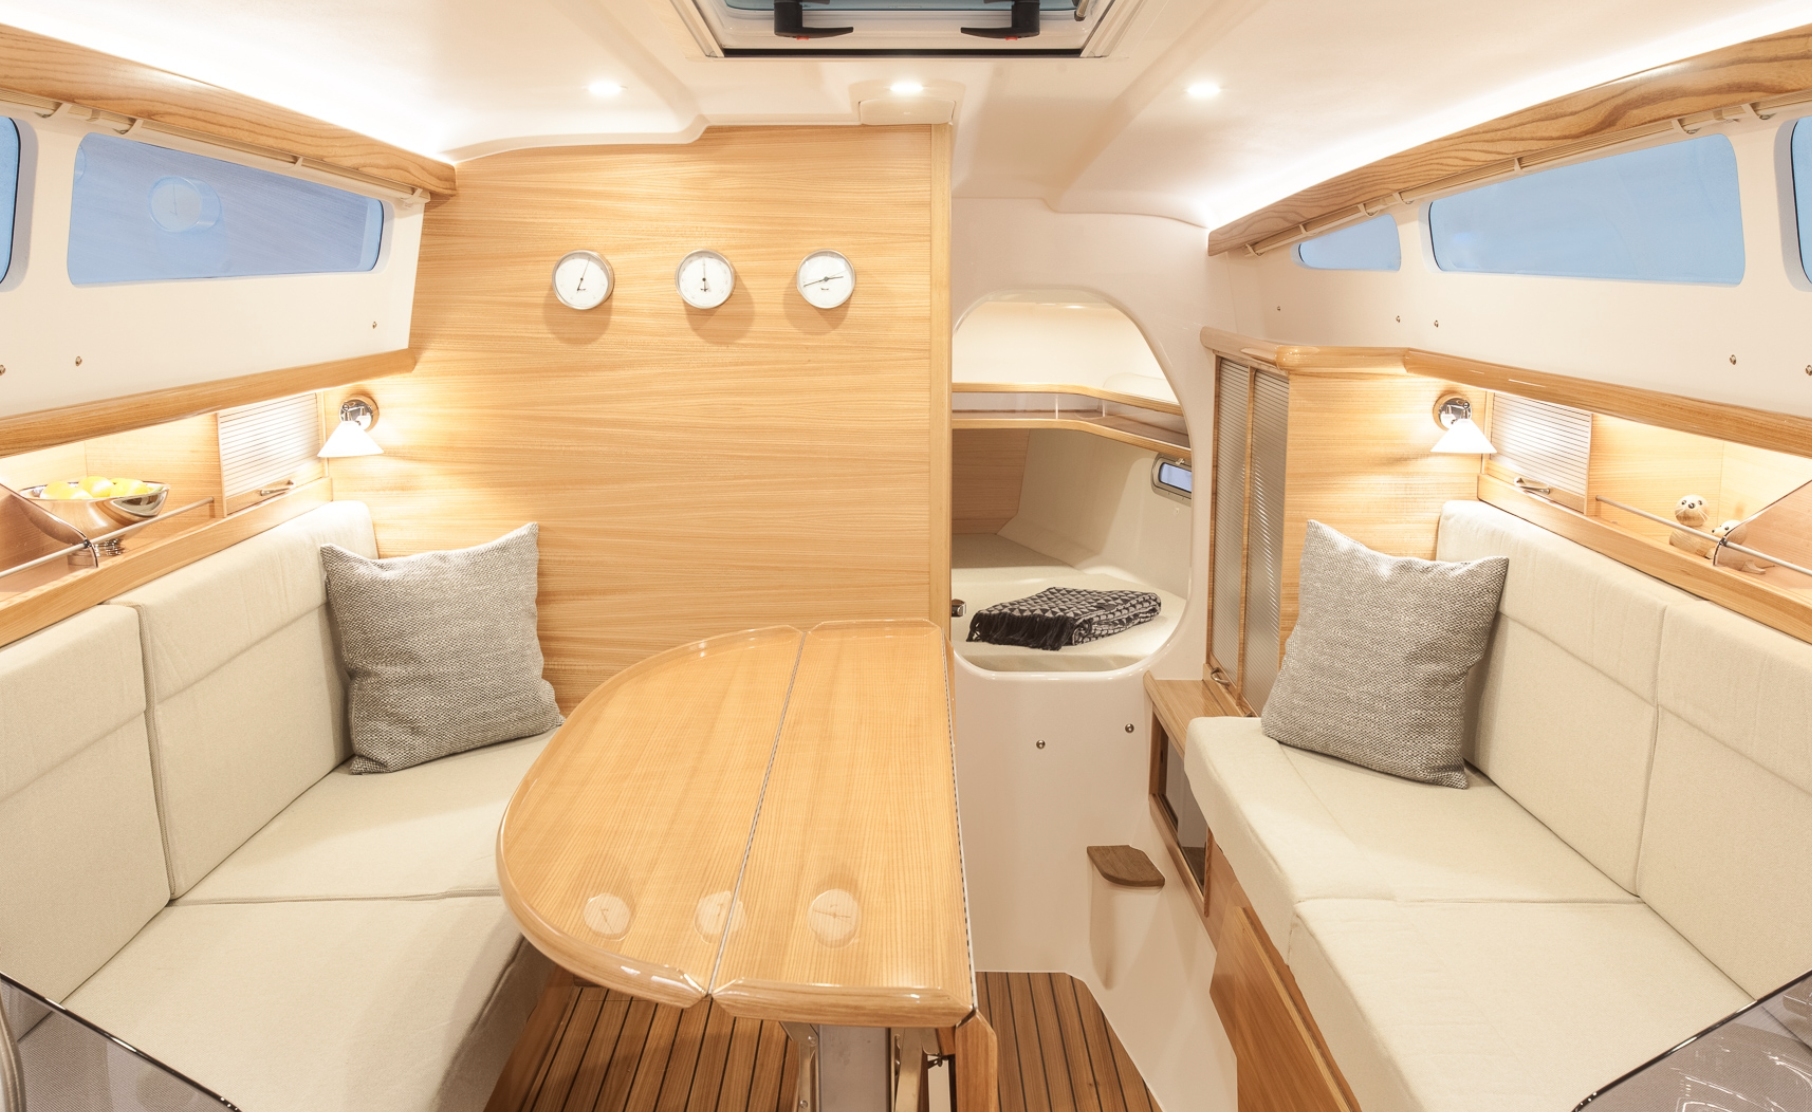
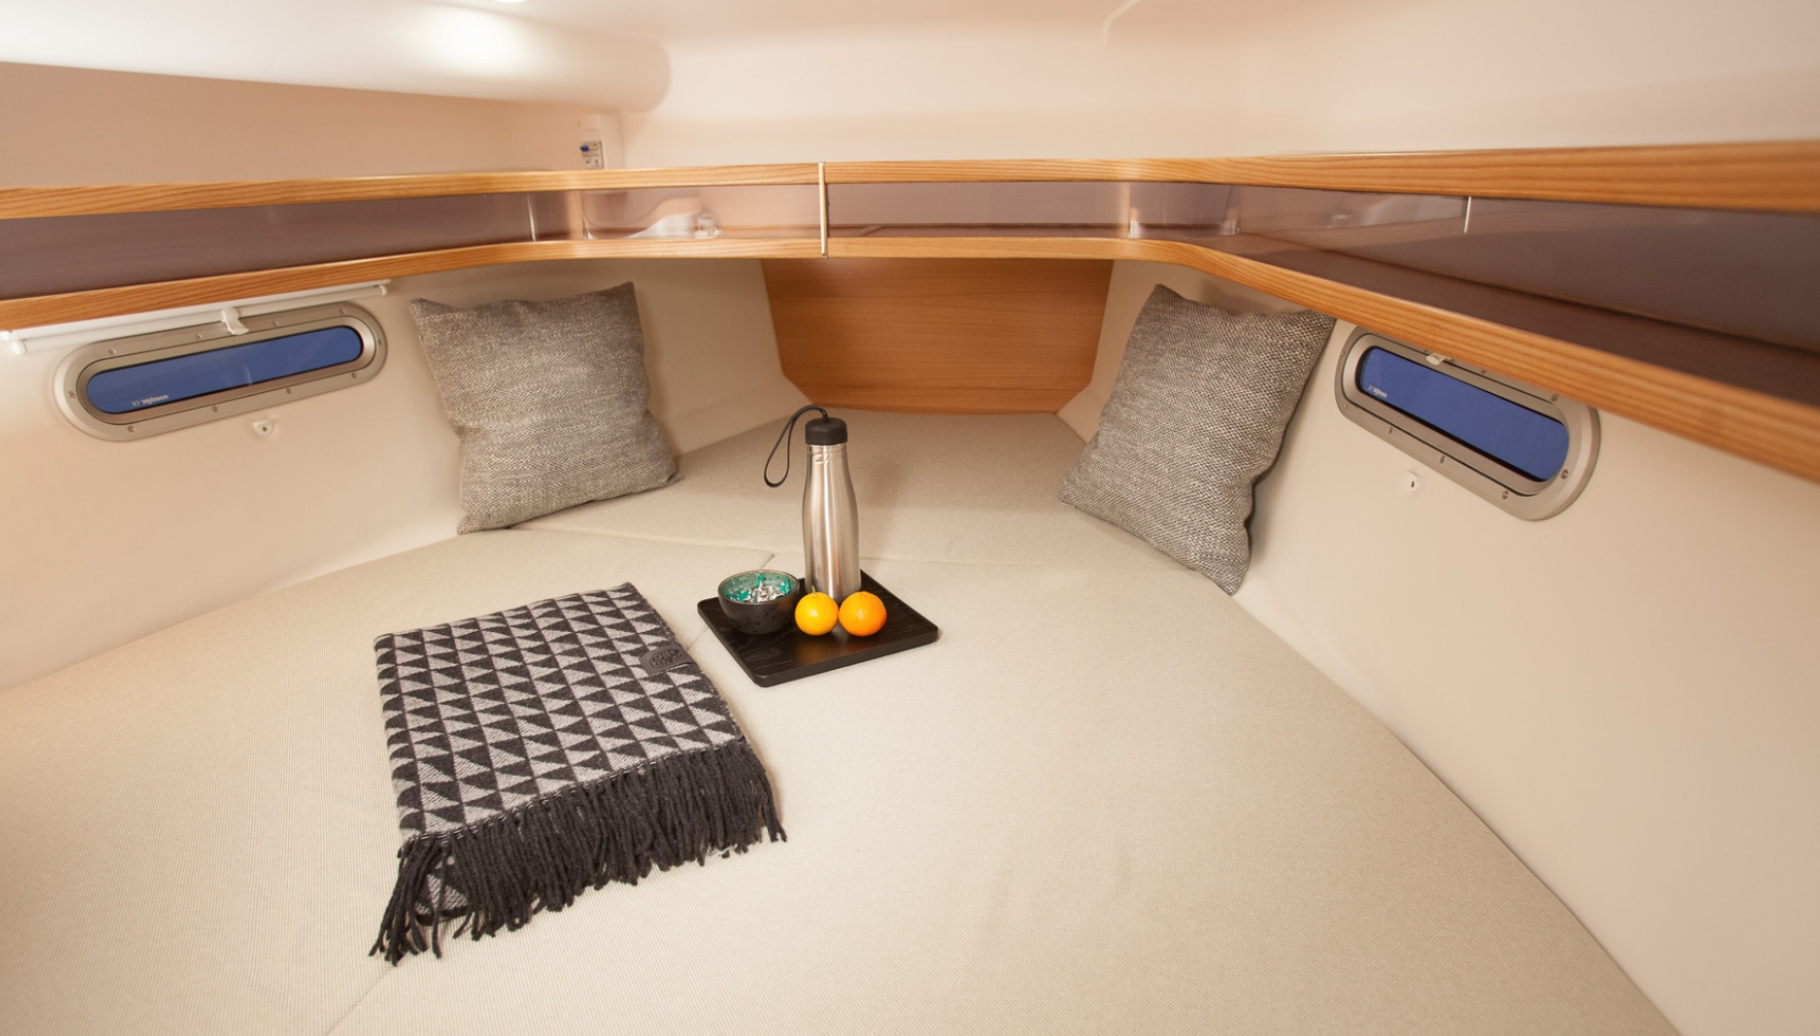
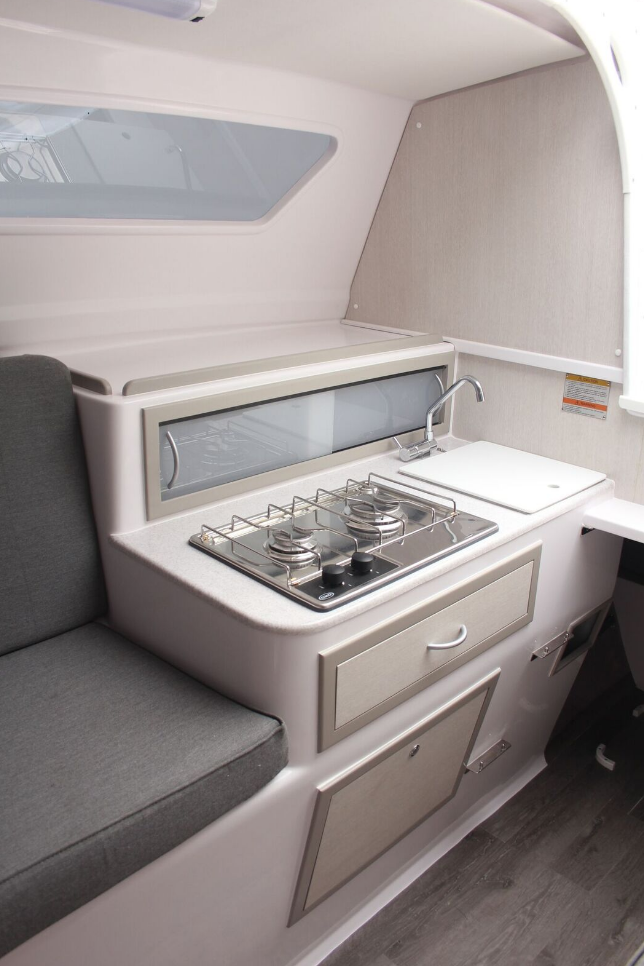
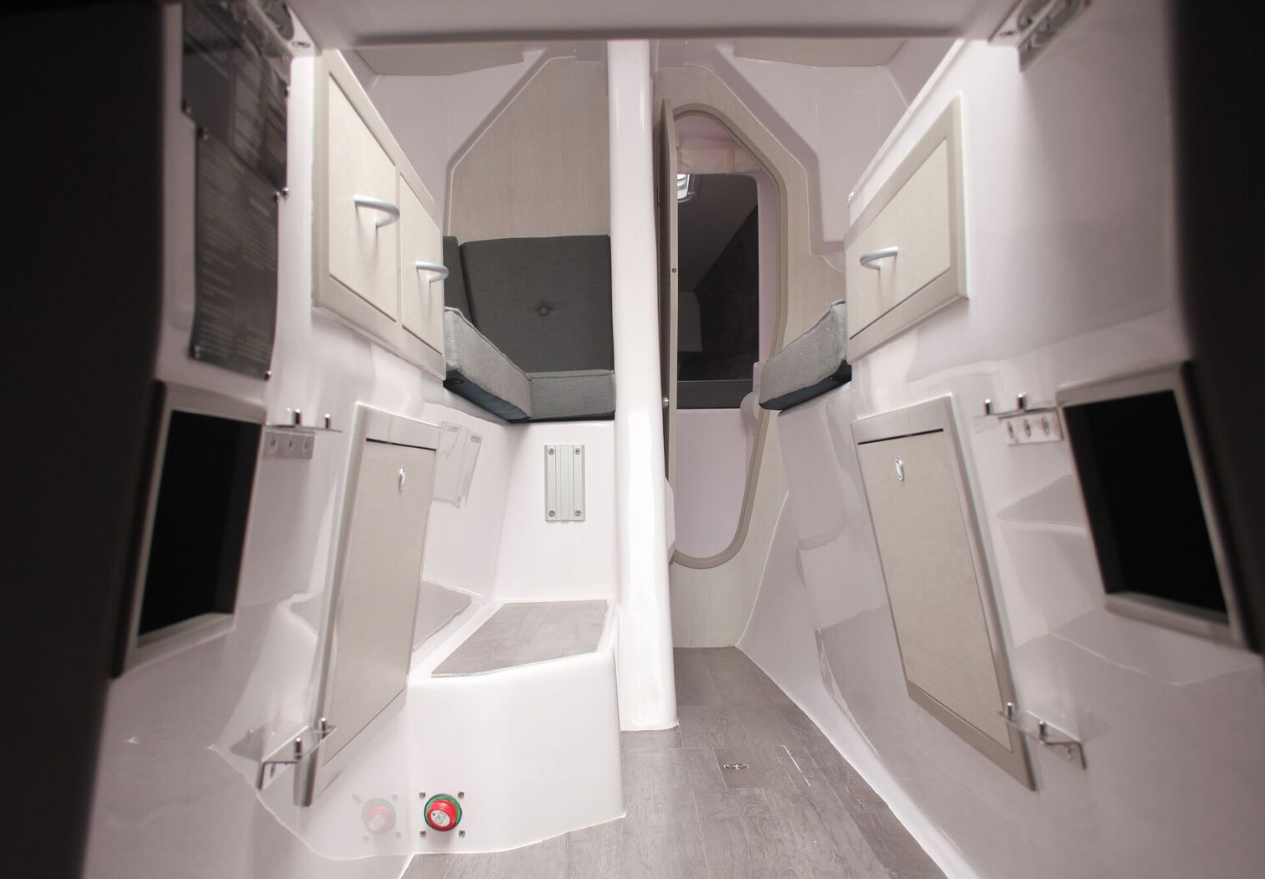
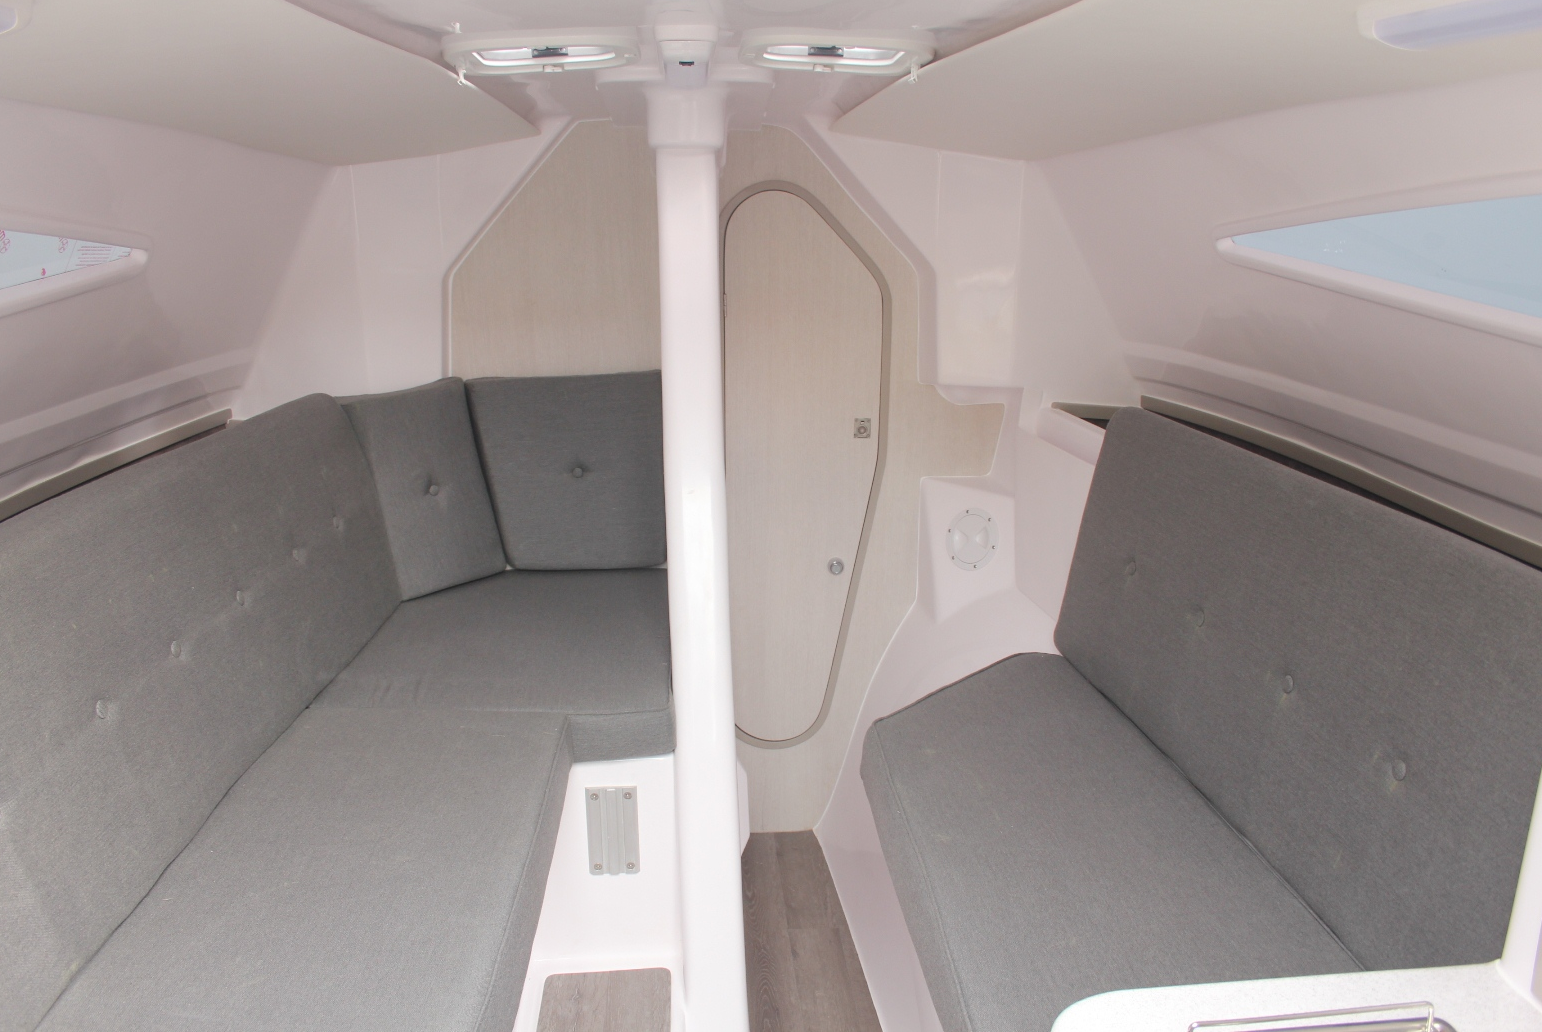
There are many creature comforts that you’ll appreciate! Check this out.

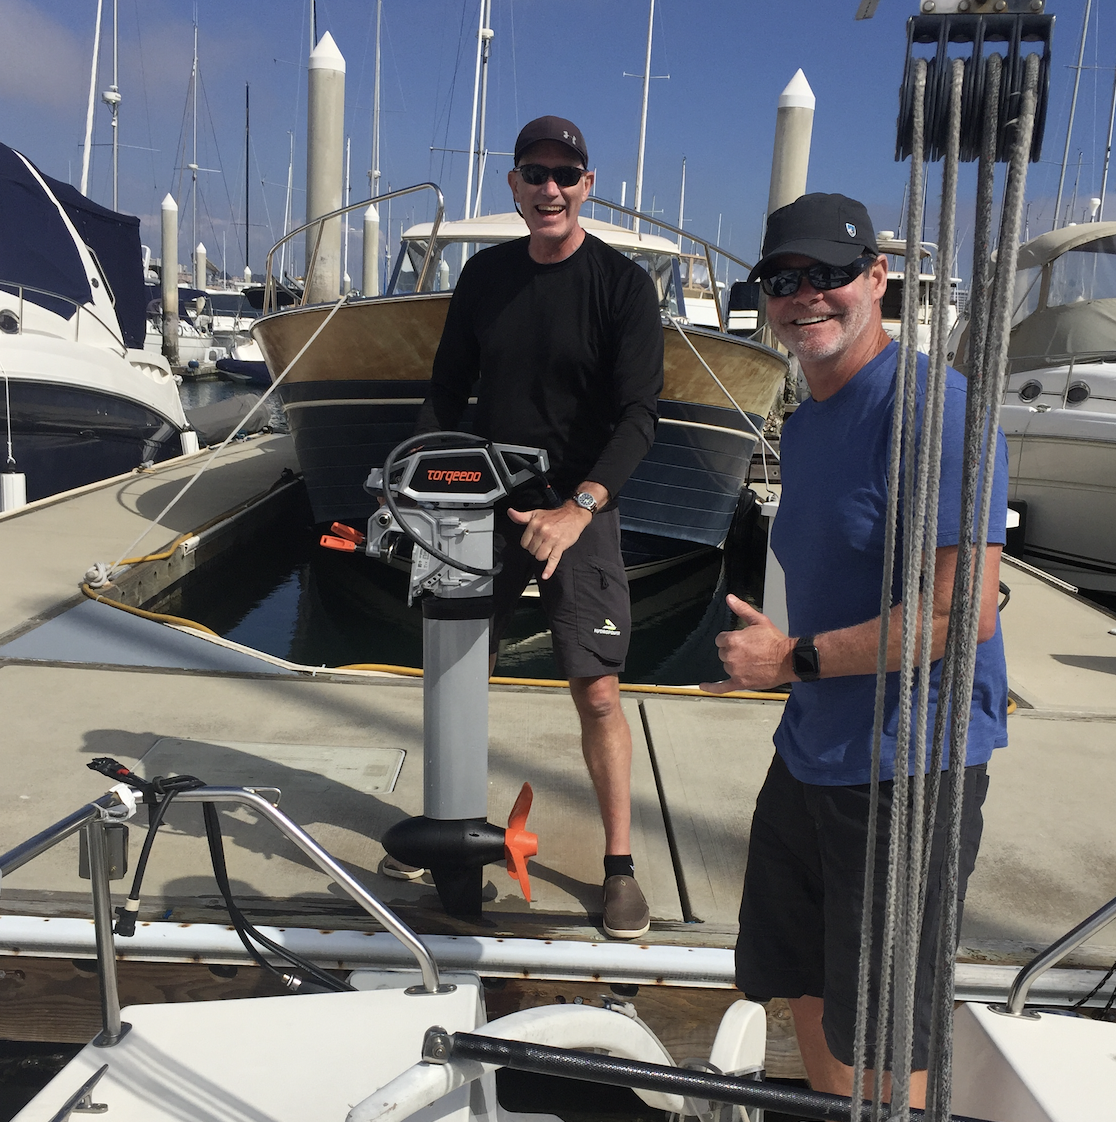
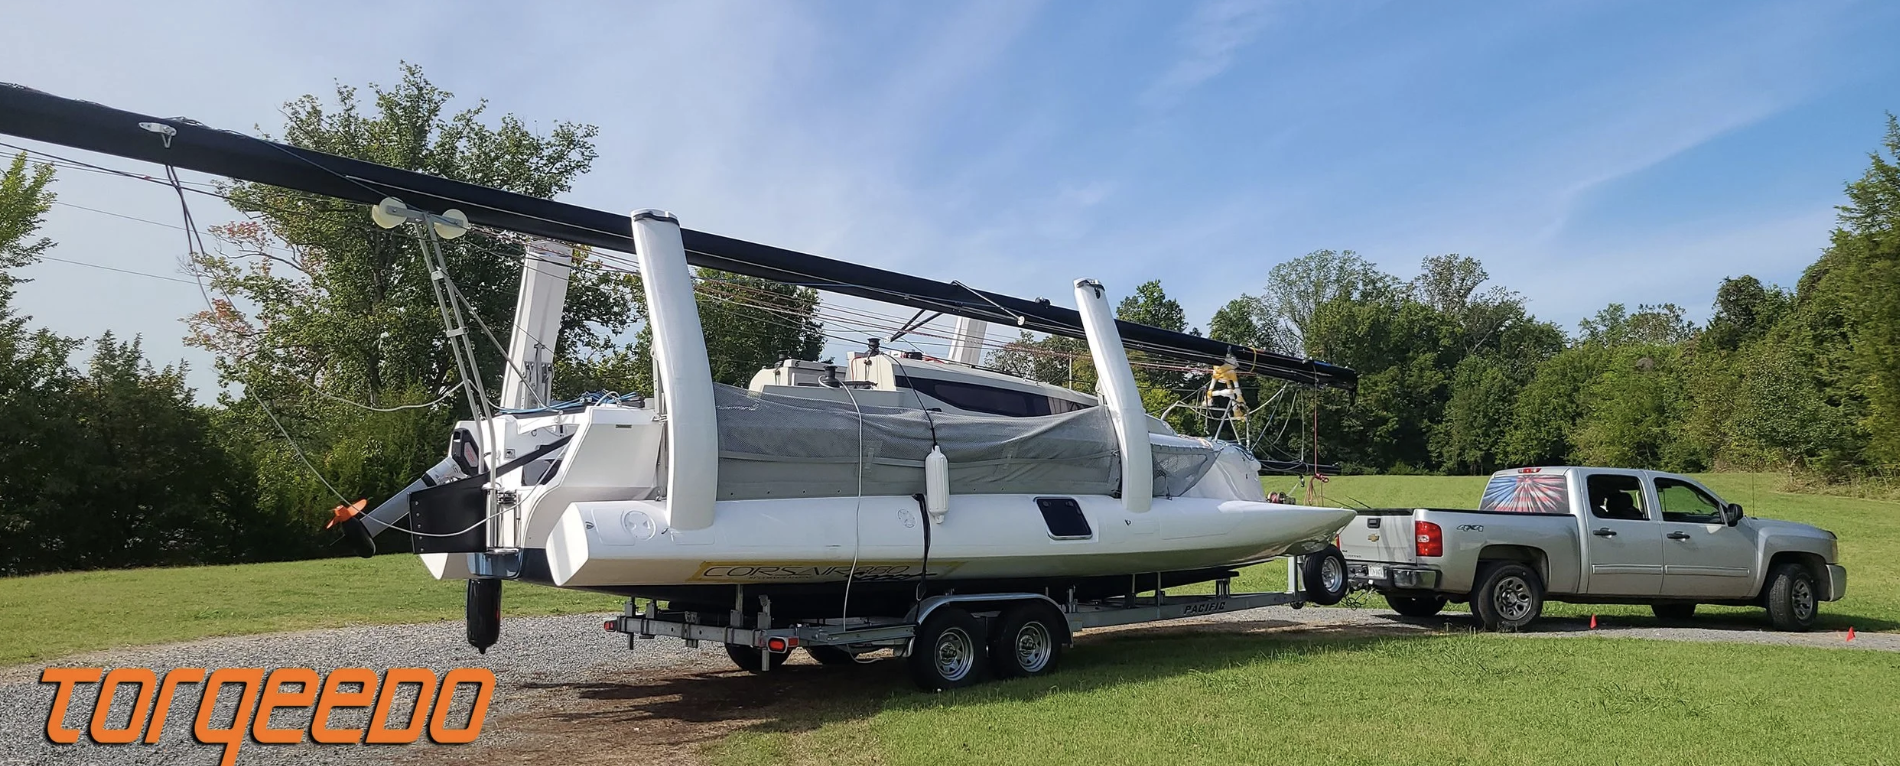
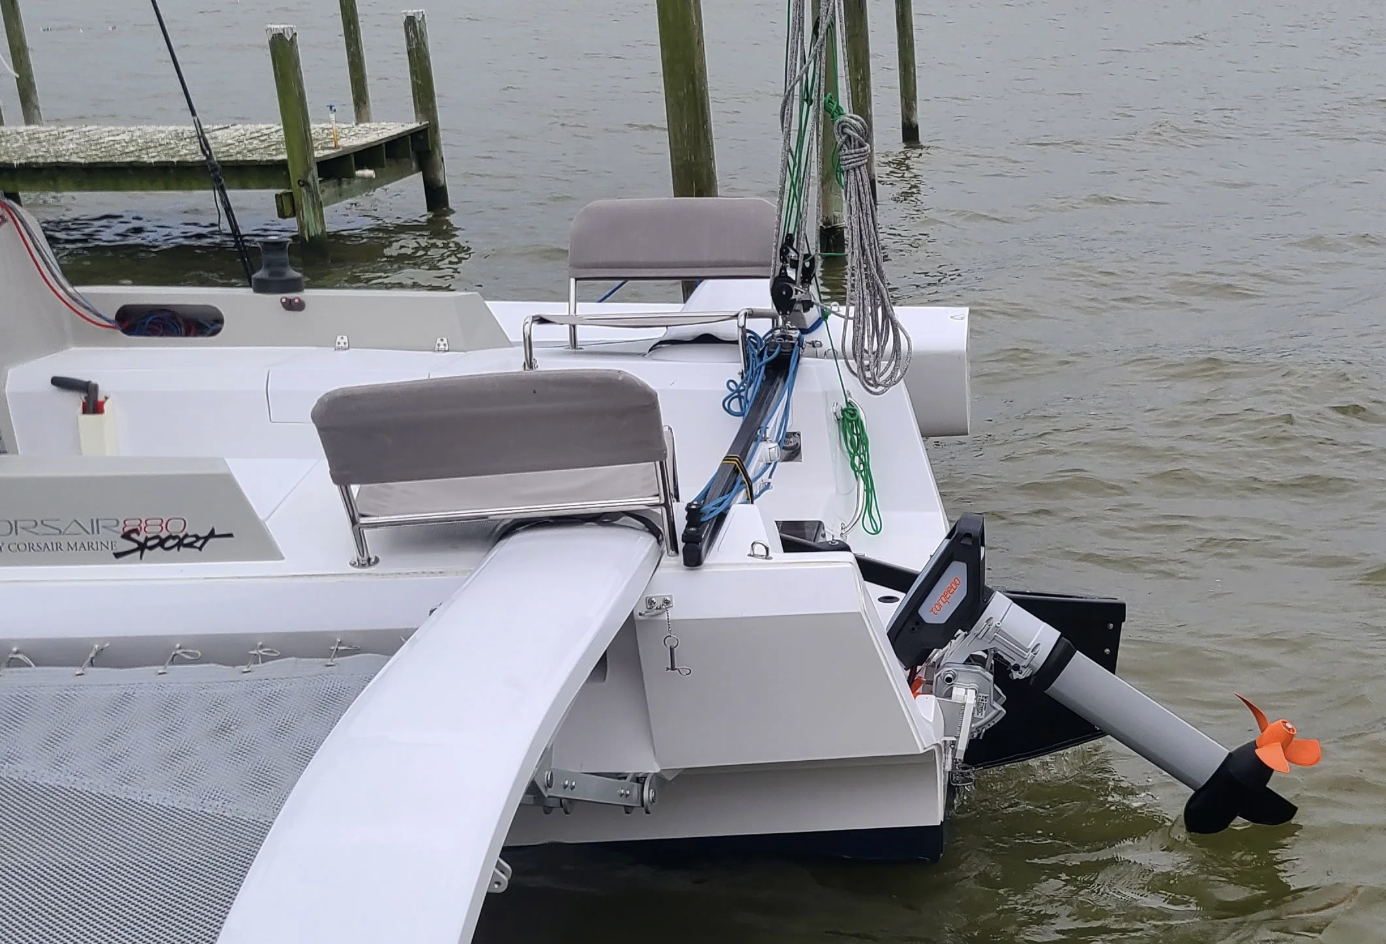
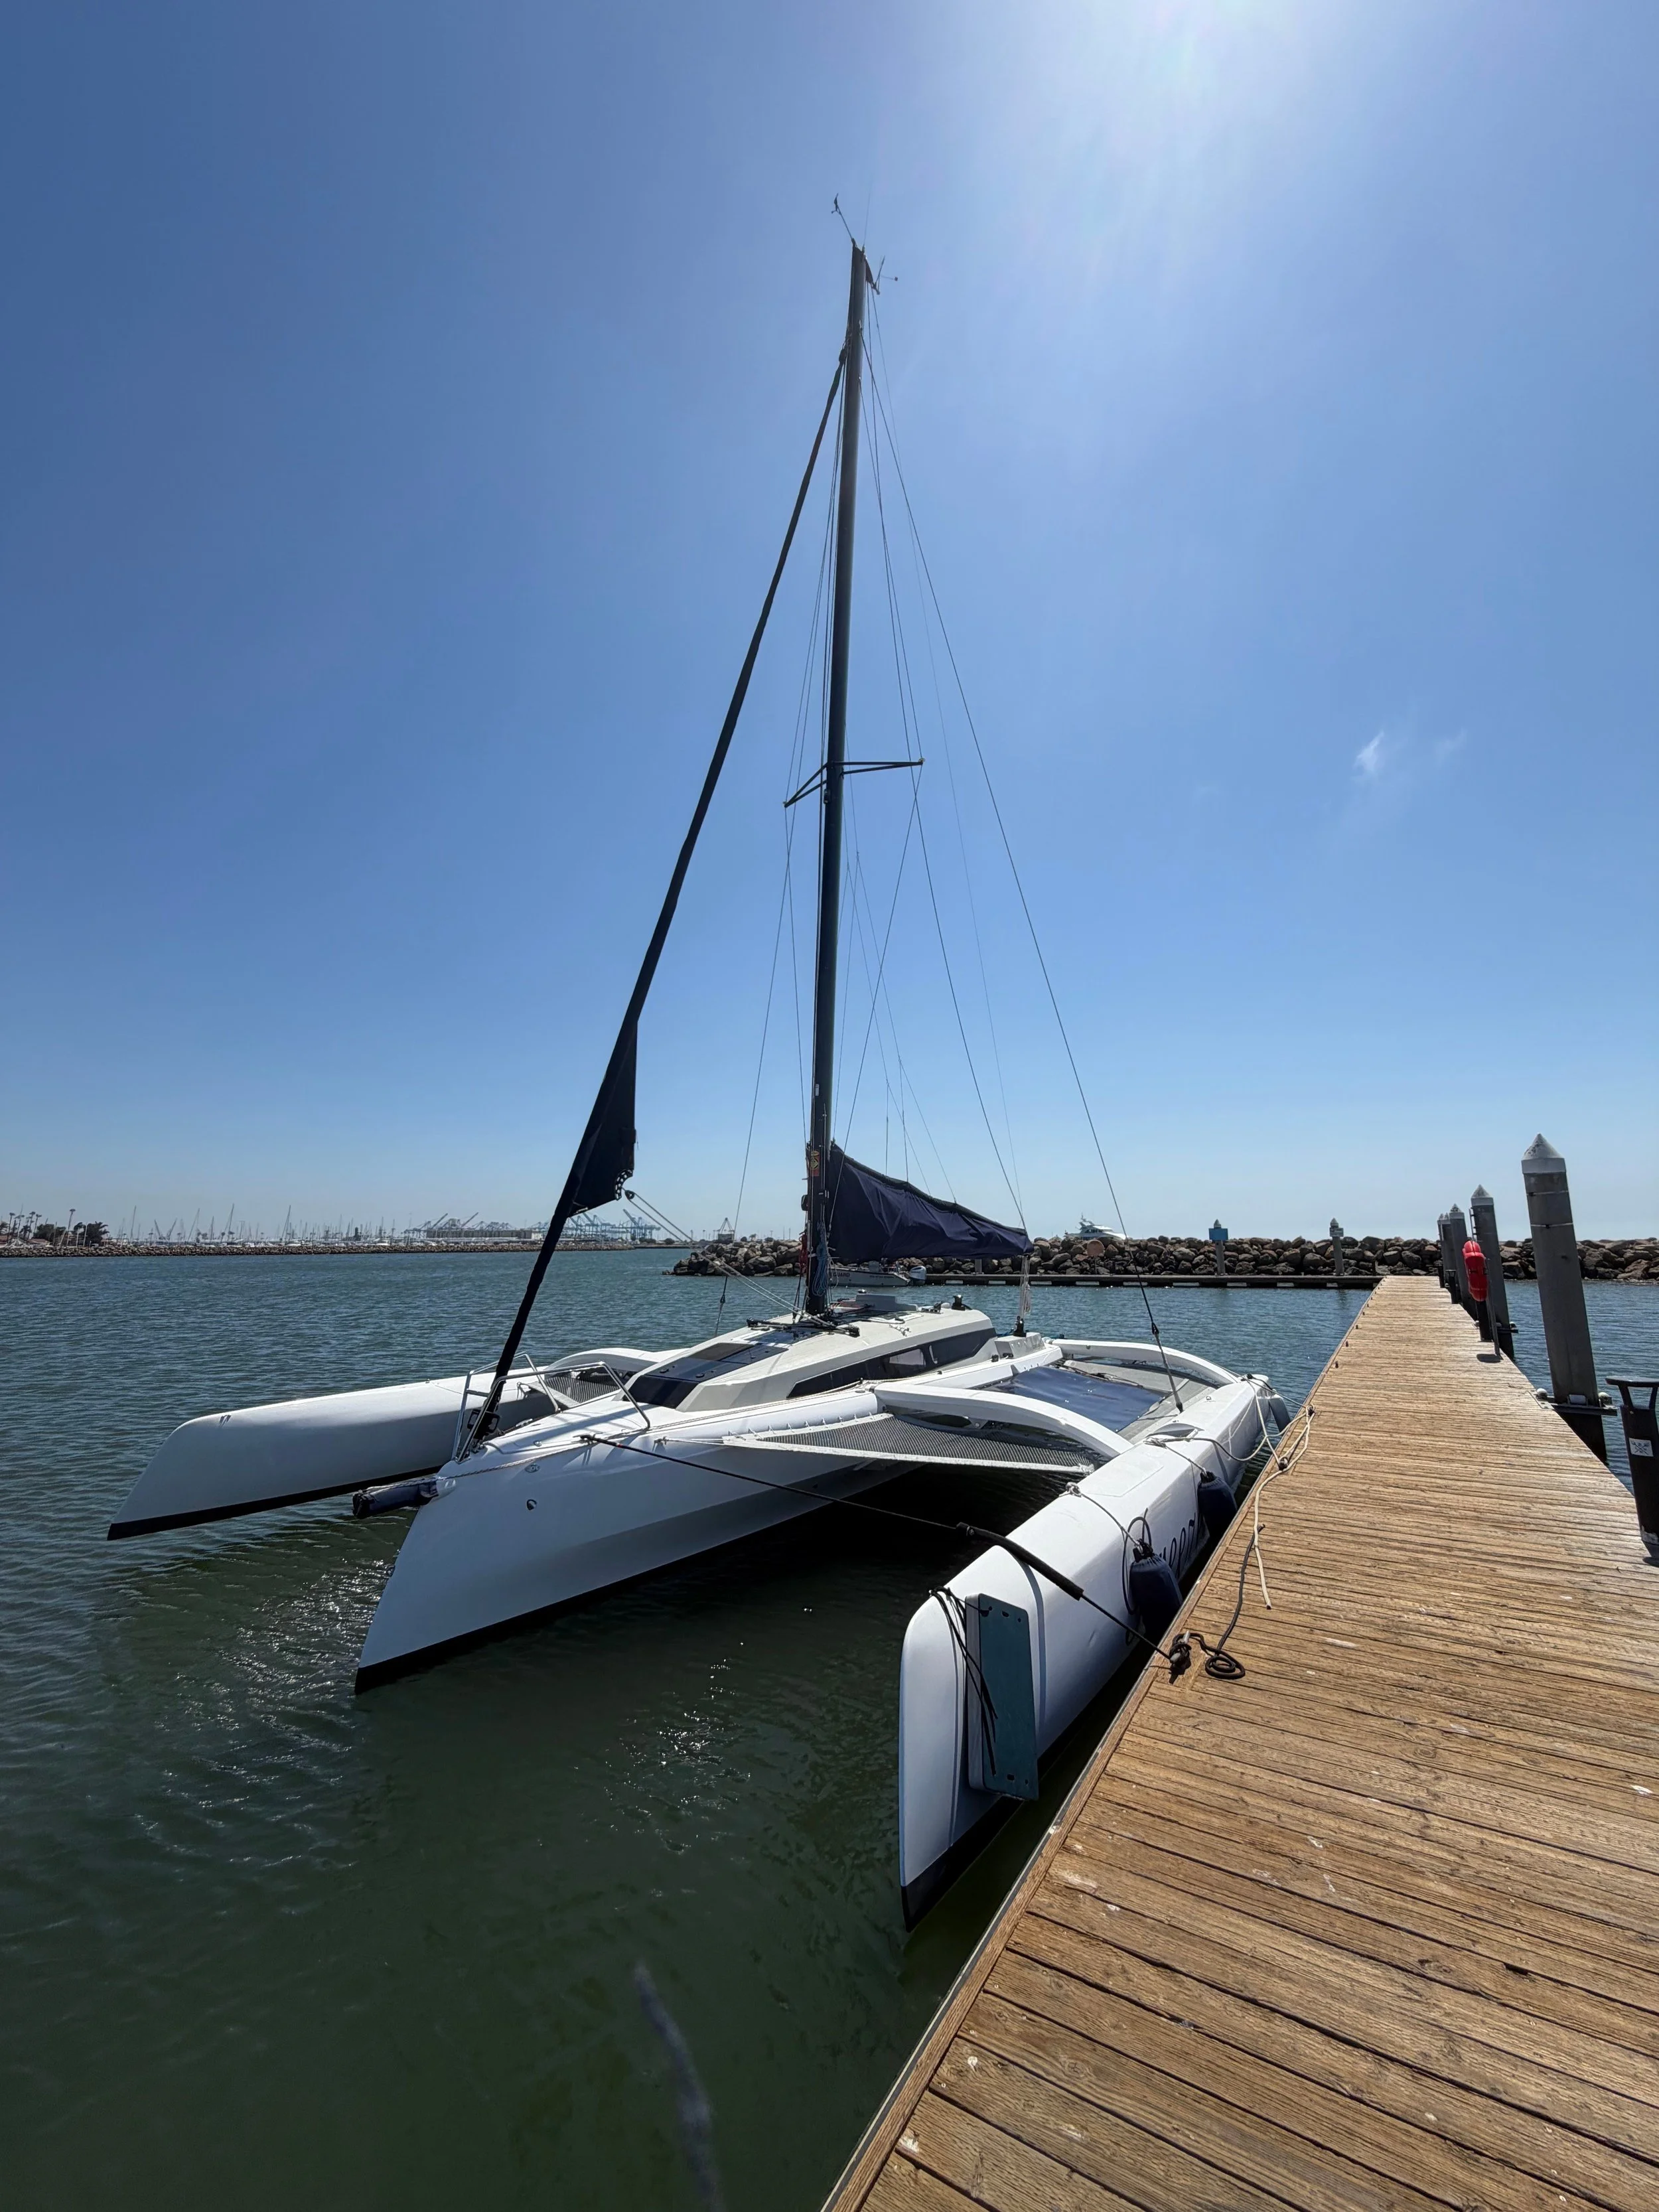
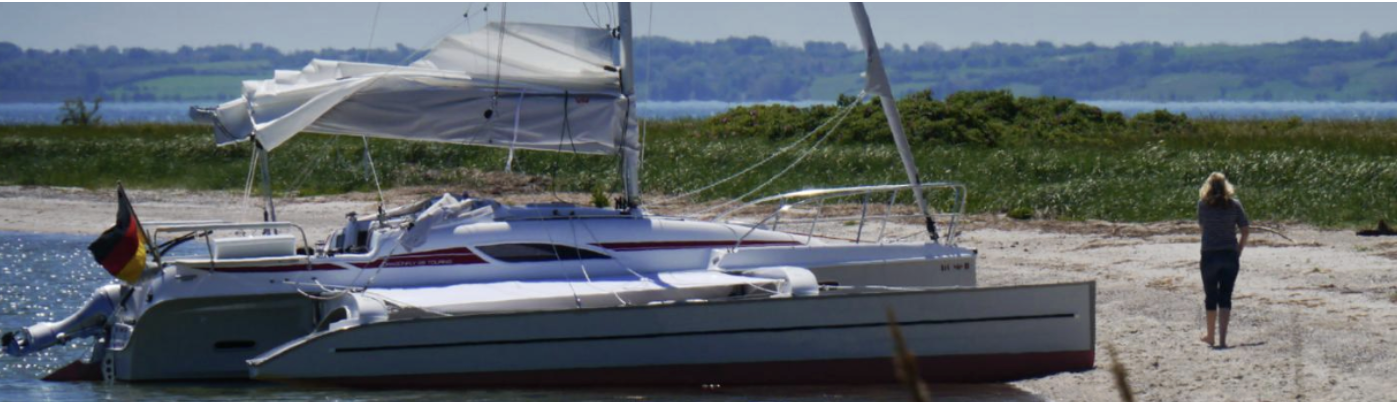
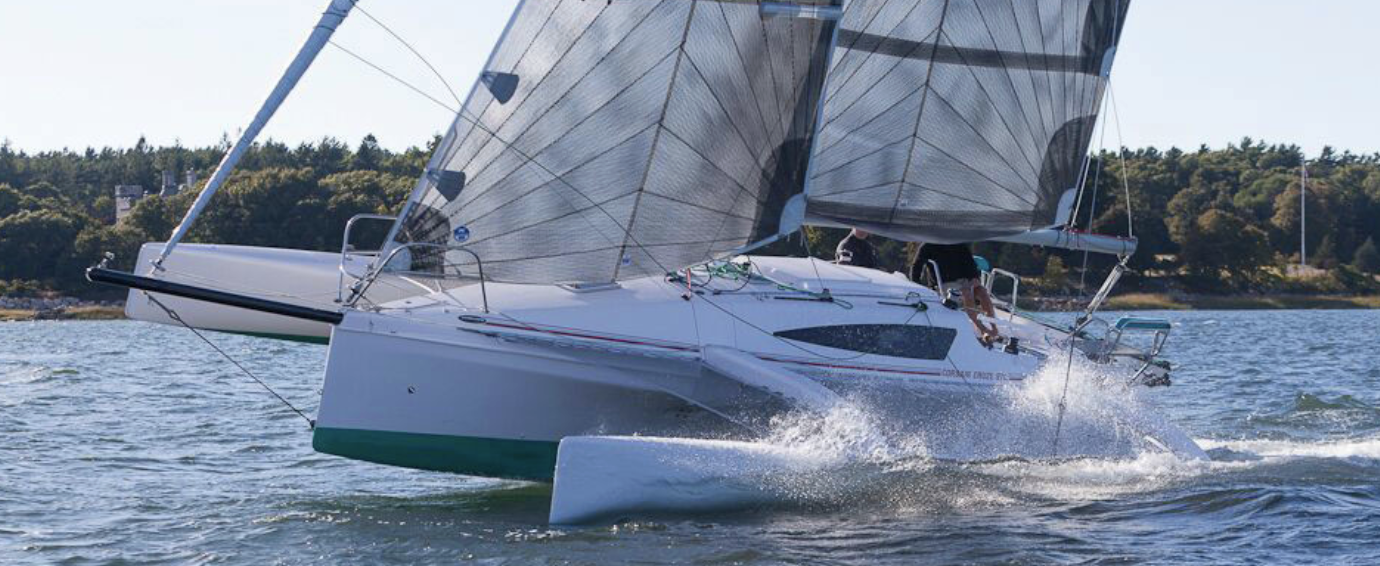
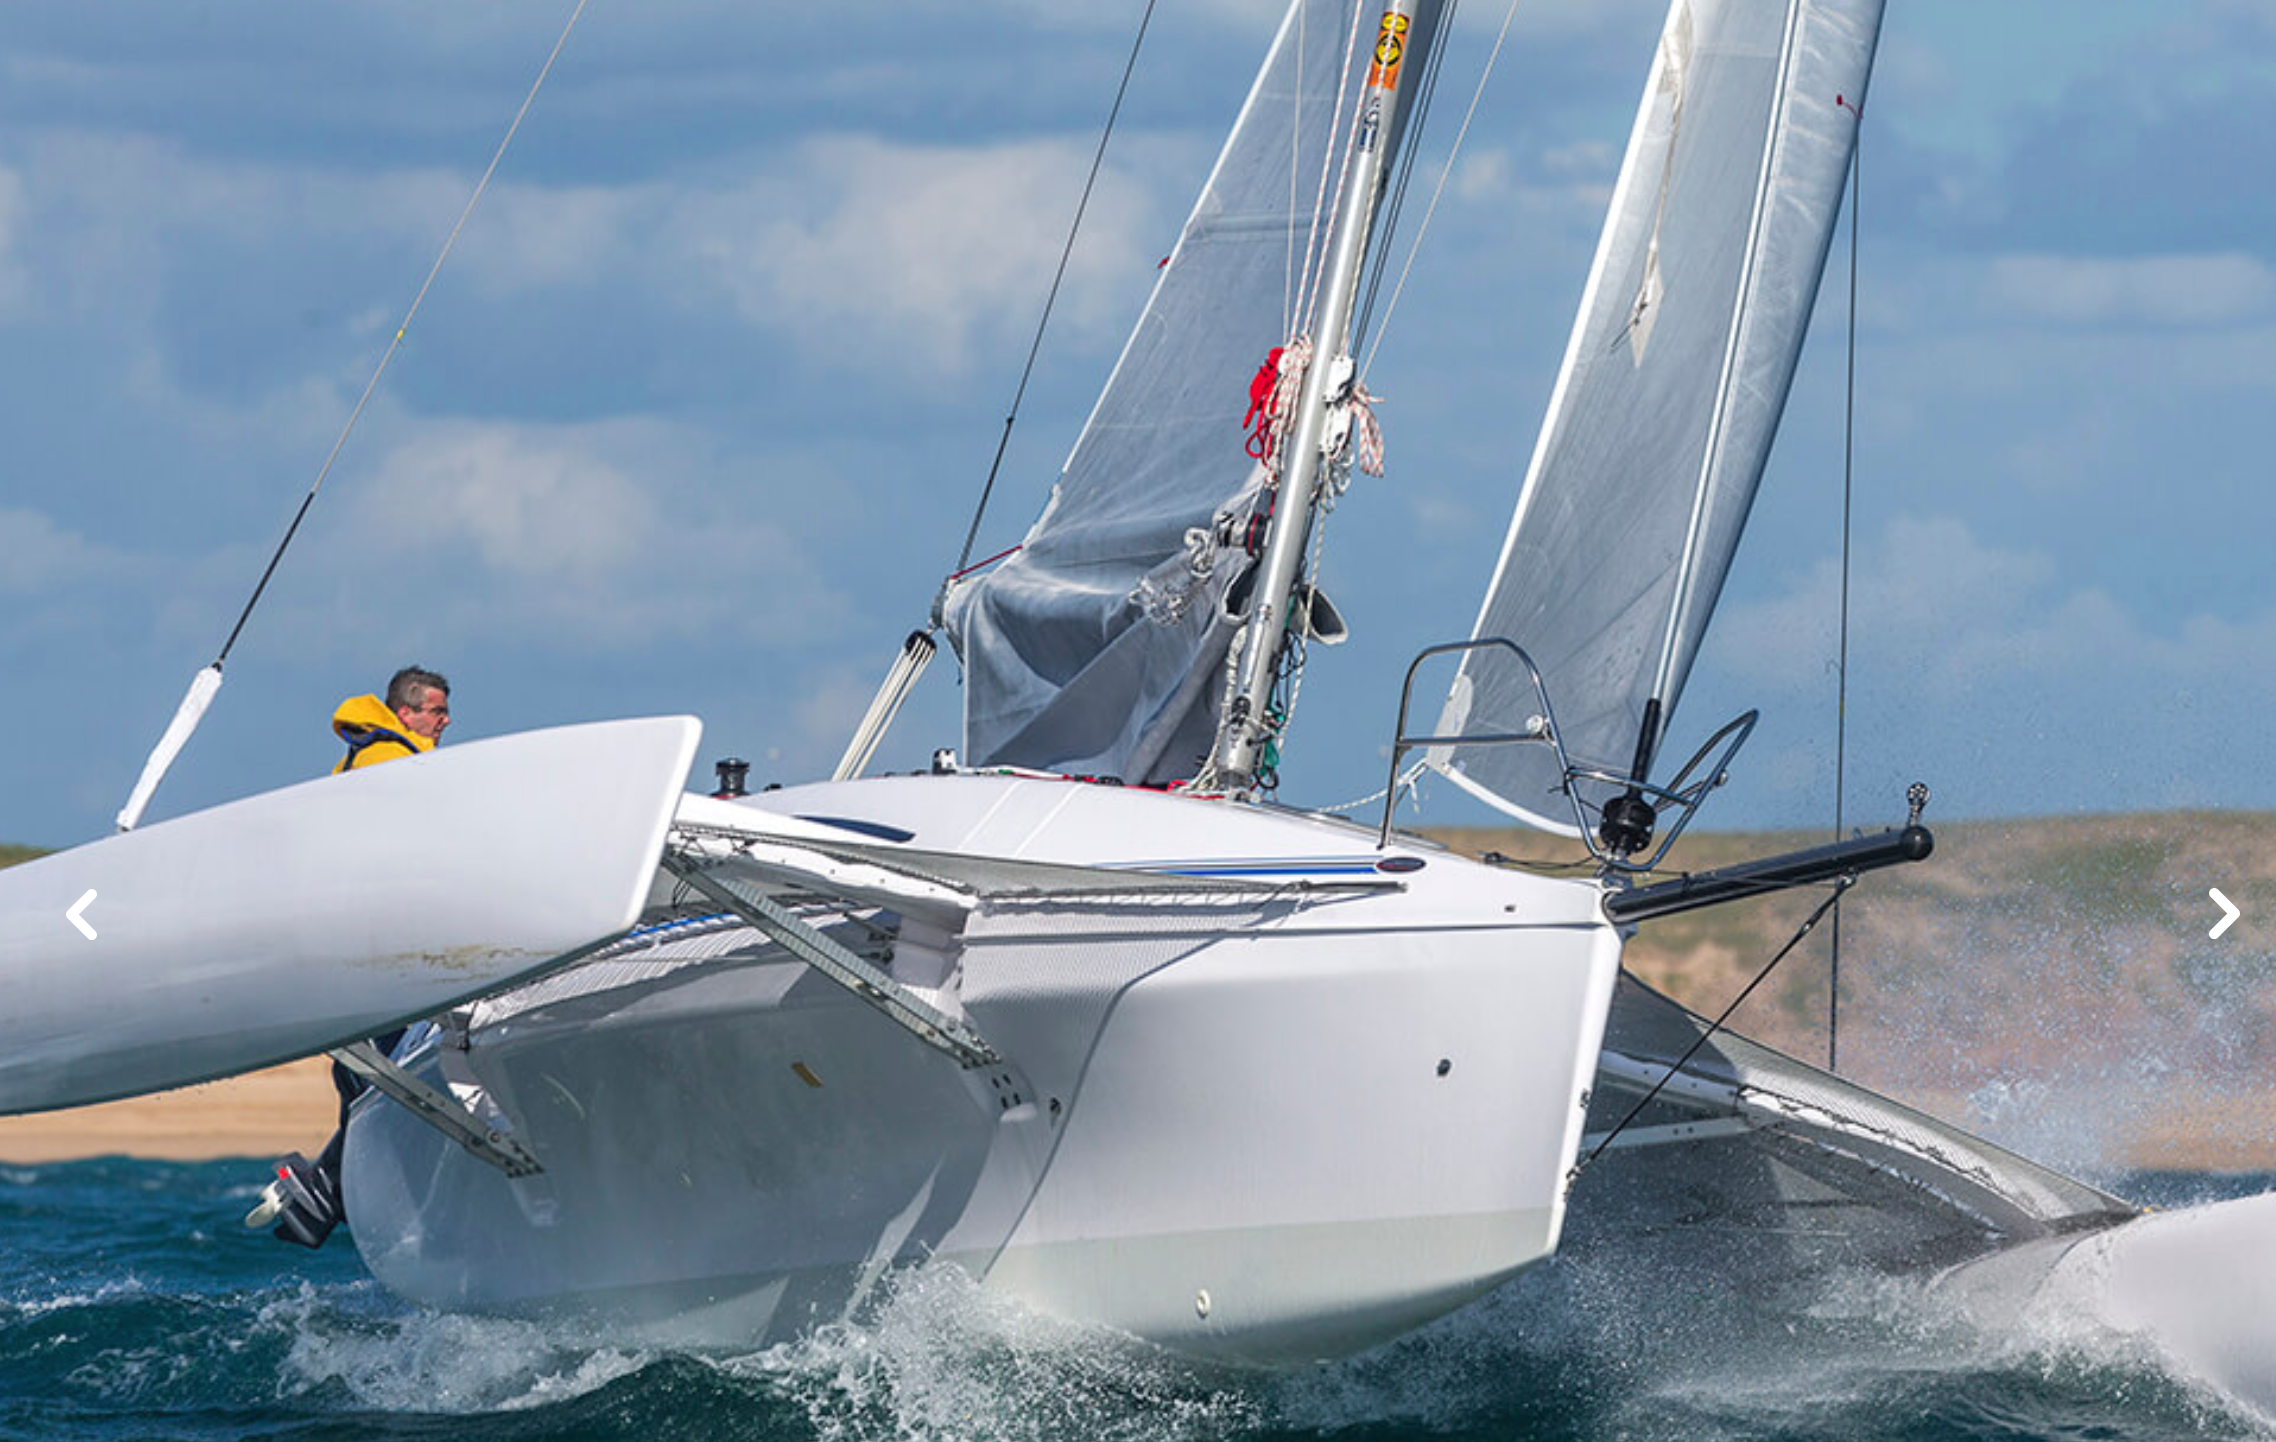
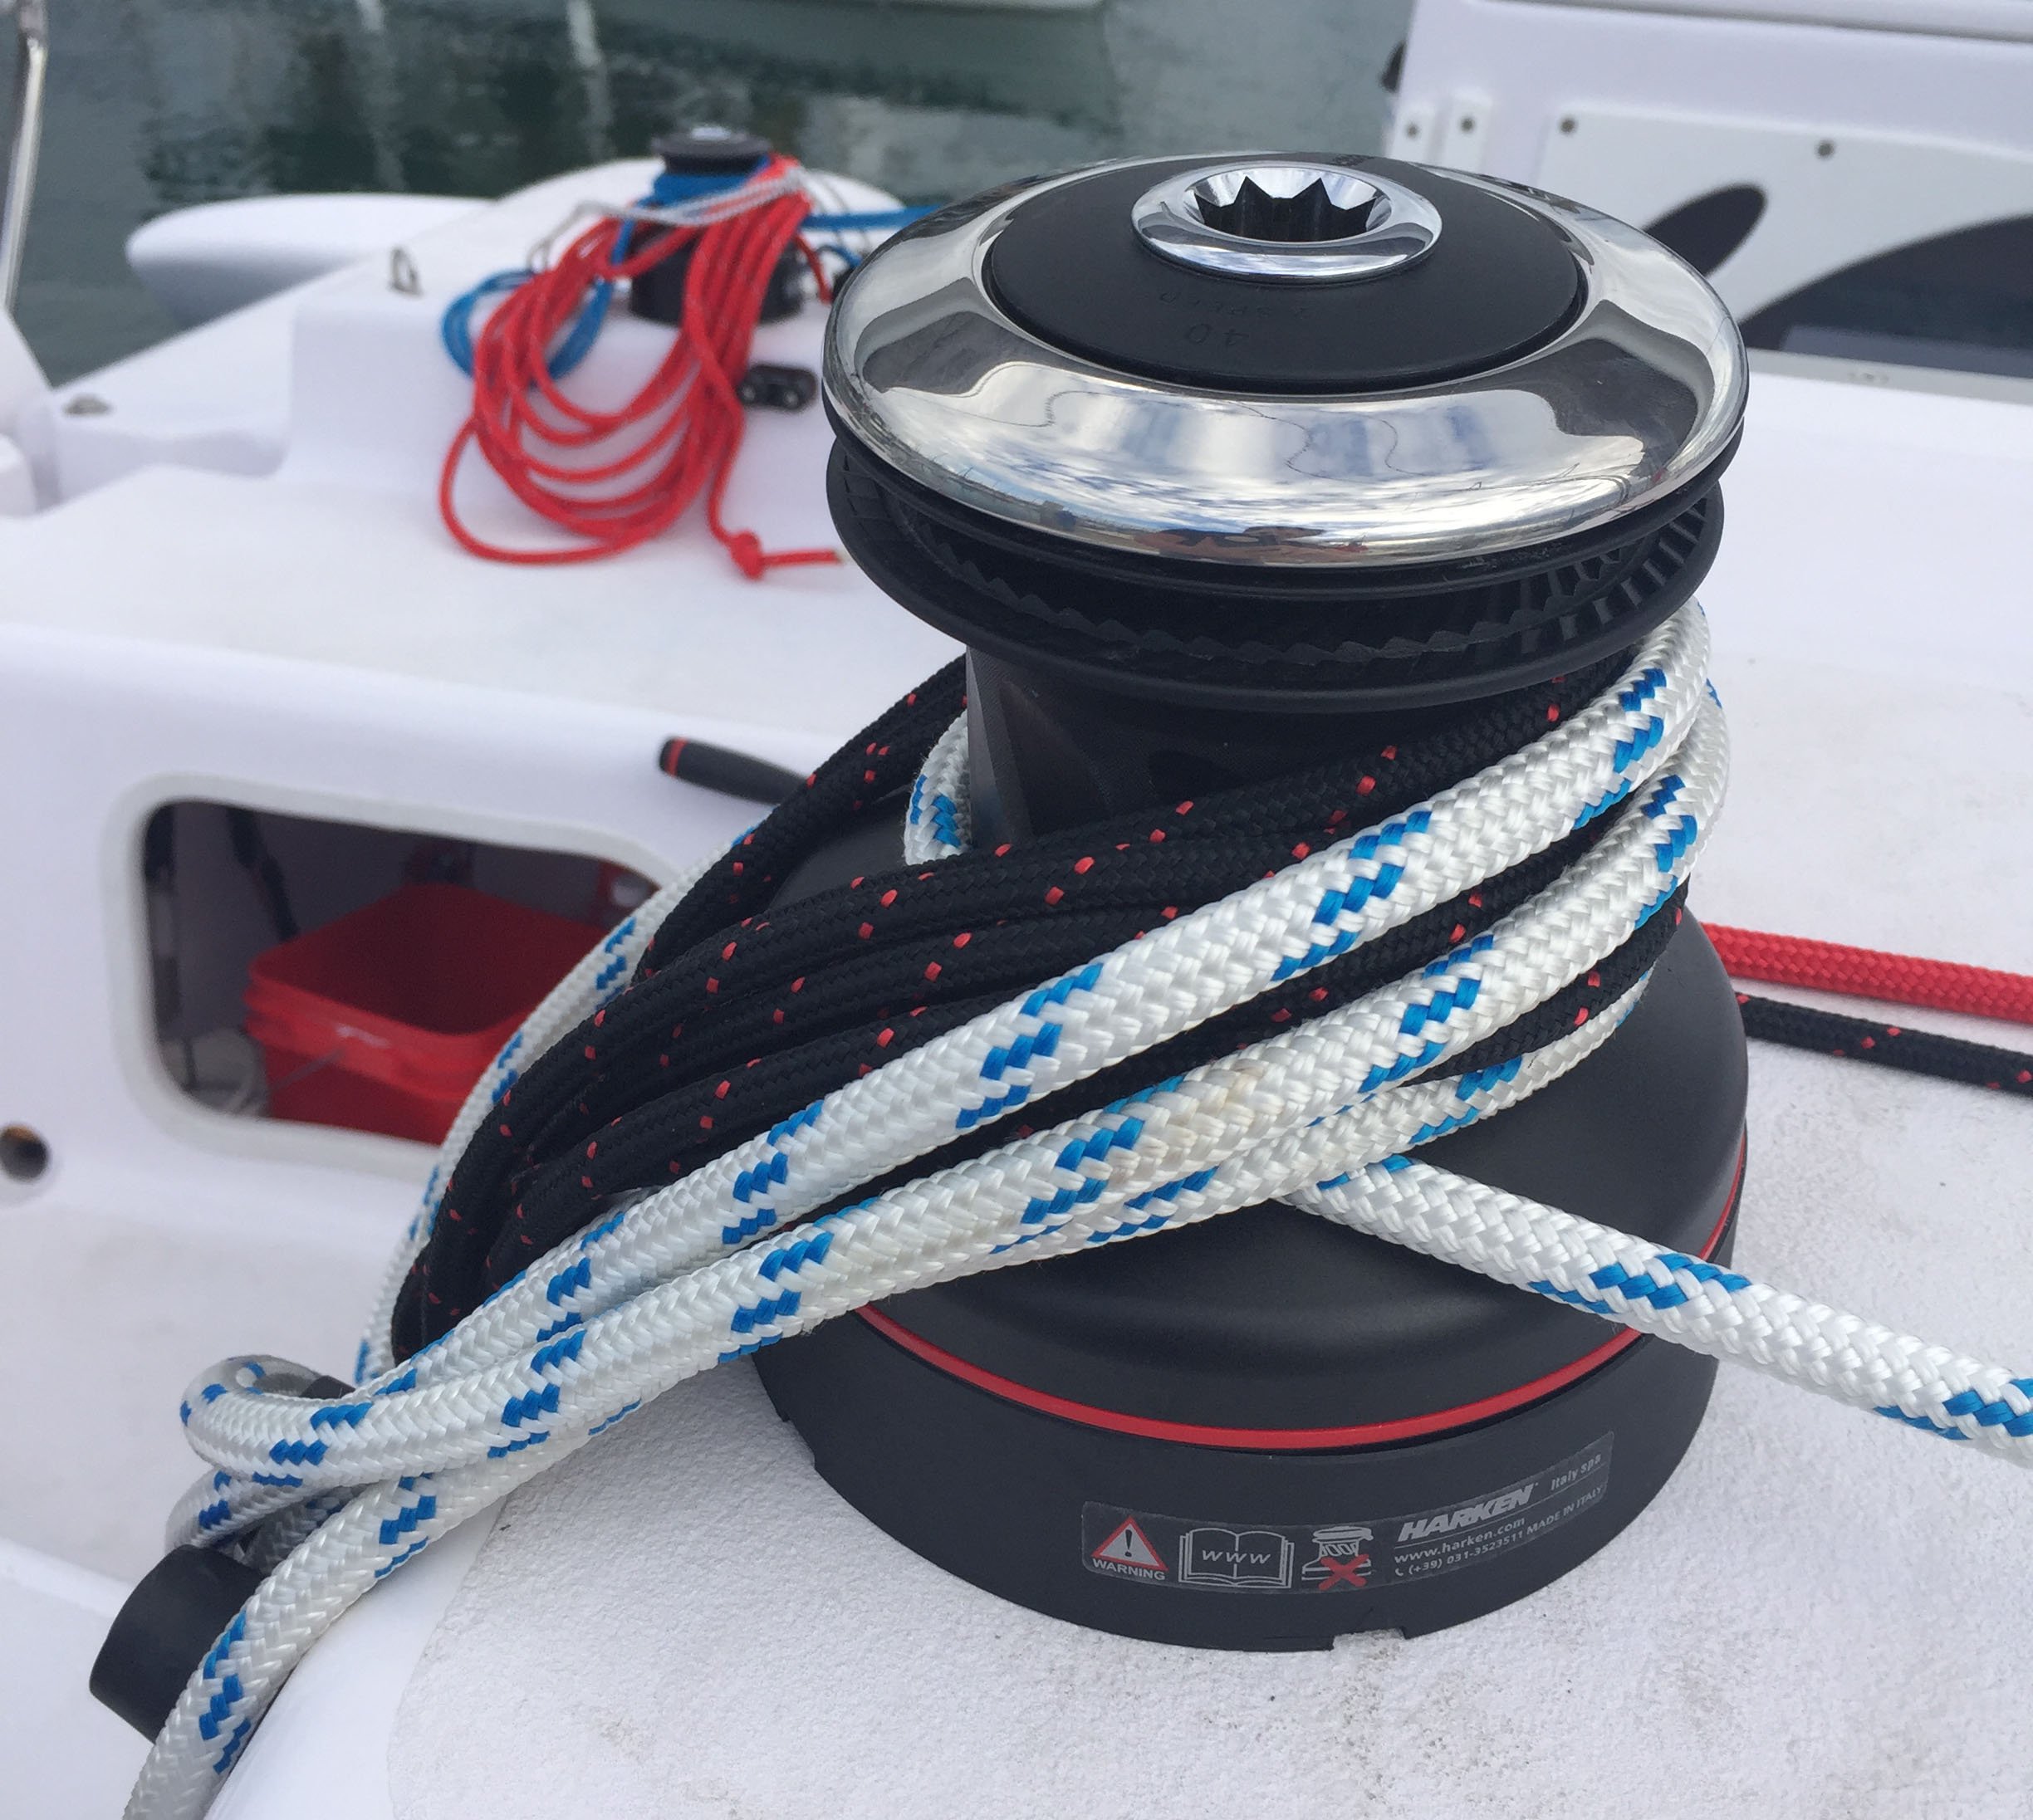
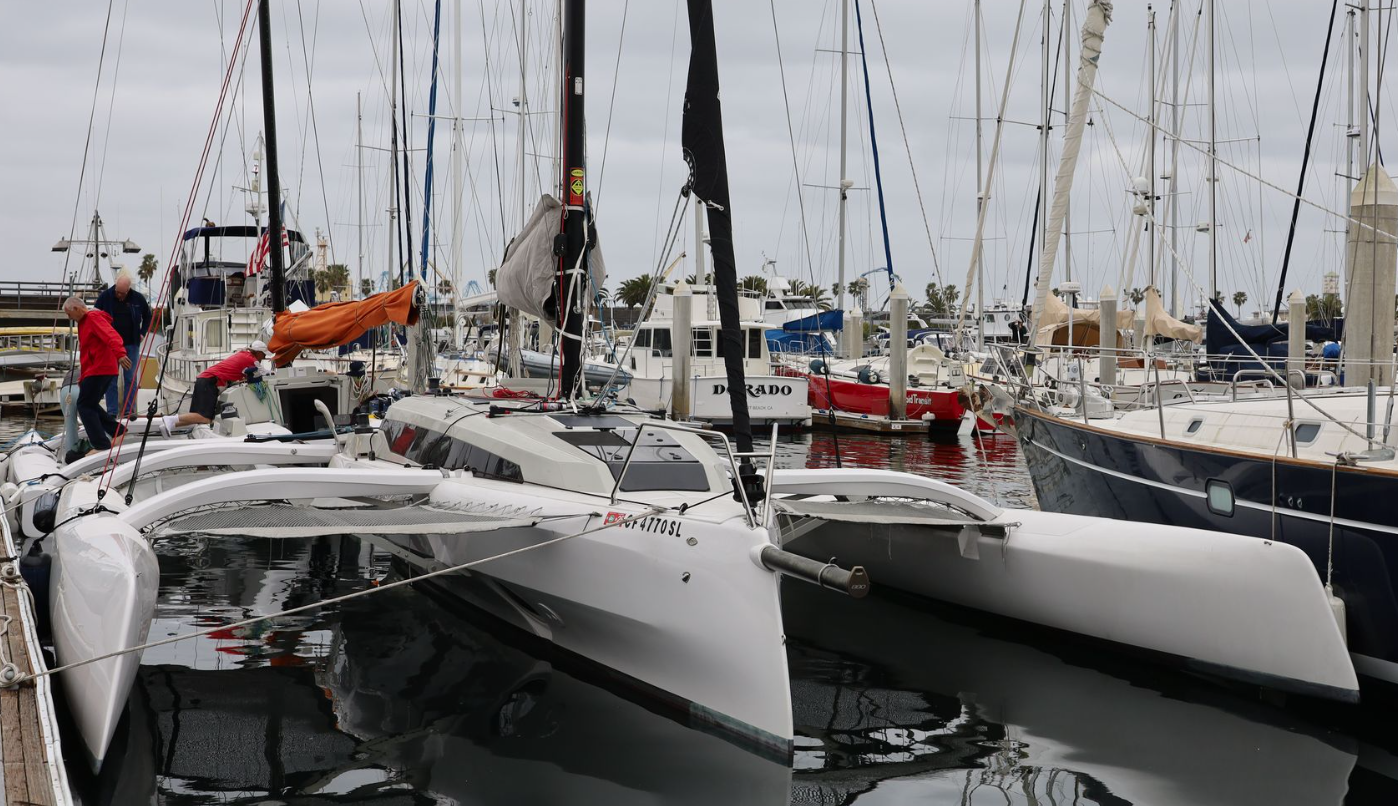
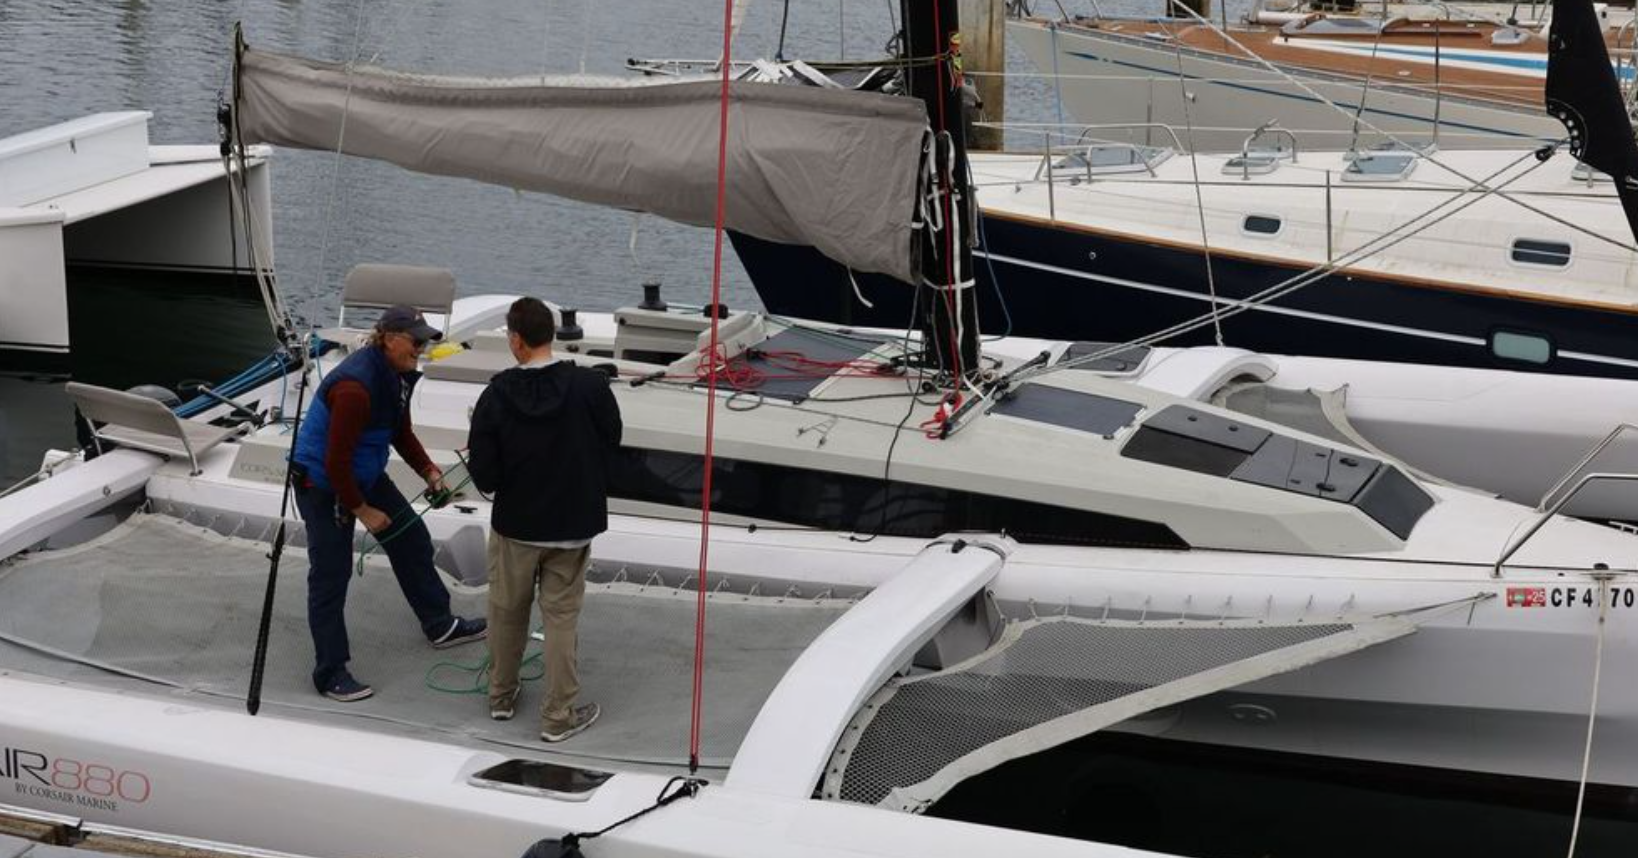
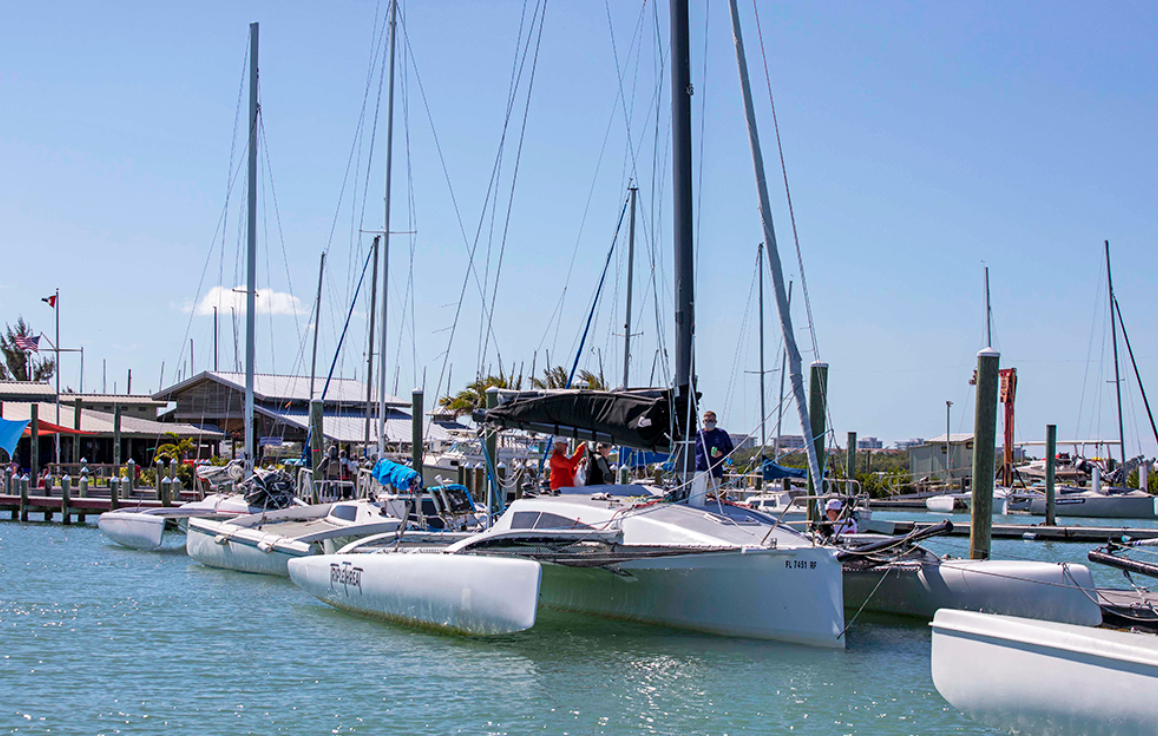
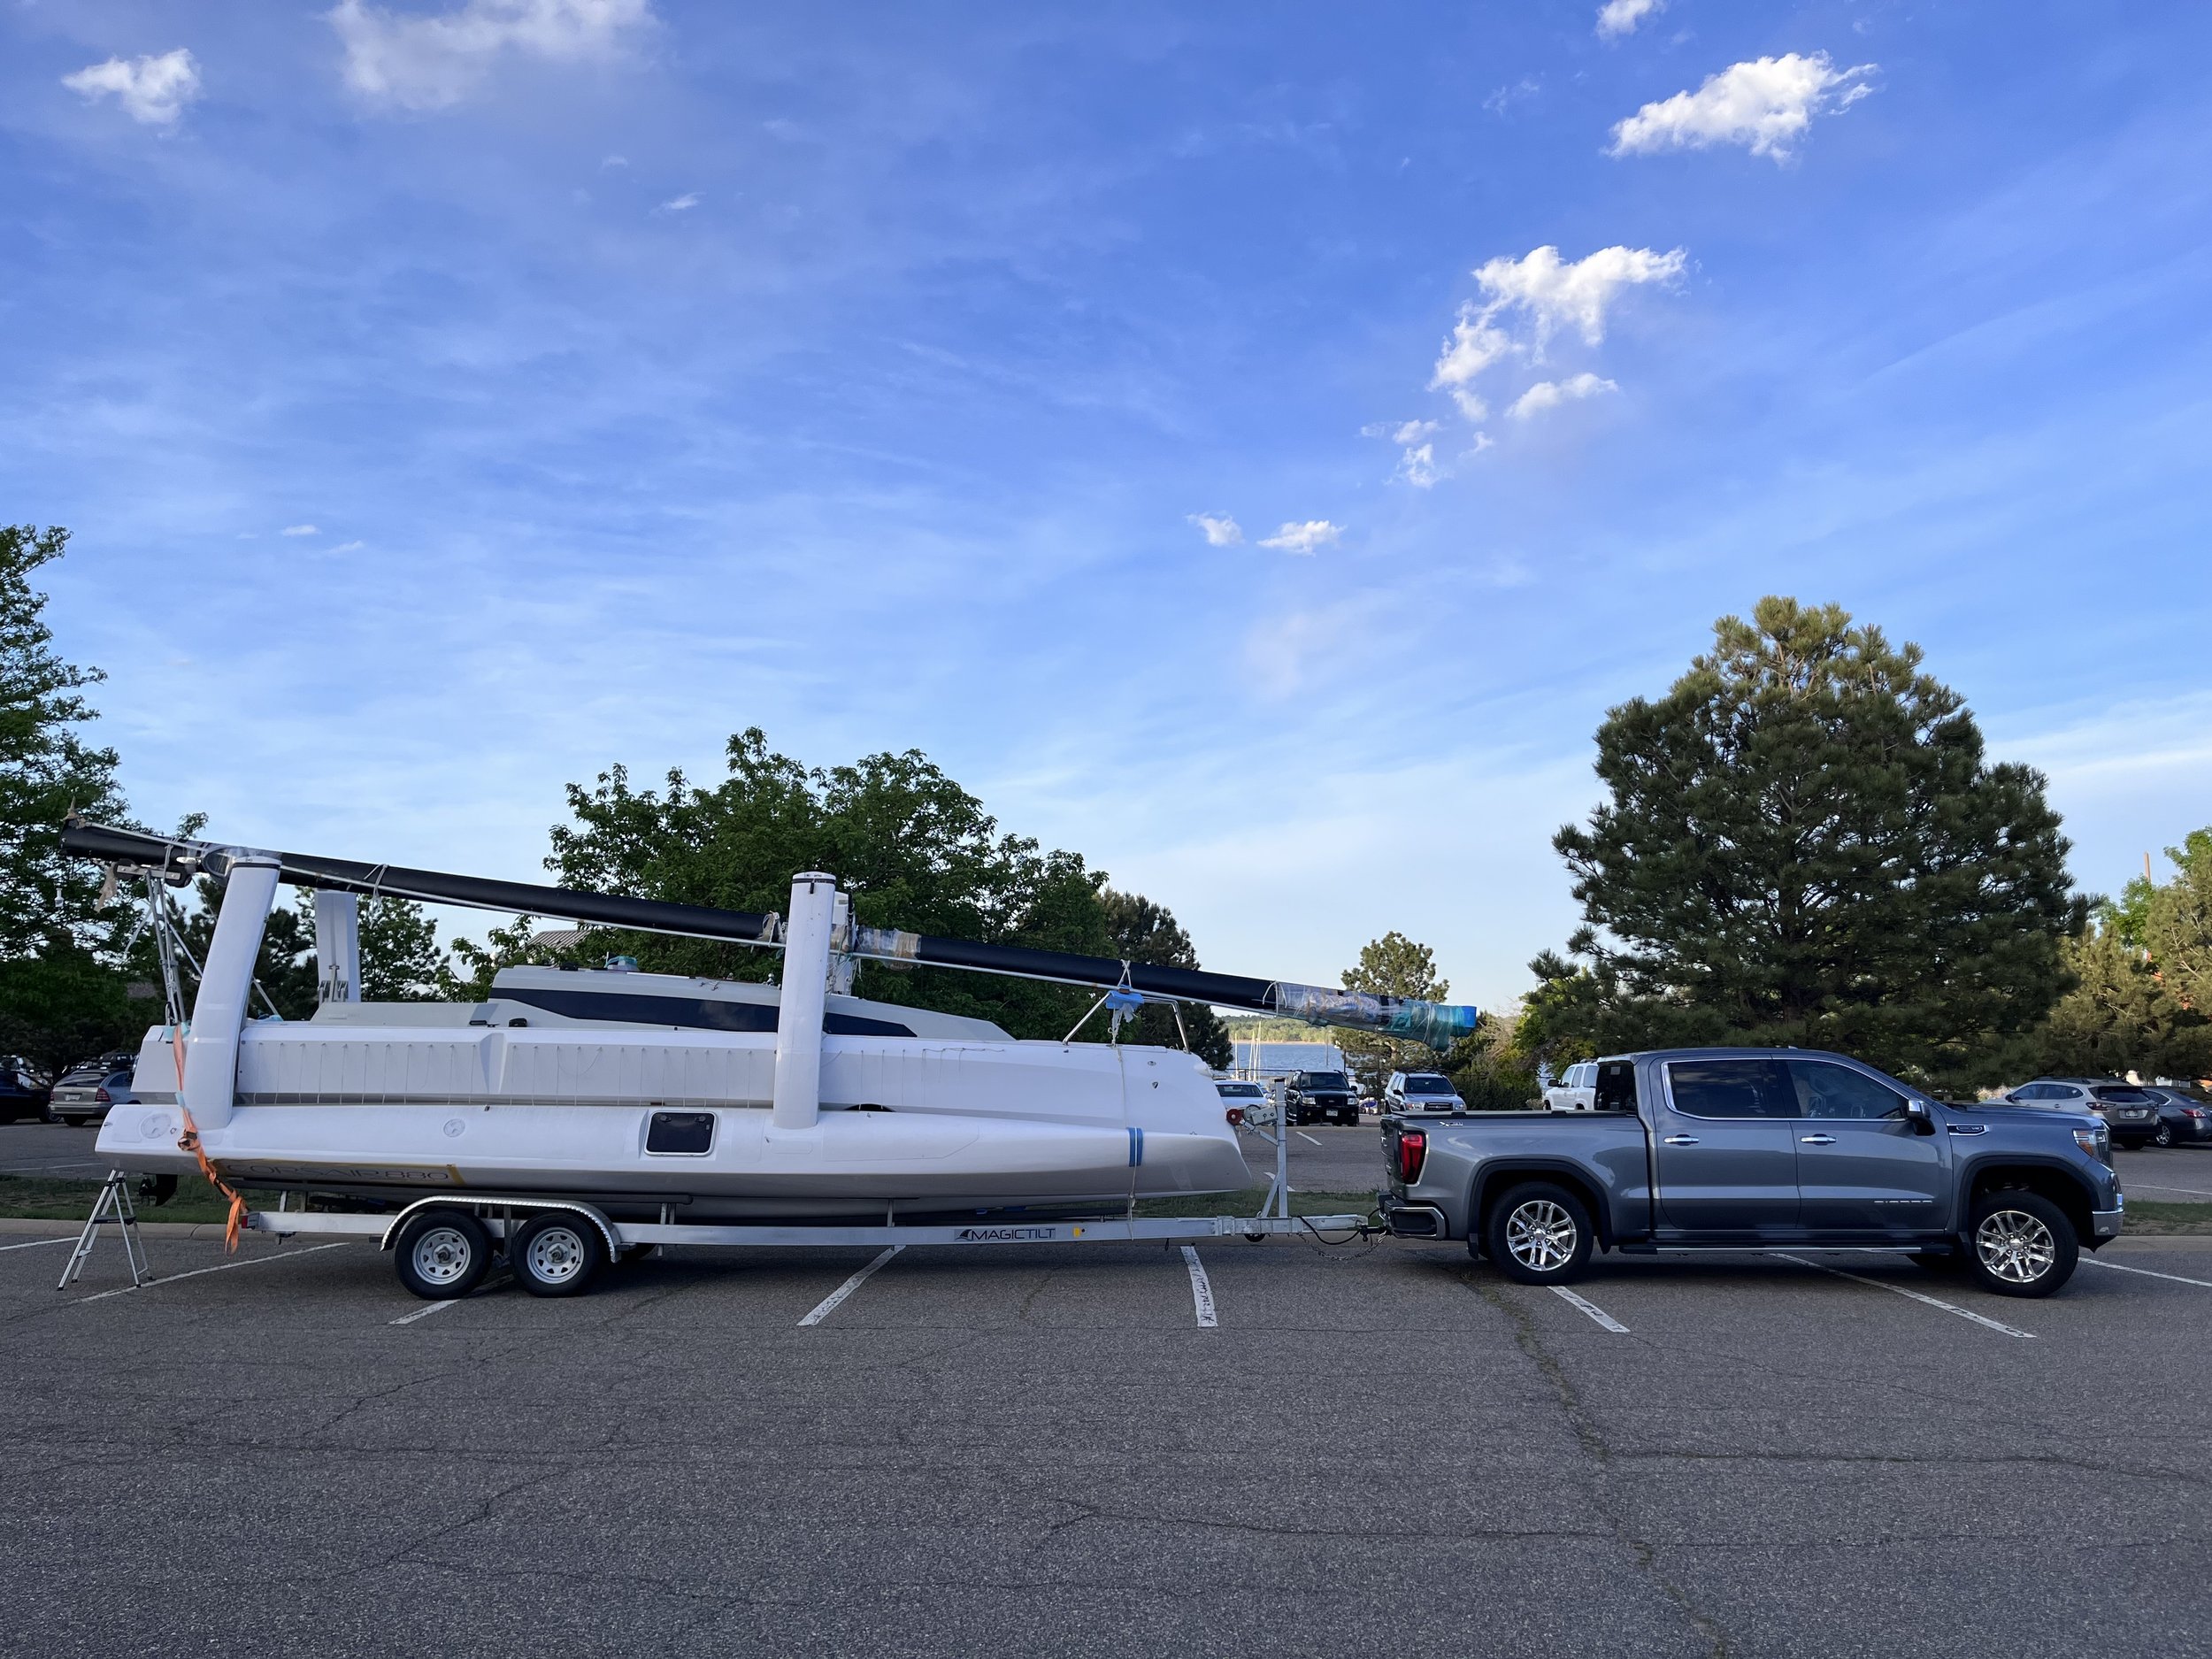
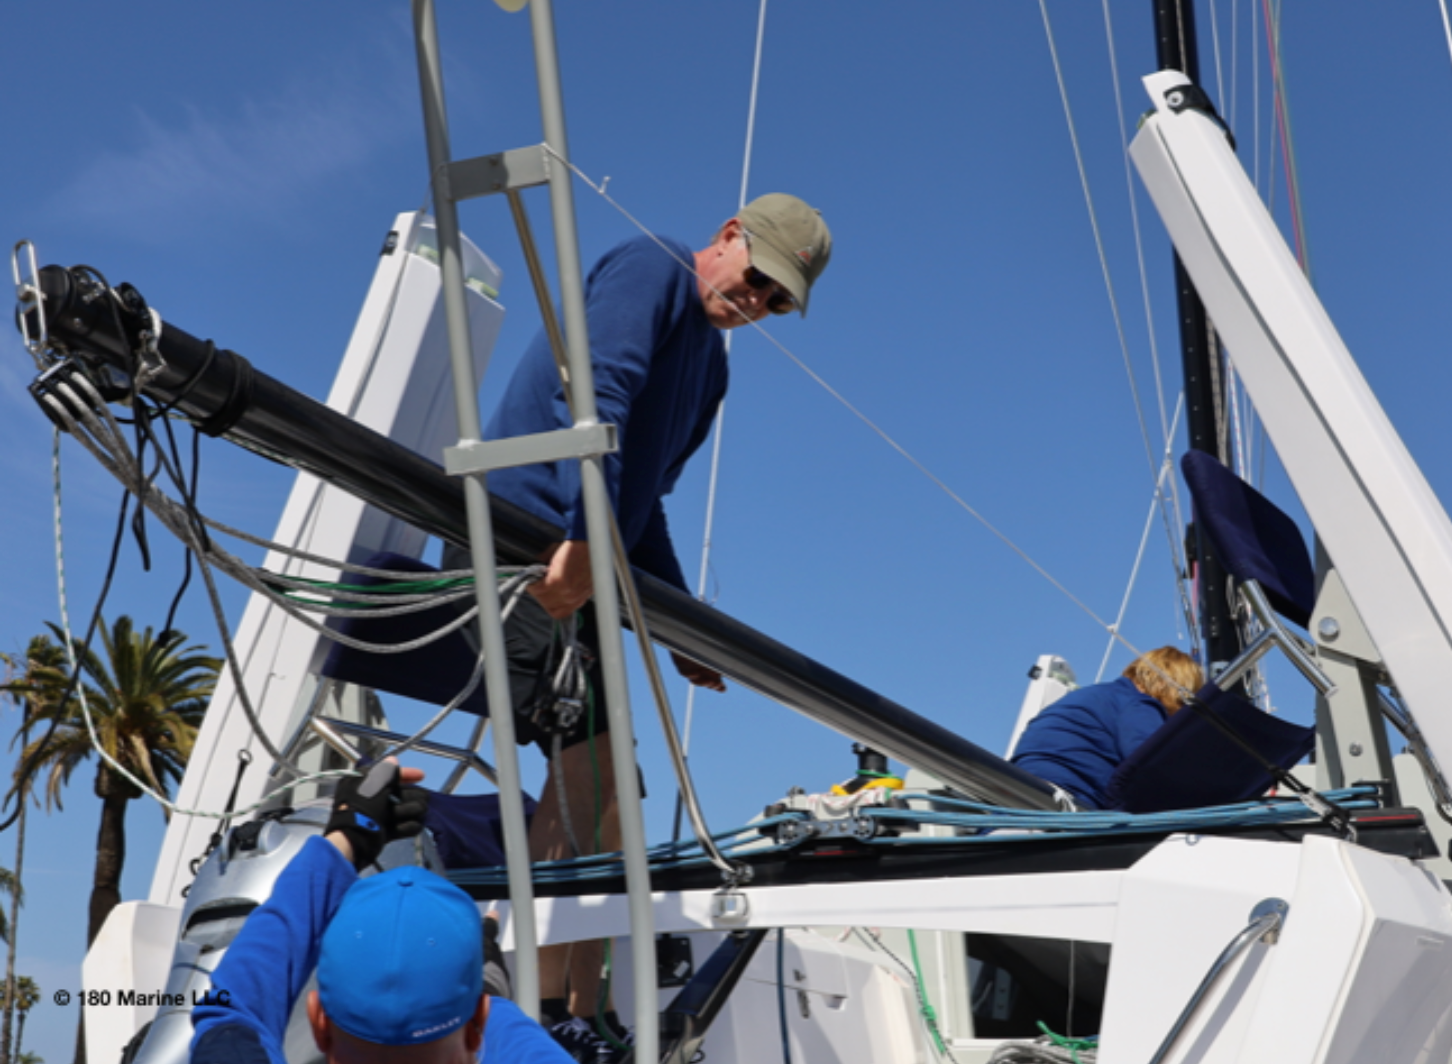
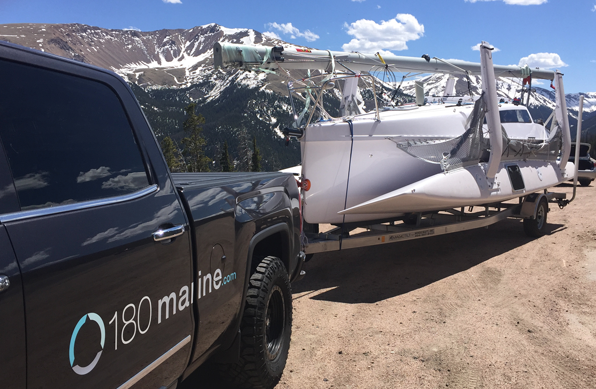
Corsair 880 Launching
I’ve raced J/80s quite a few years in club settings where you need to get on and off the crane quickly to make room for others who need to launch just as quickly for the event. Here’s how they compare for launching:

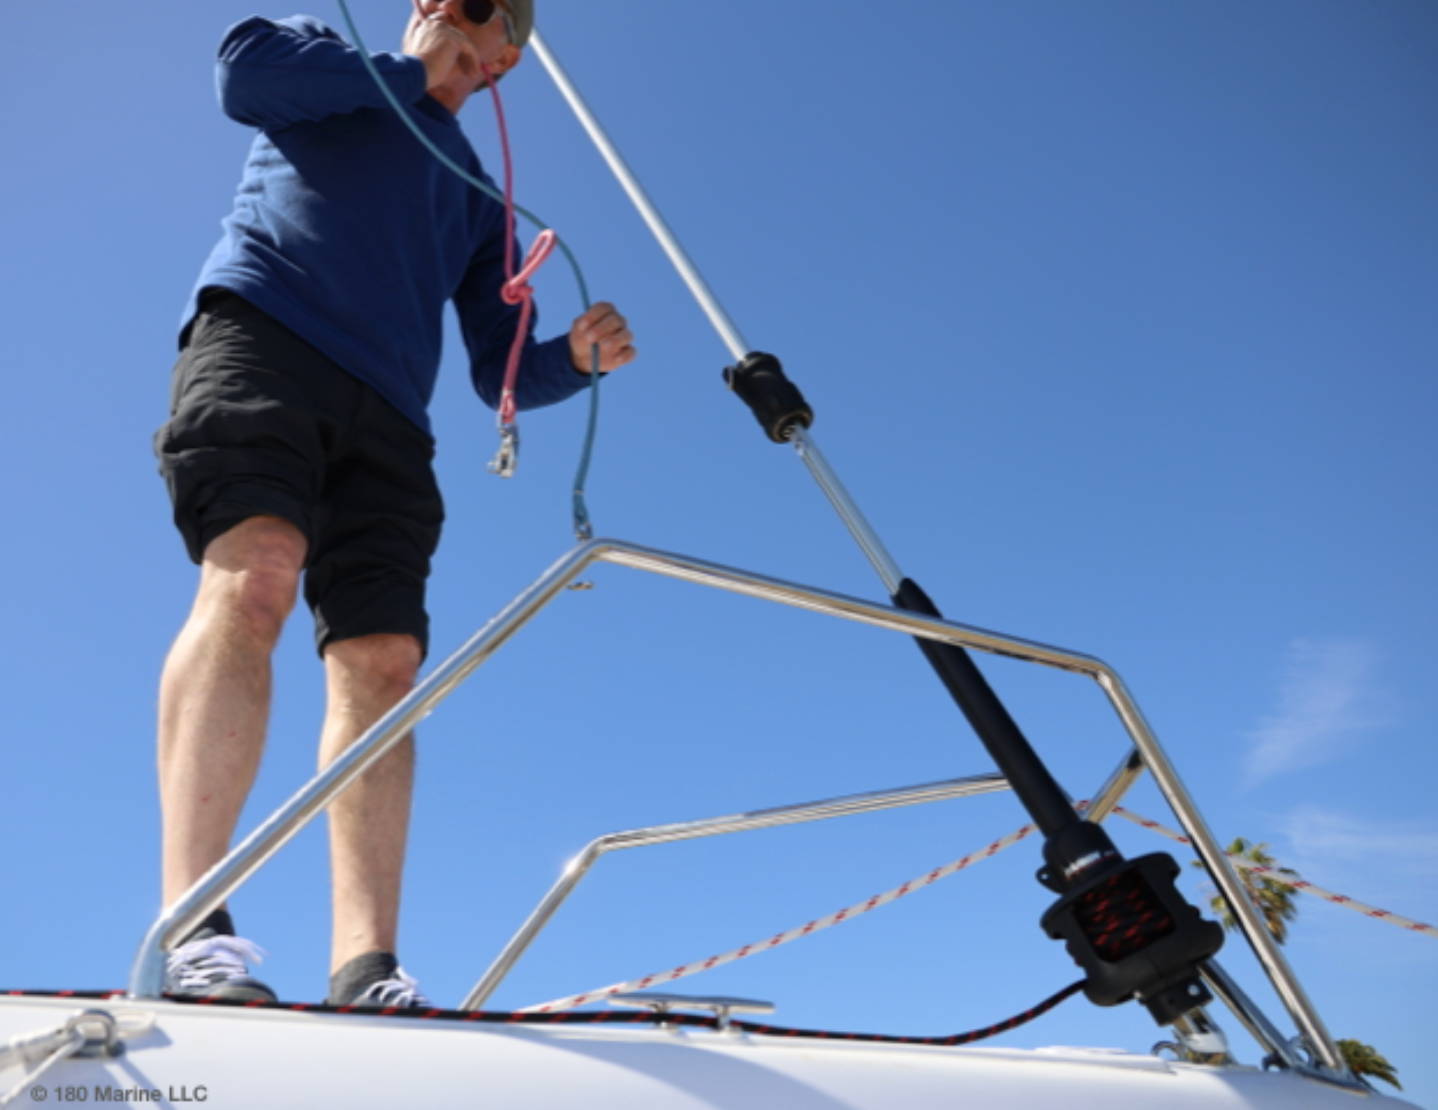
  • The Corsair 880 has no backstay, so in that regard, it’s probably faster to get on and off the crane.

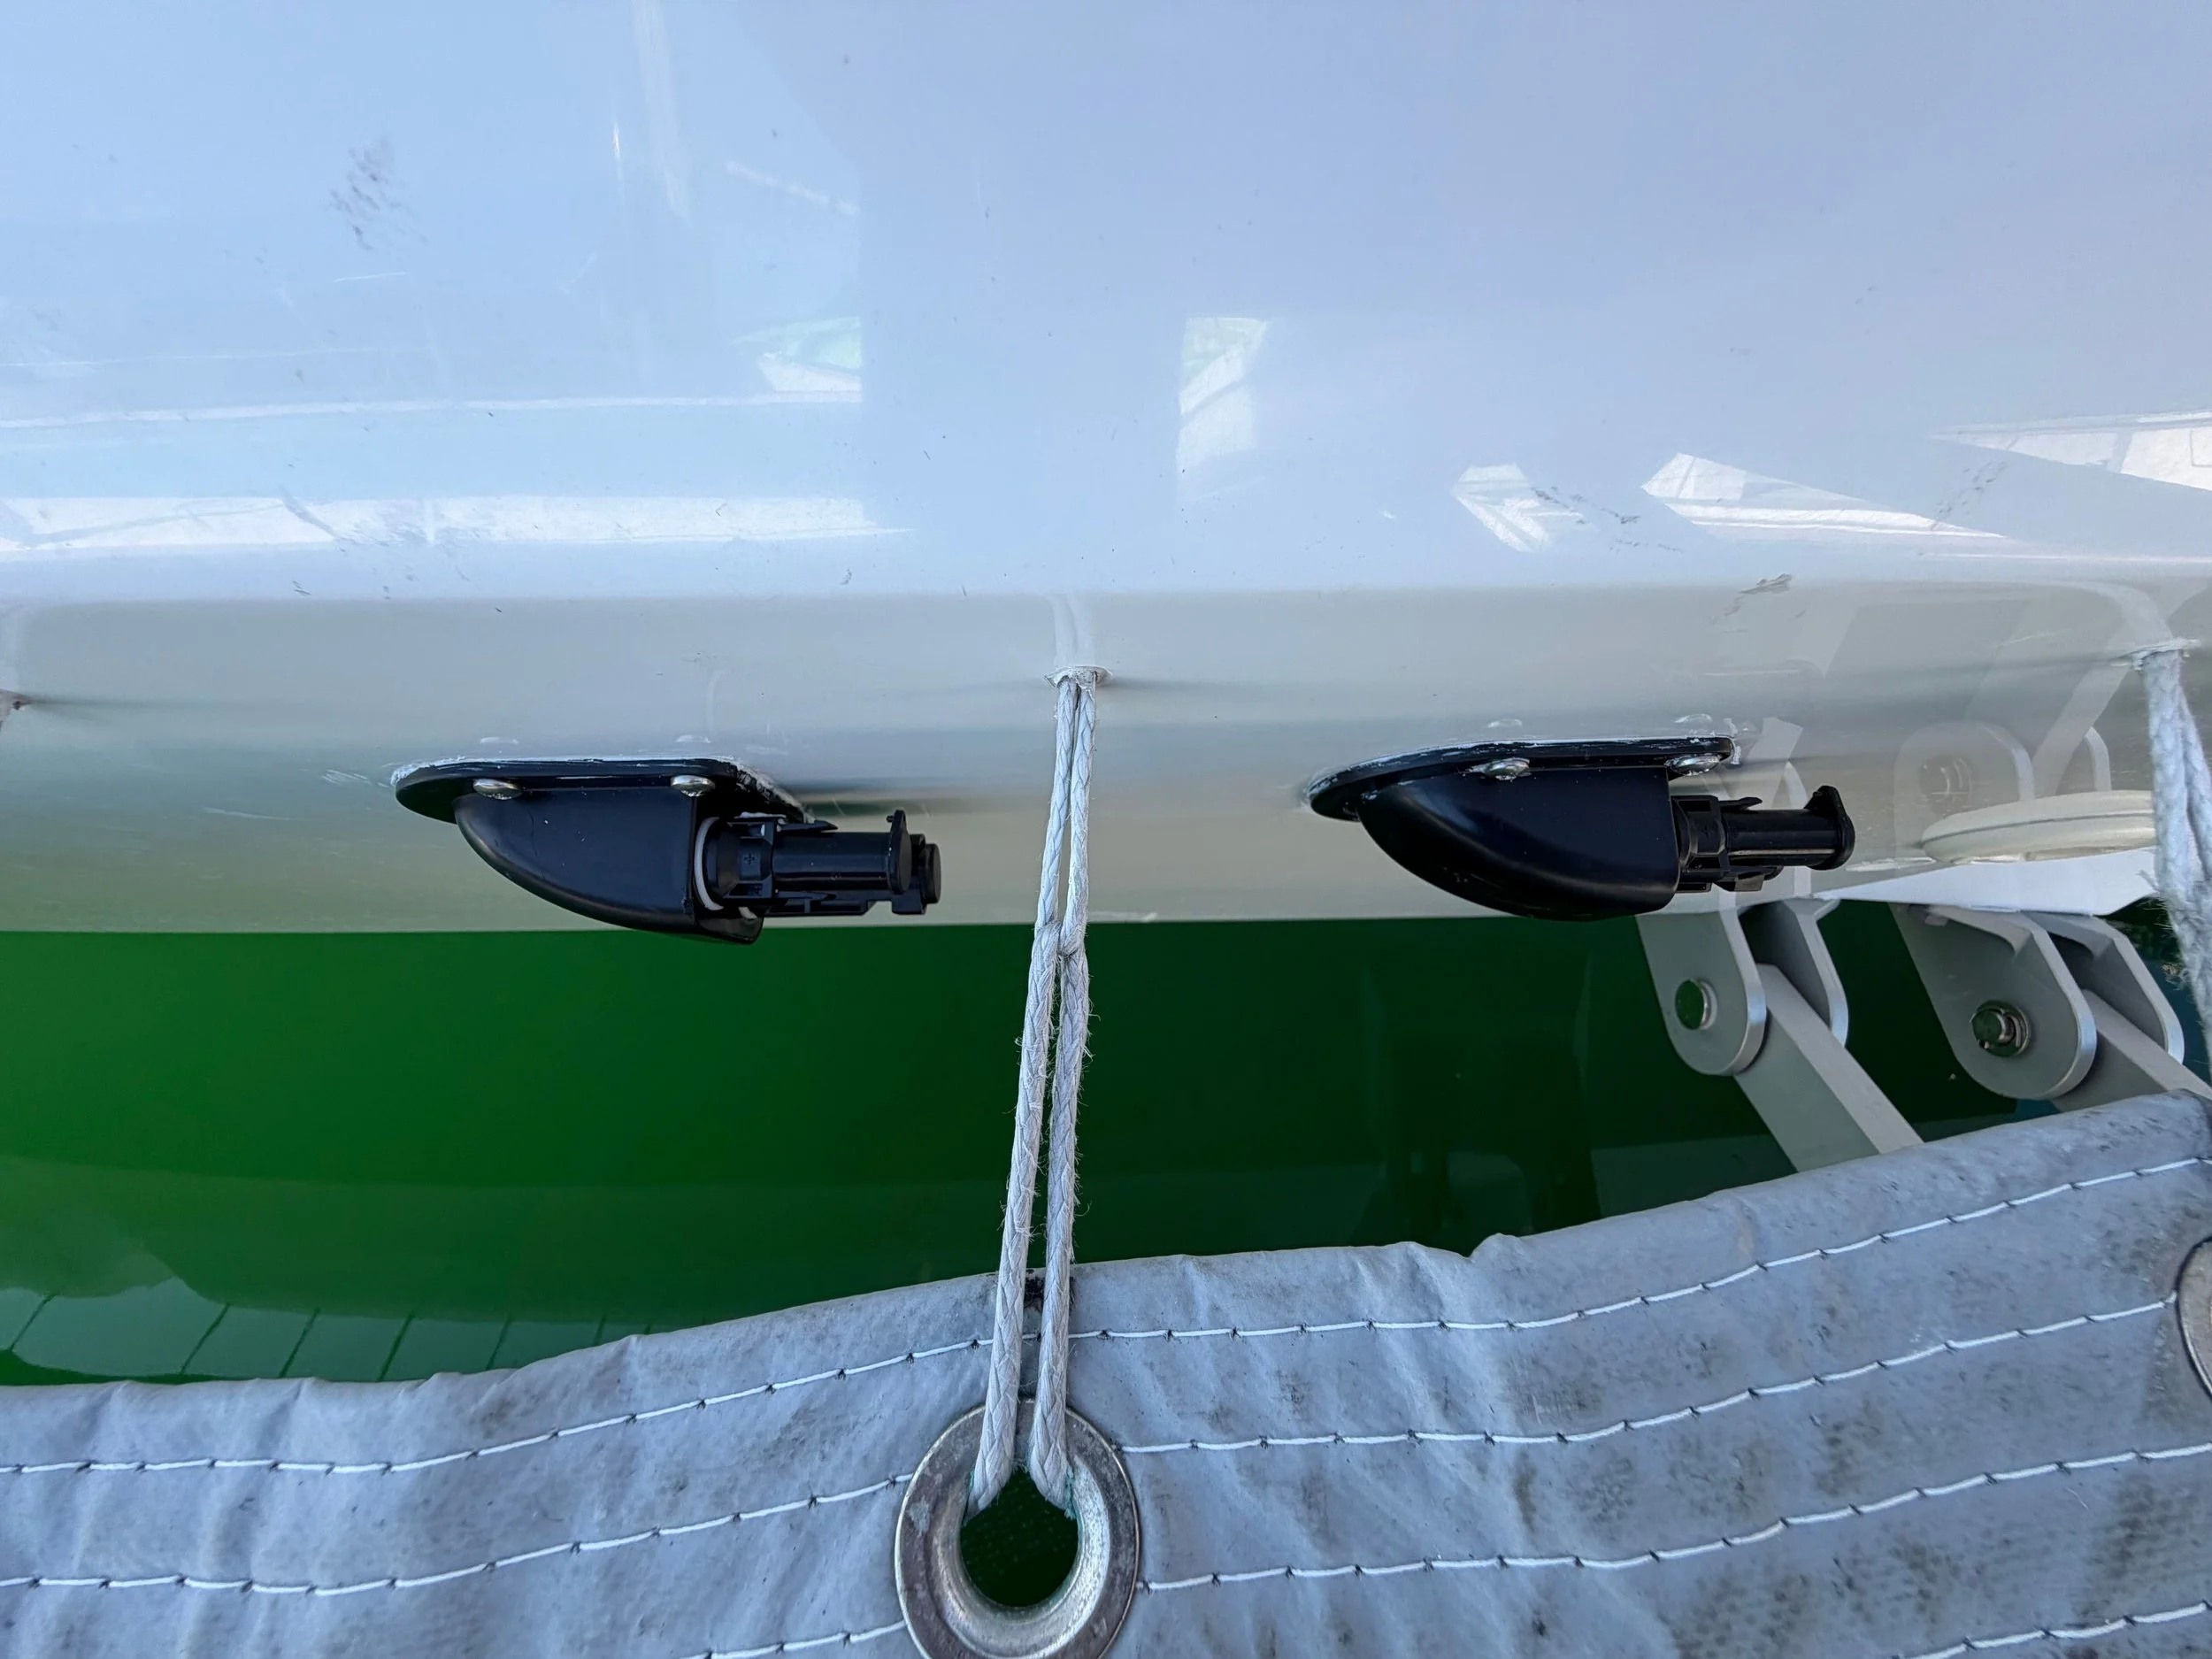
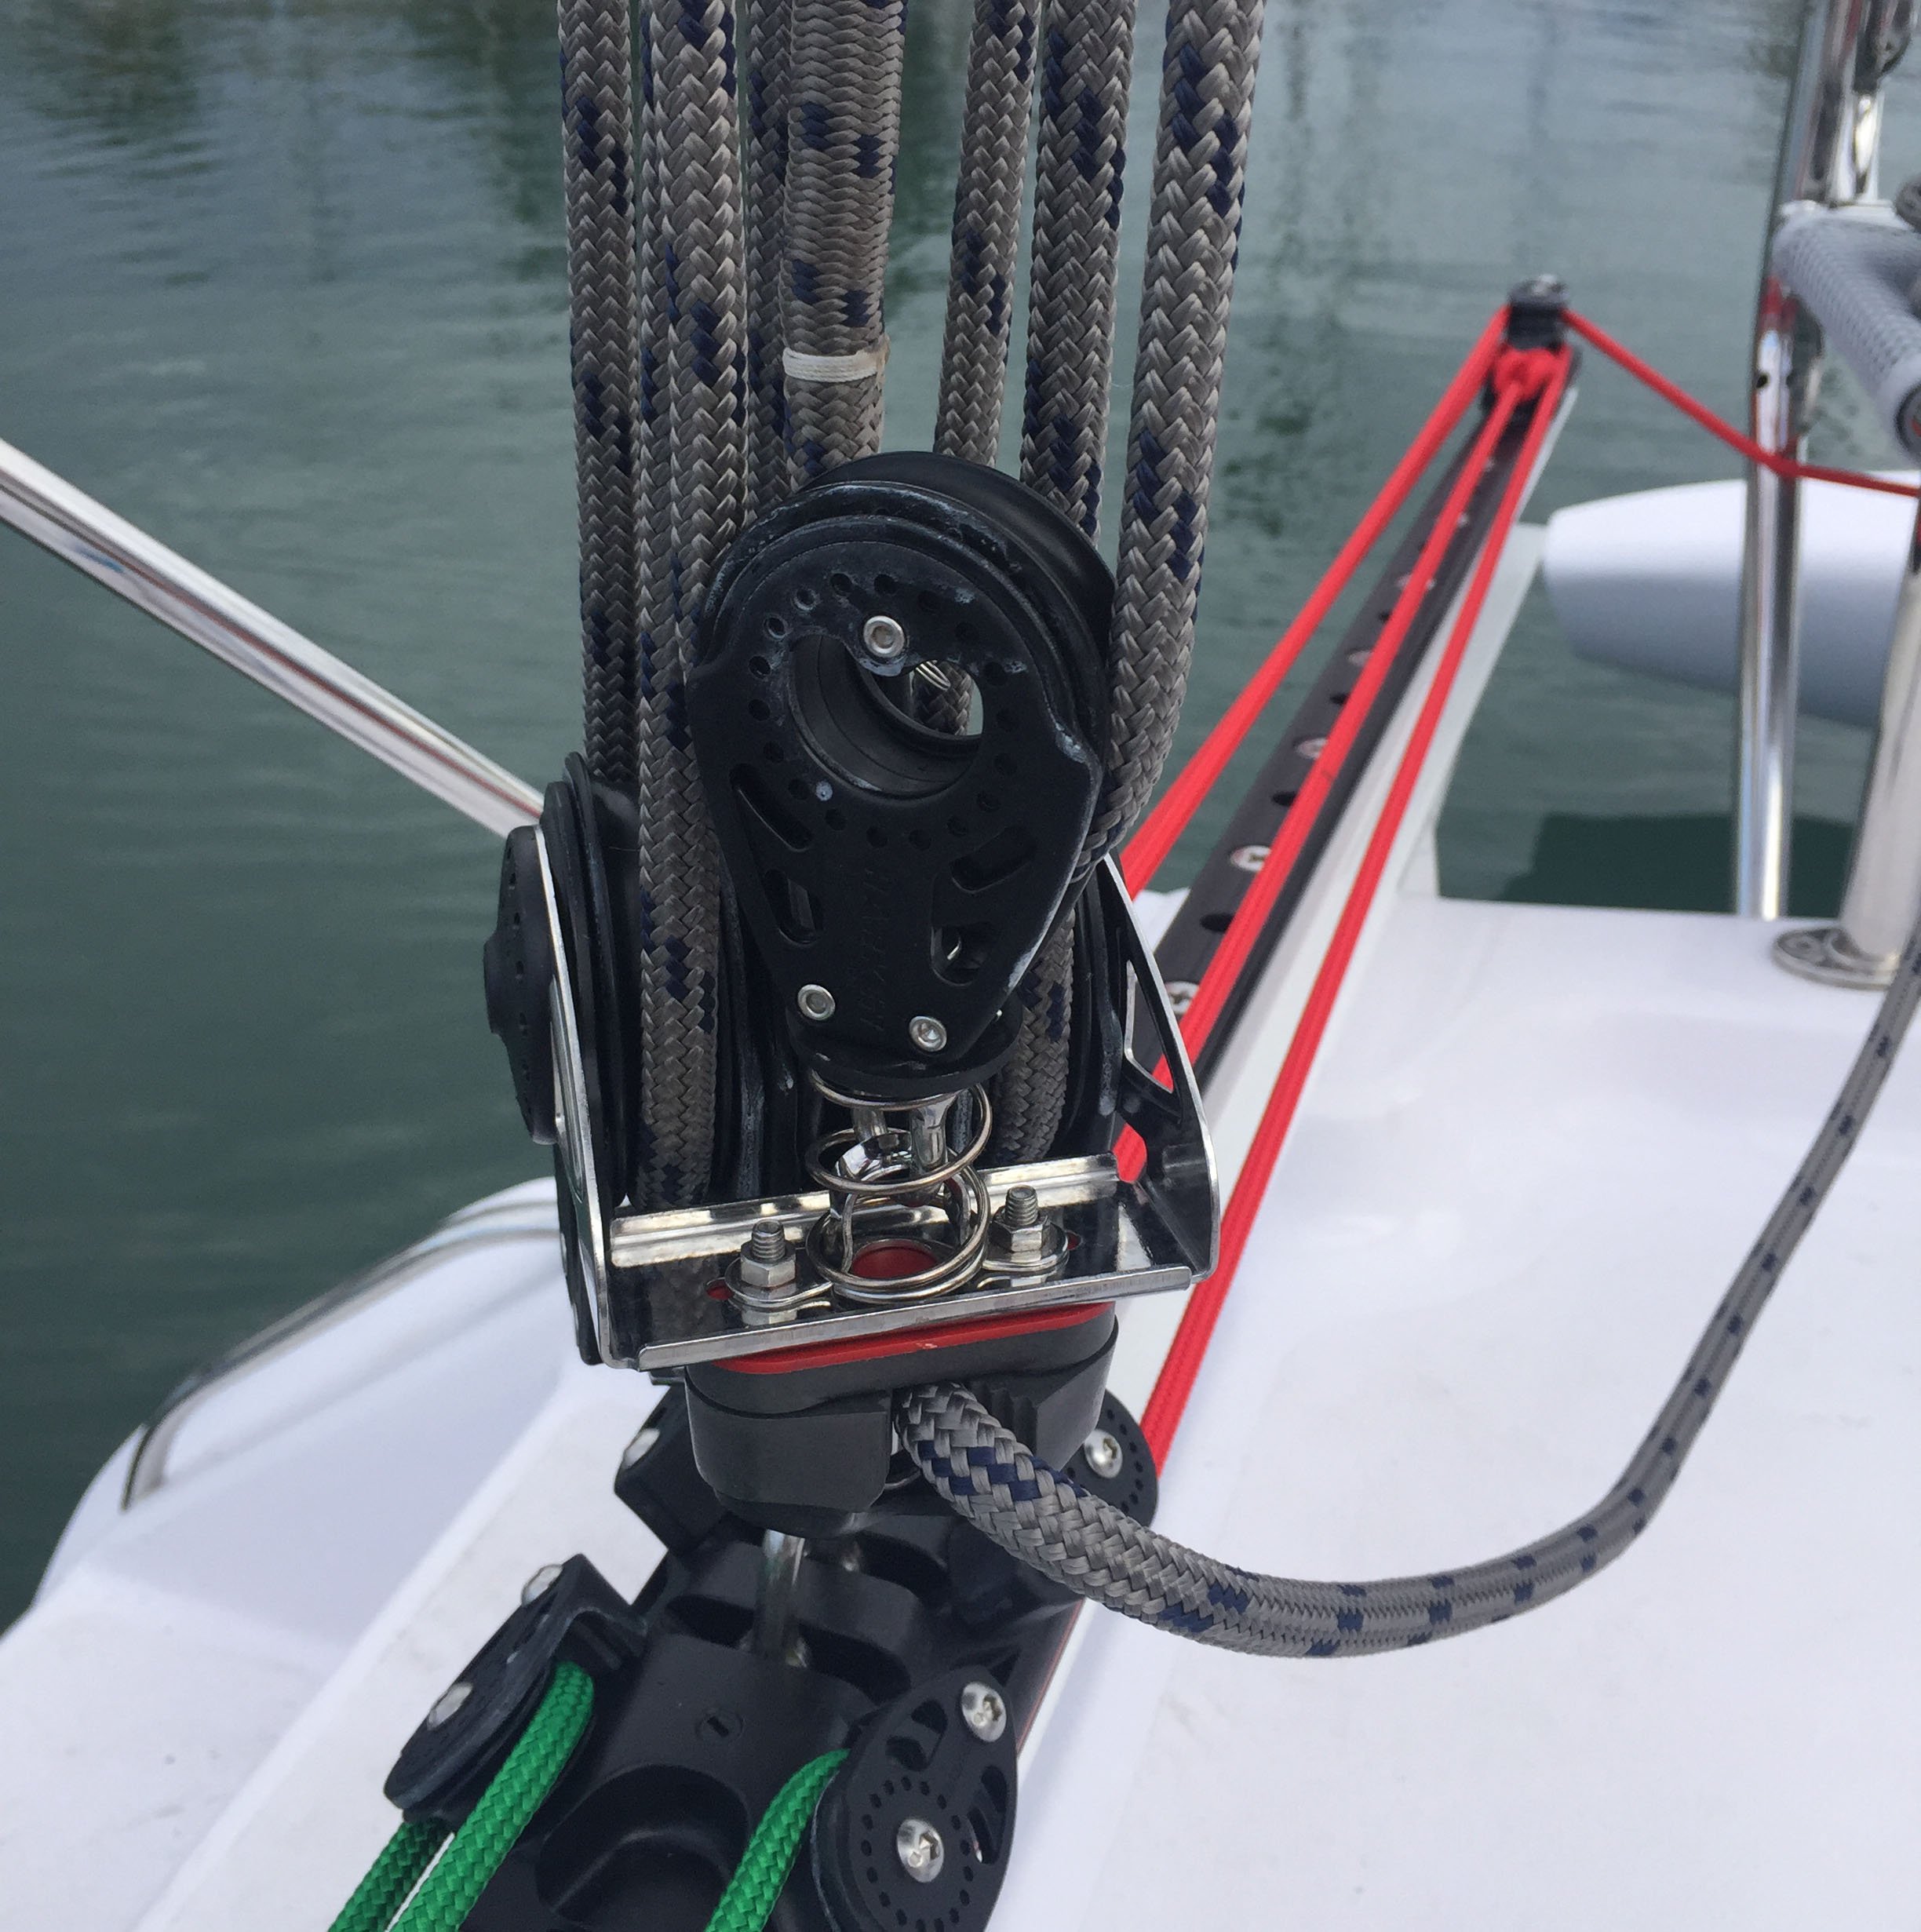
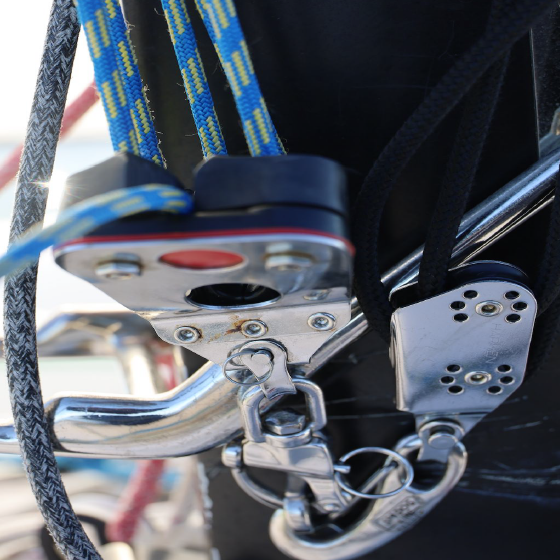
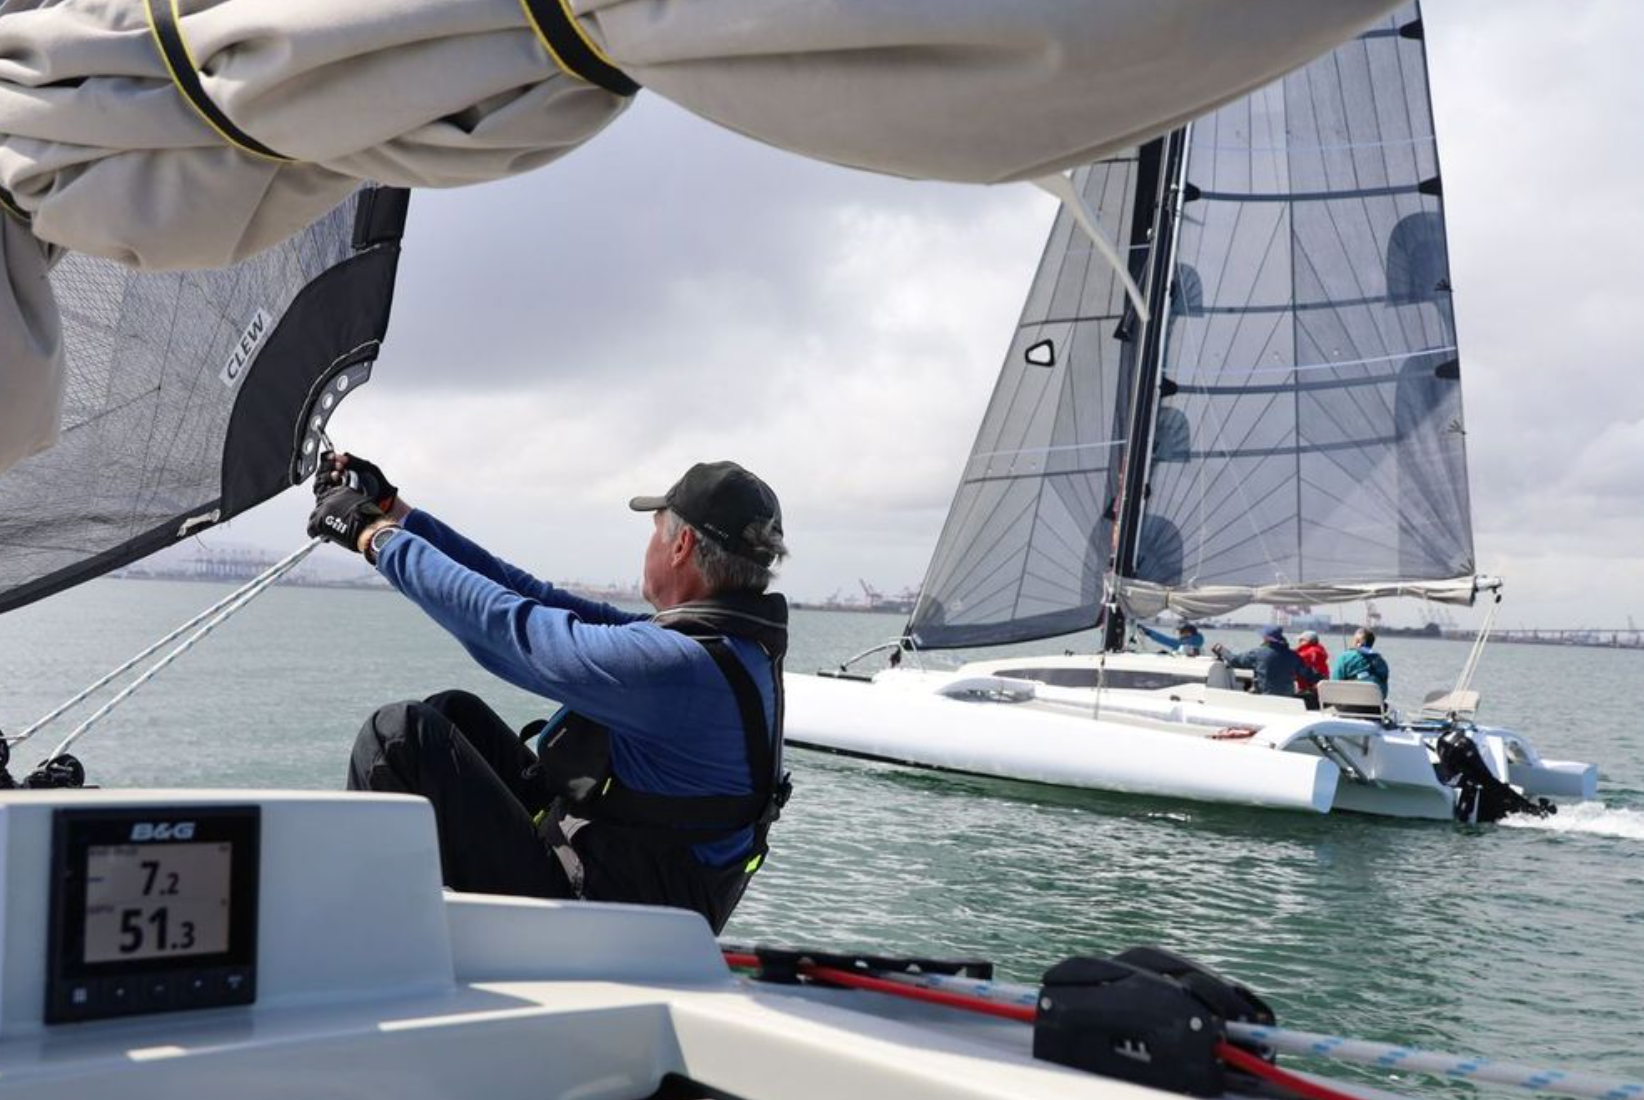
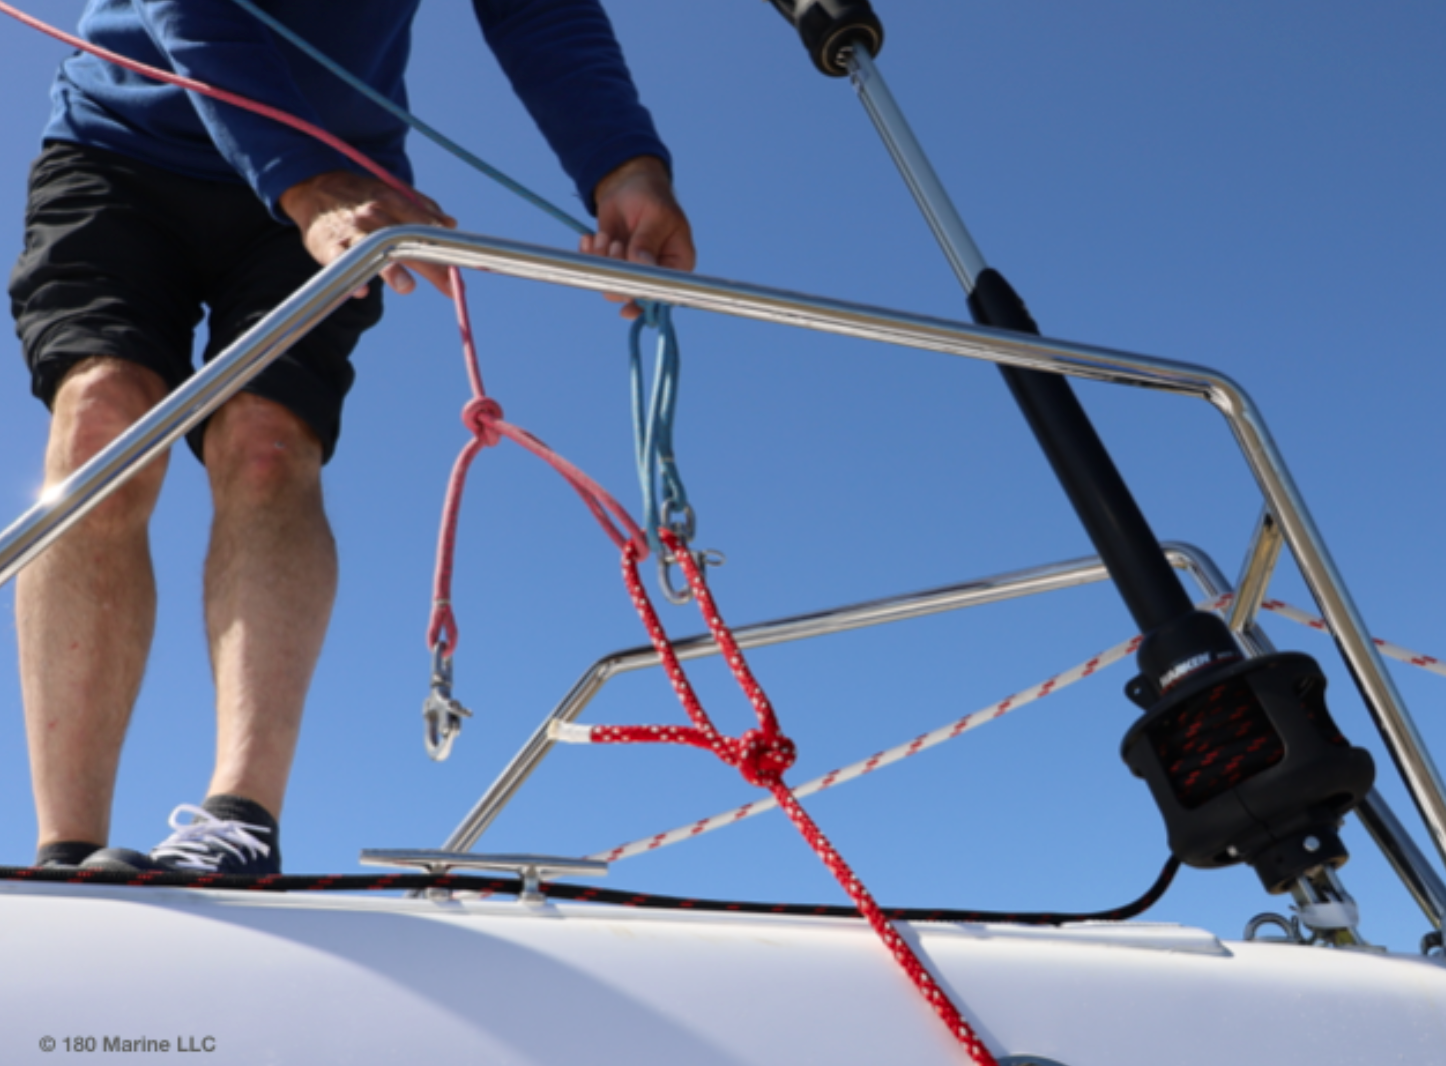
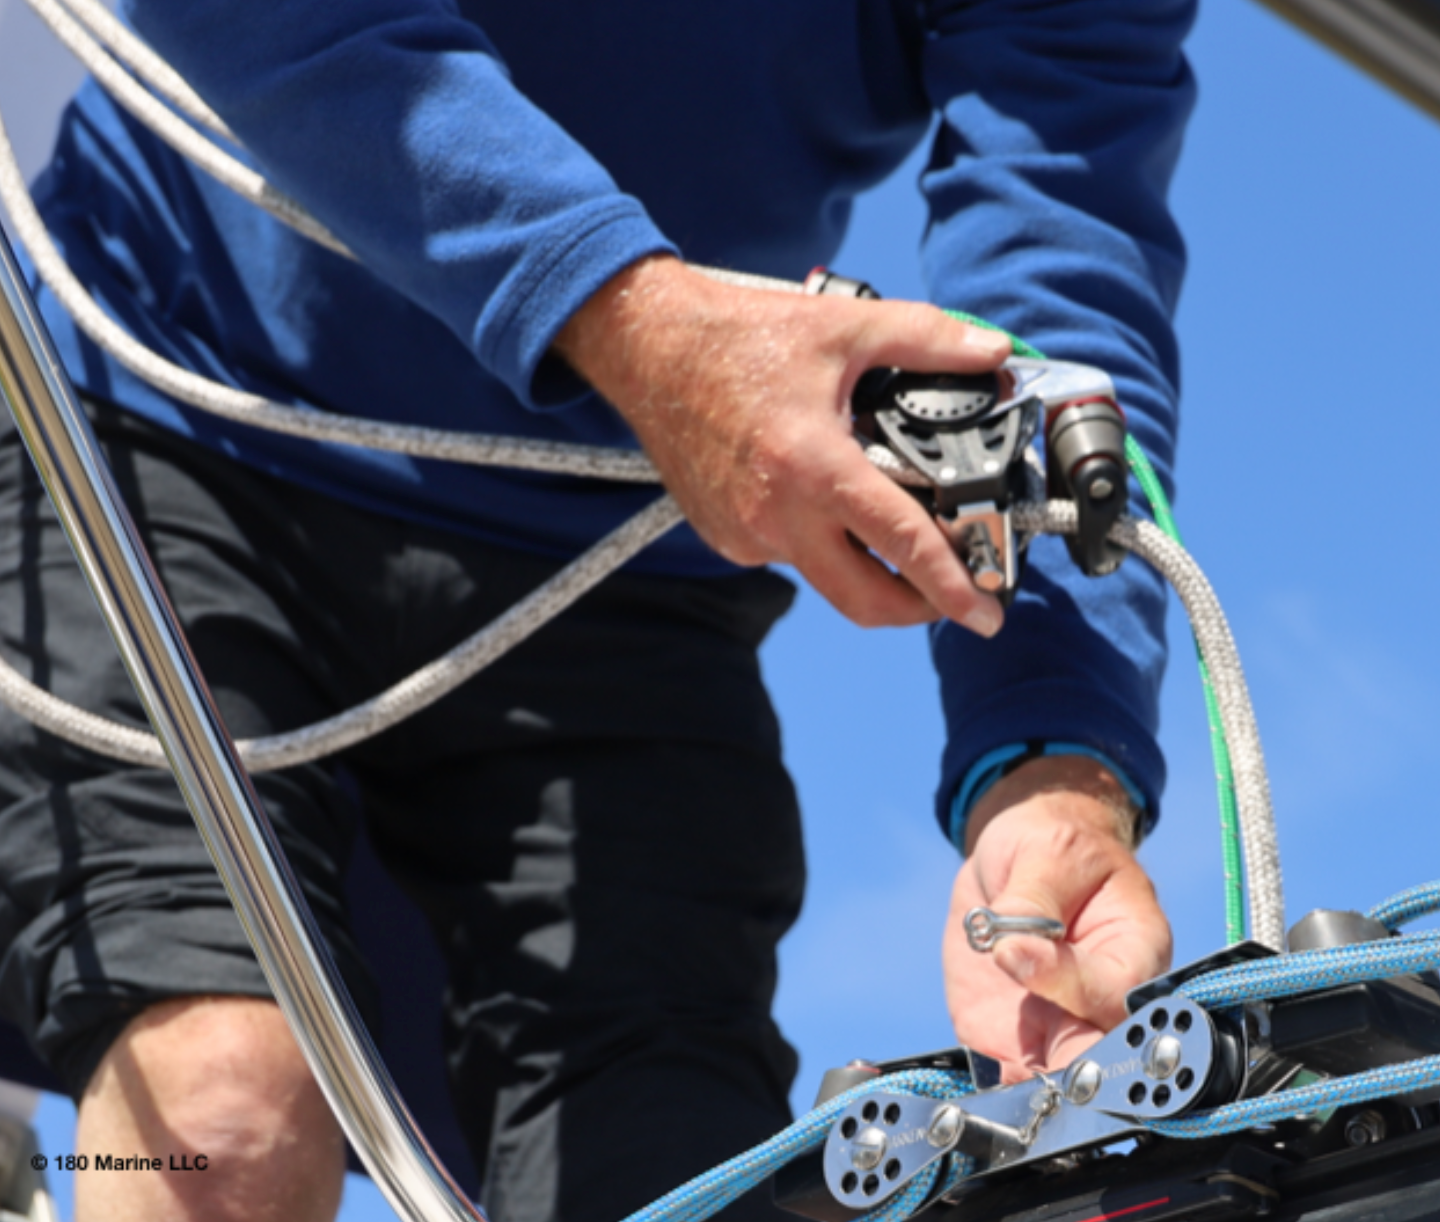
  • The lifting bridle has four lines that terminate in a single ring at the top. Each line attaches to four “hard points” on the side of the hull near the beam connections.

  • The ring is big enough to easily slip onto the crane's lifting hook. The 880 can be crane launched by one person, but like the J/80 two crew works better.

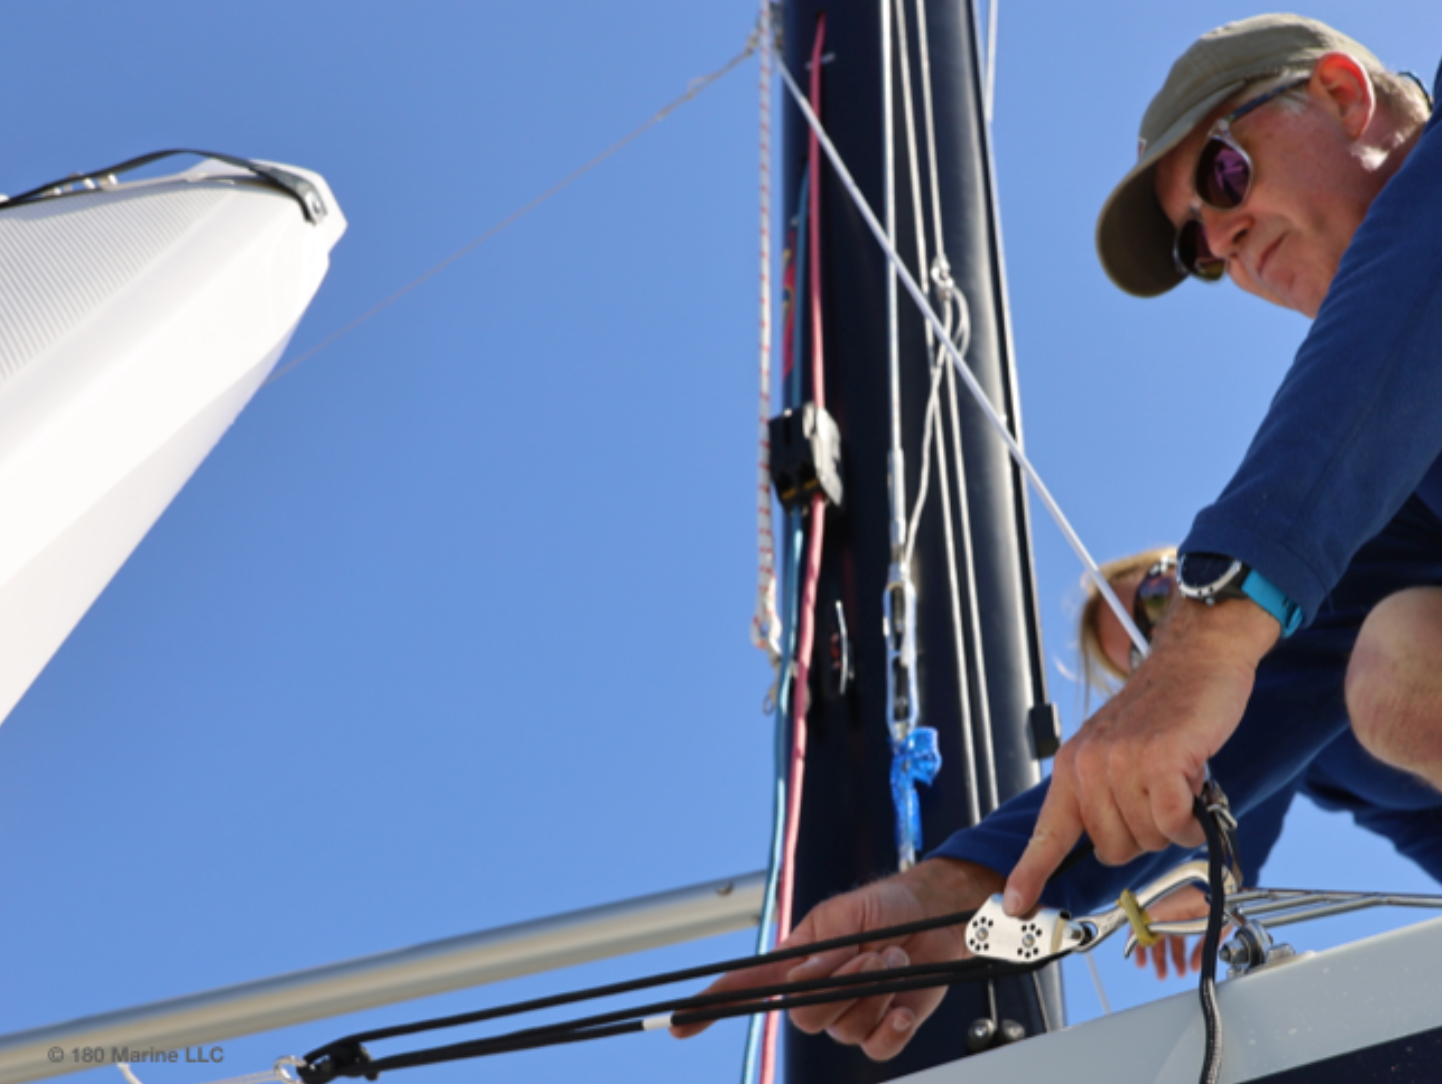
  • On my own Corsairs, we have quick disconnects to attach the lifting bridle in less than 2 minutes and take it off at the same time. For most other racing monohulls you have to be careful not to hook the backstay with the crane arm.

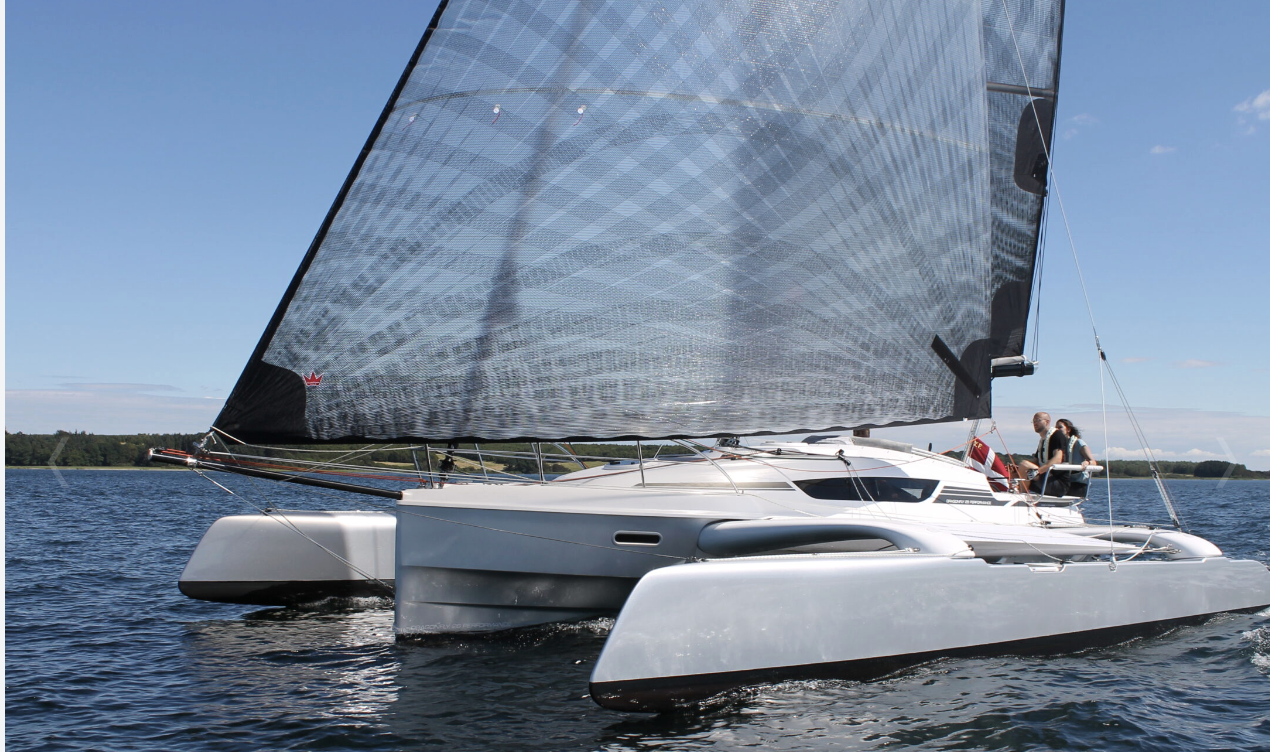
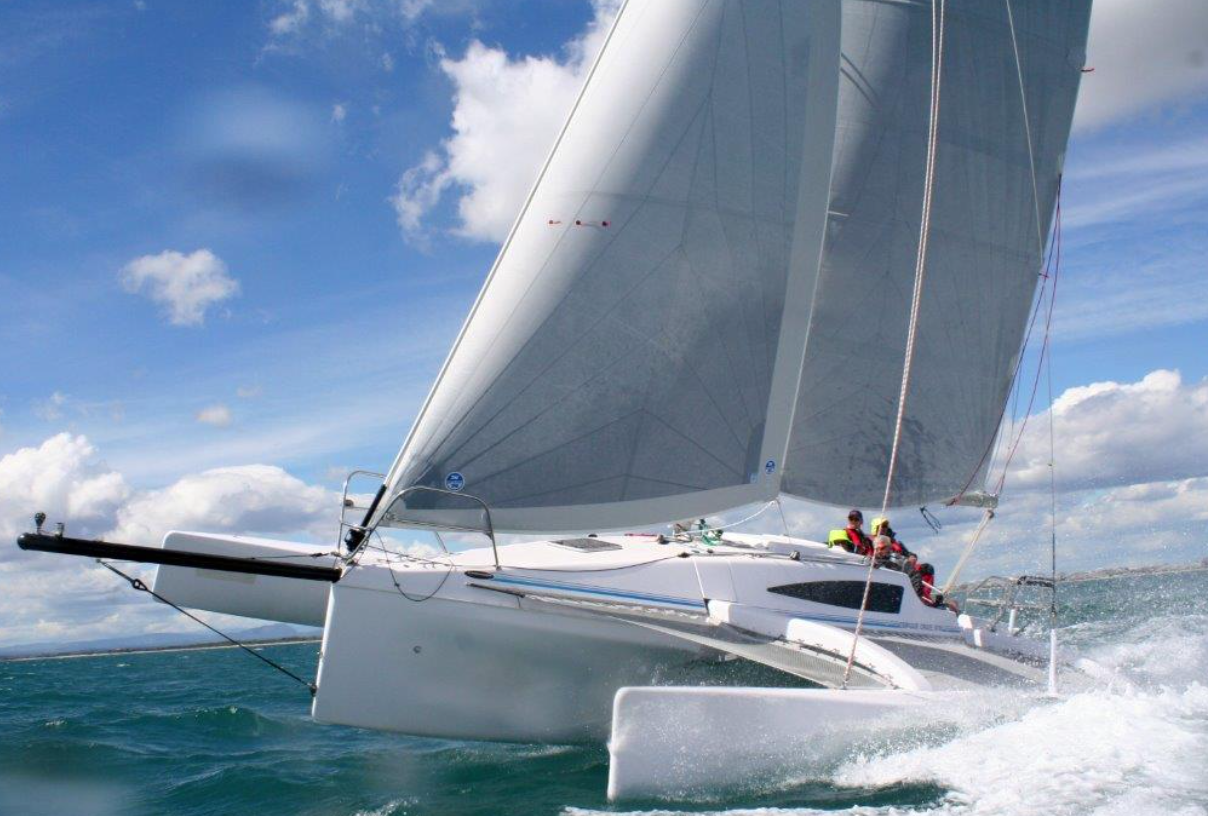
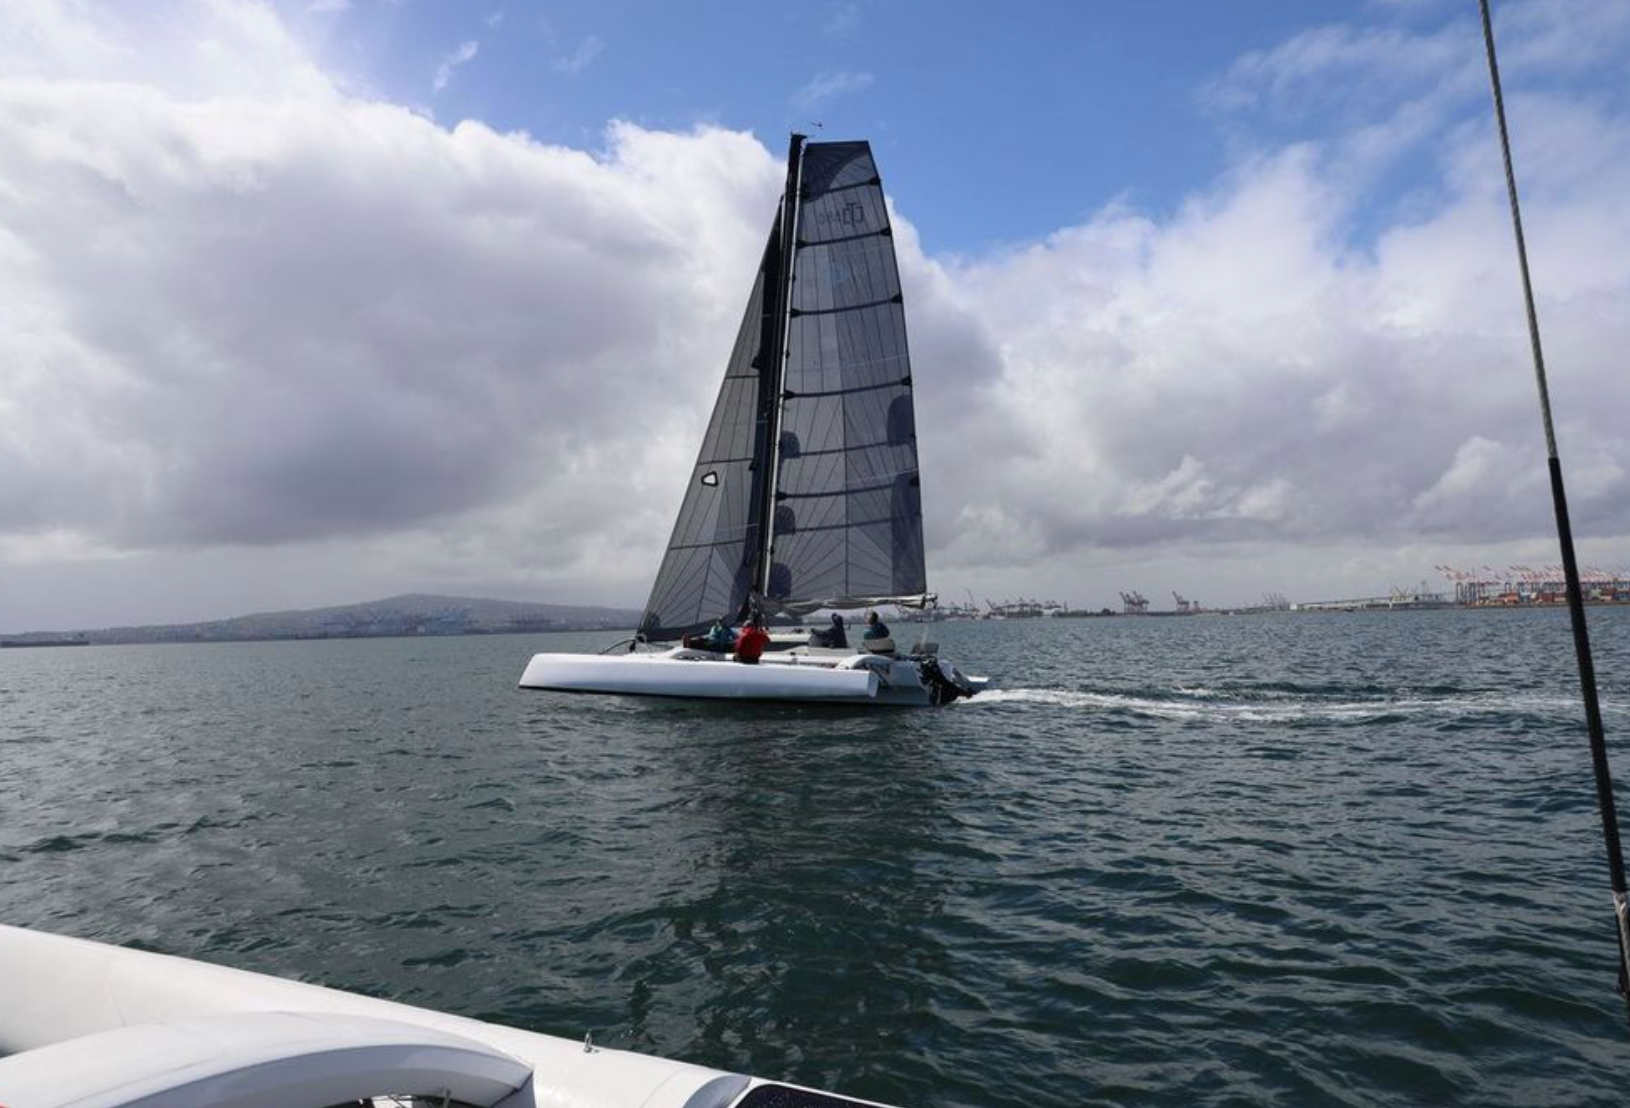
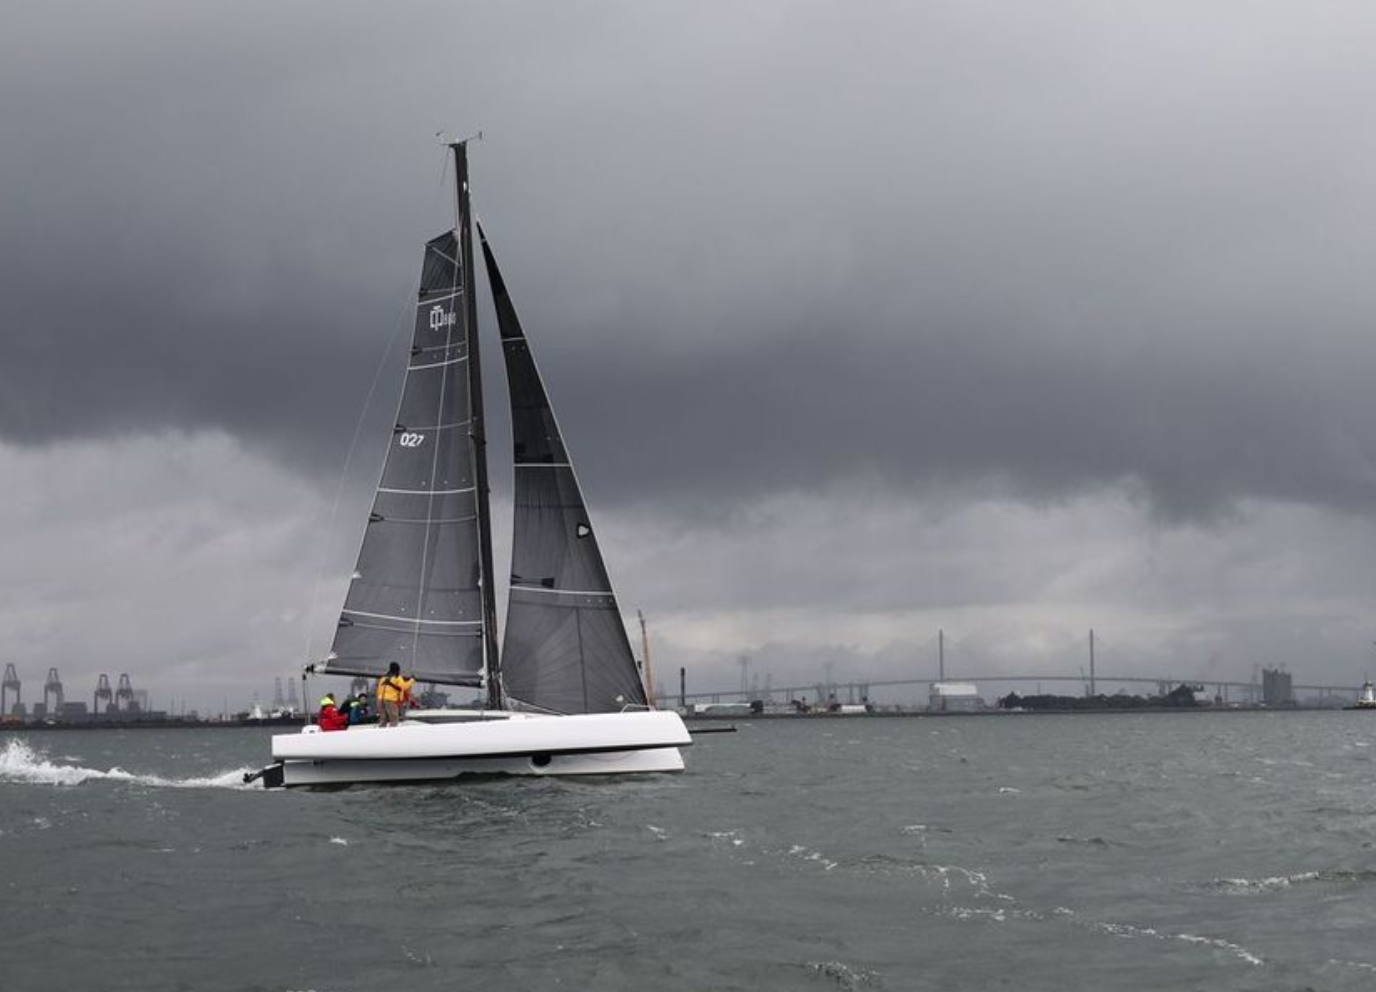
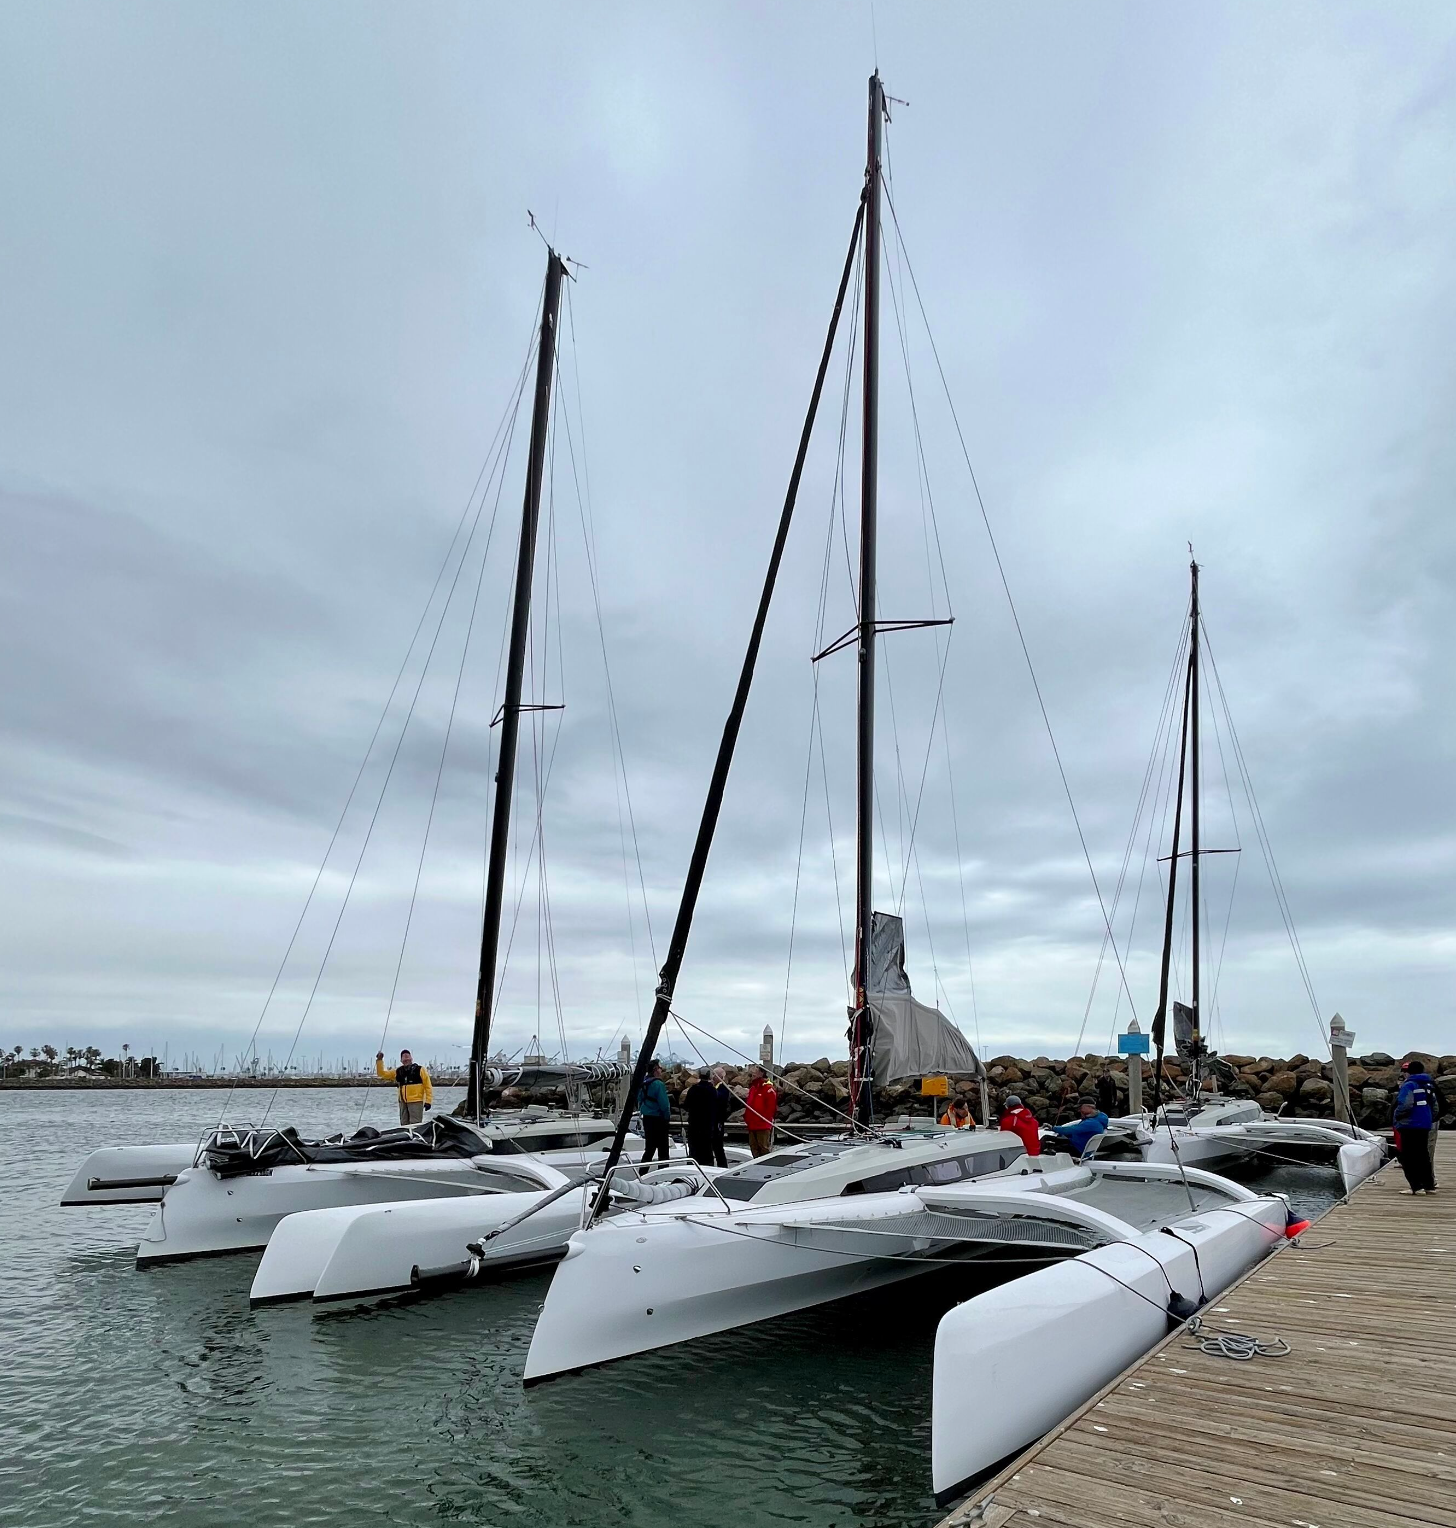
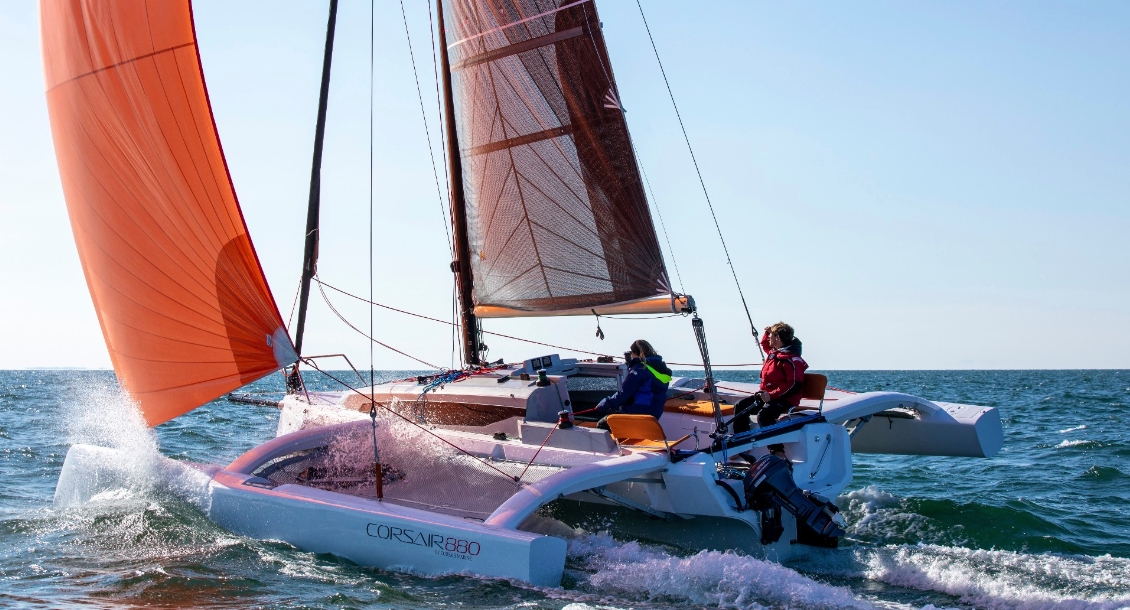
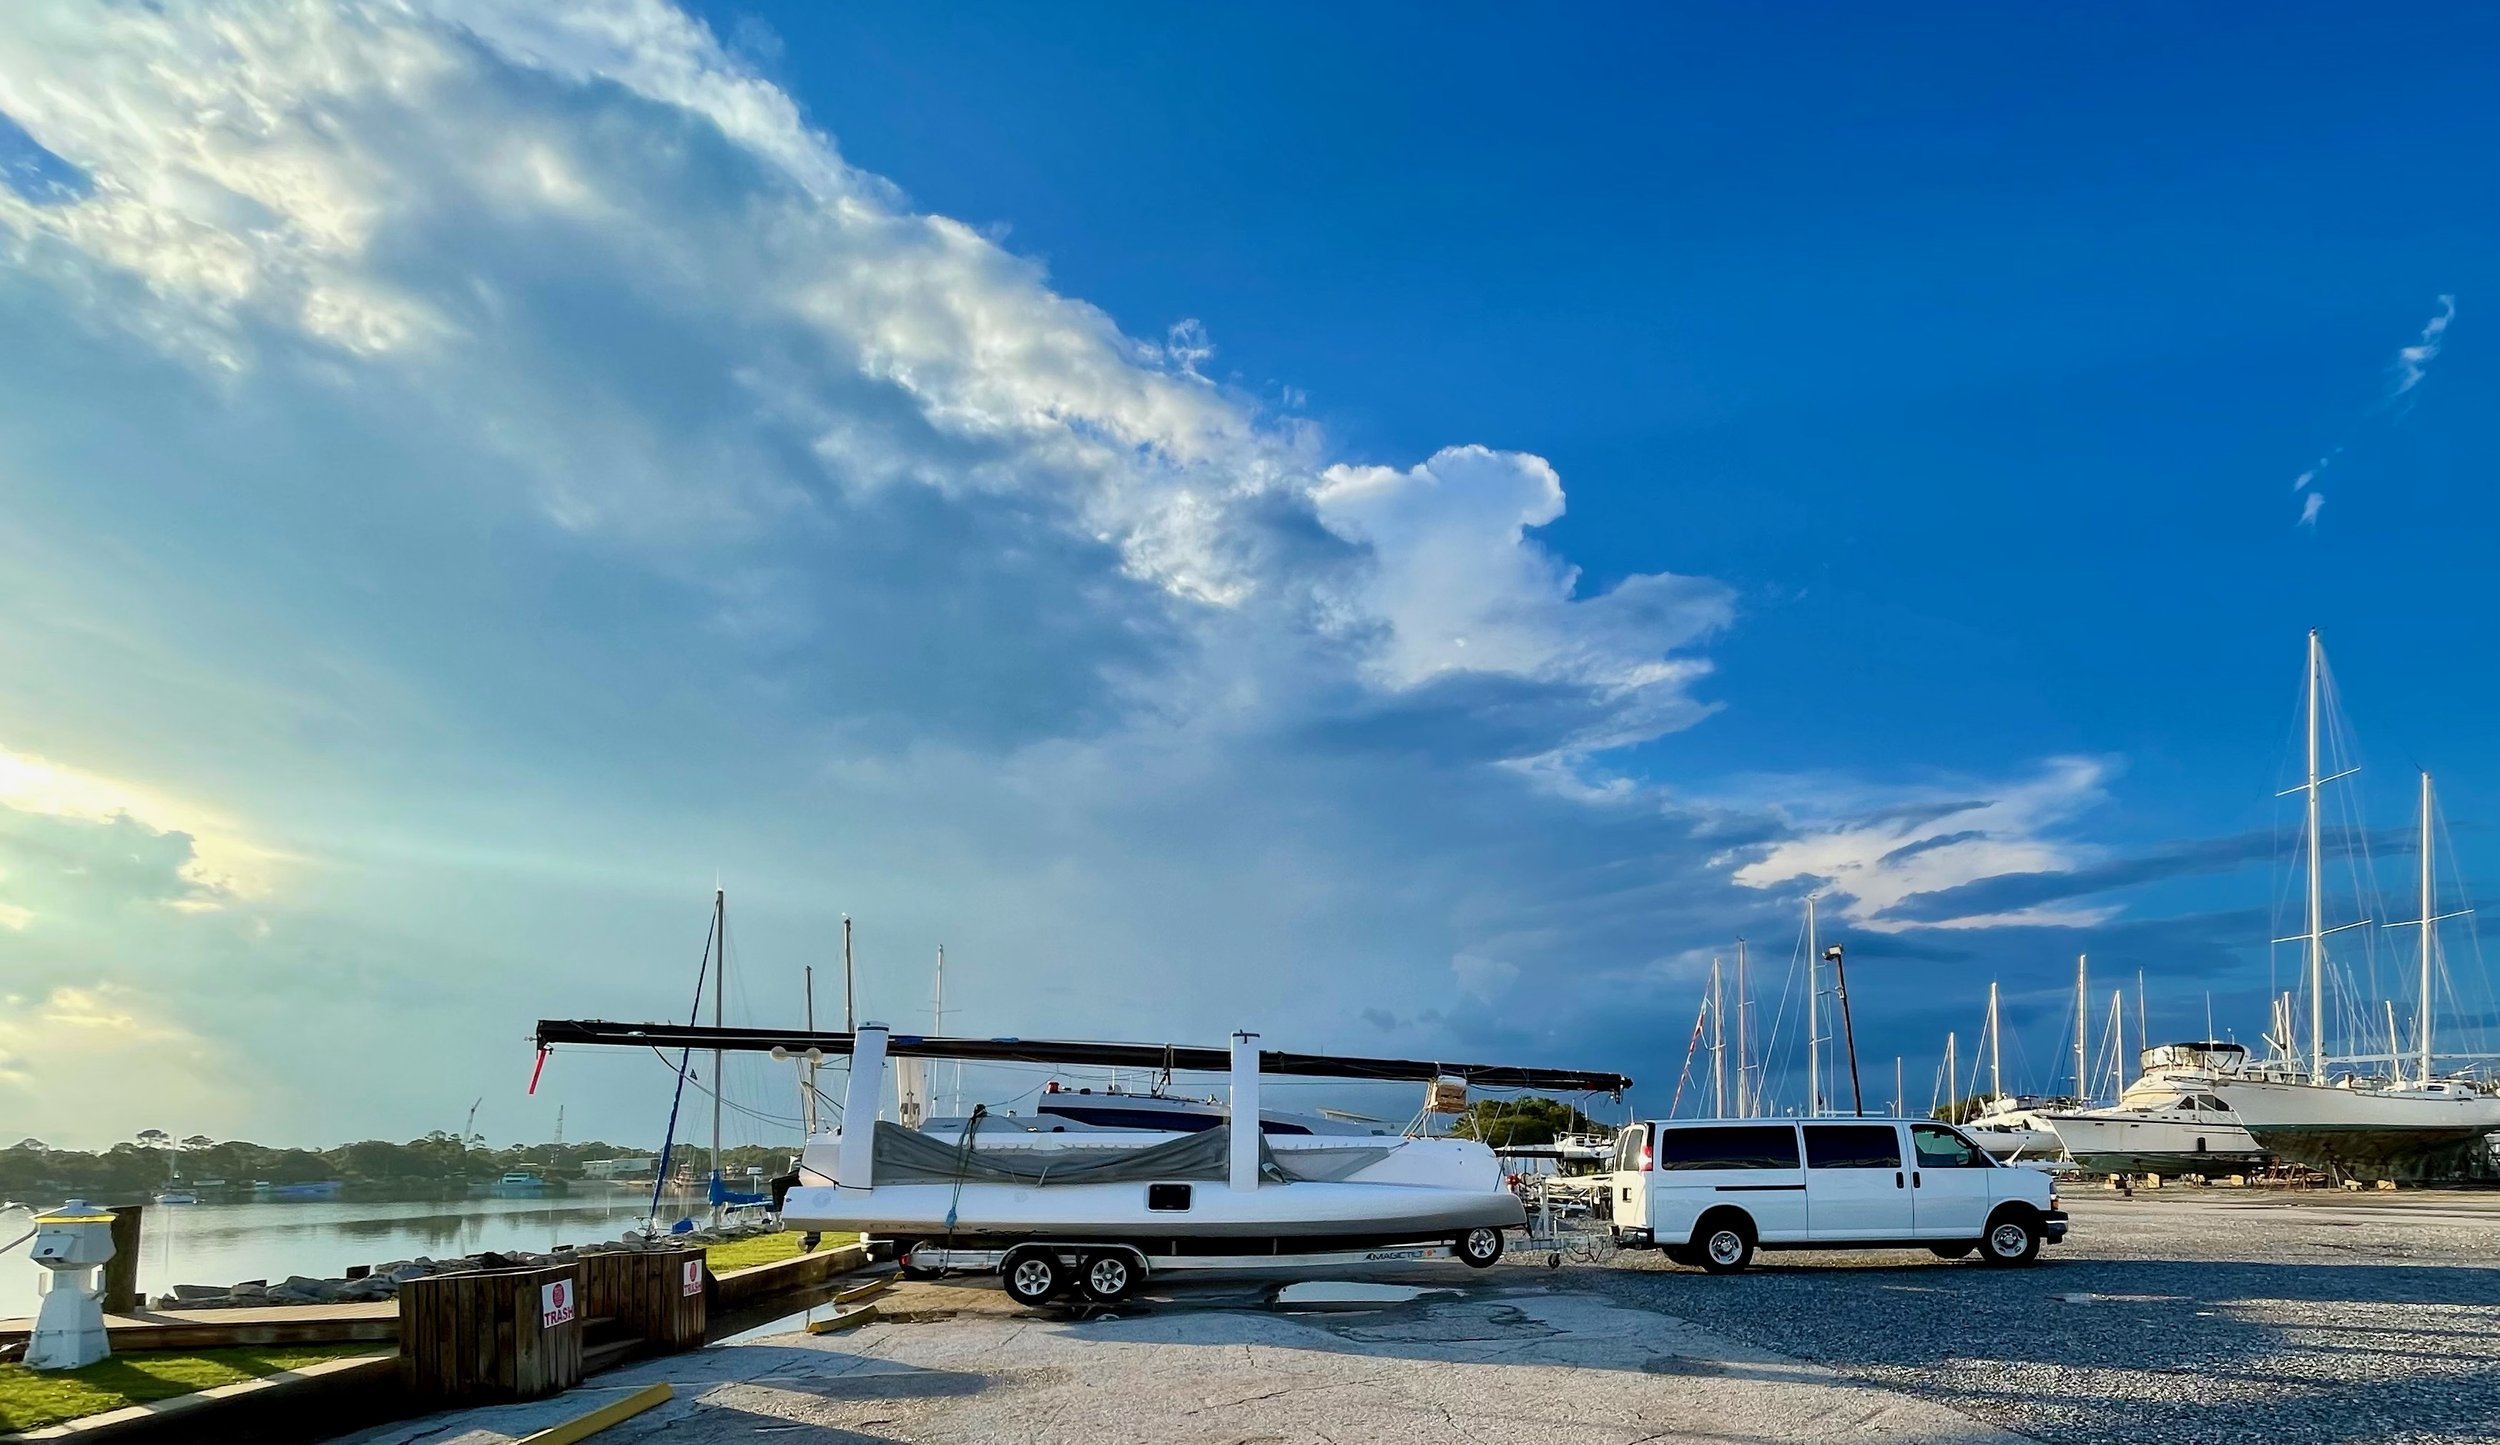
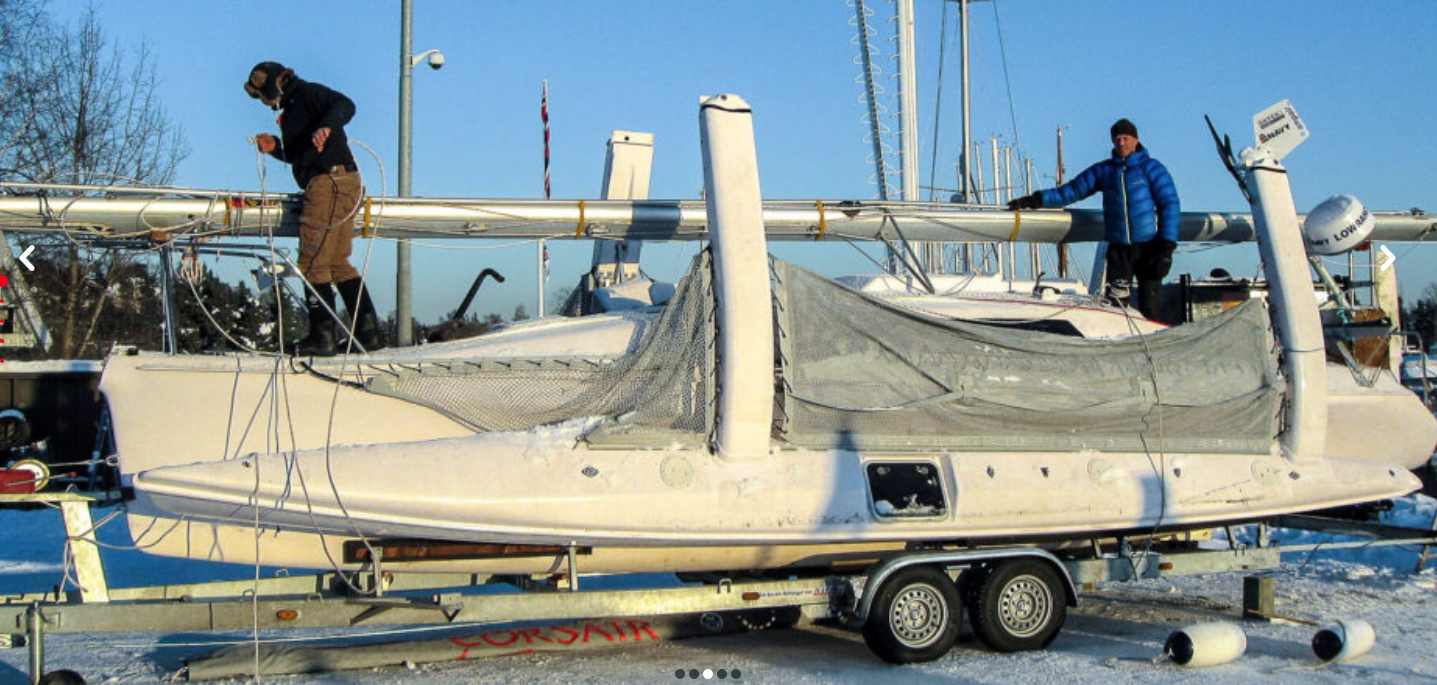
  • The Corsair 880 is 250 pounds lighter than the J/80, so the same cranes are suitable. It’s 8 feet wide when folded, just like the J/80. 22 feet wide when sailing.

  • It’s easier to launch at the ramp than a J/80 when needed, MUCH easier because the daggerboard retracts and you don’t need to sink the trailer deep into the water.

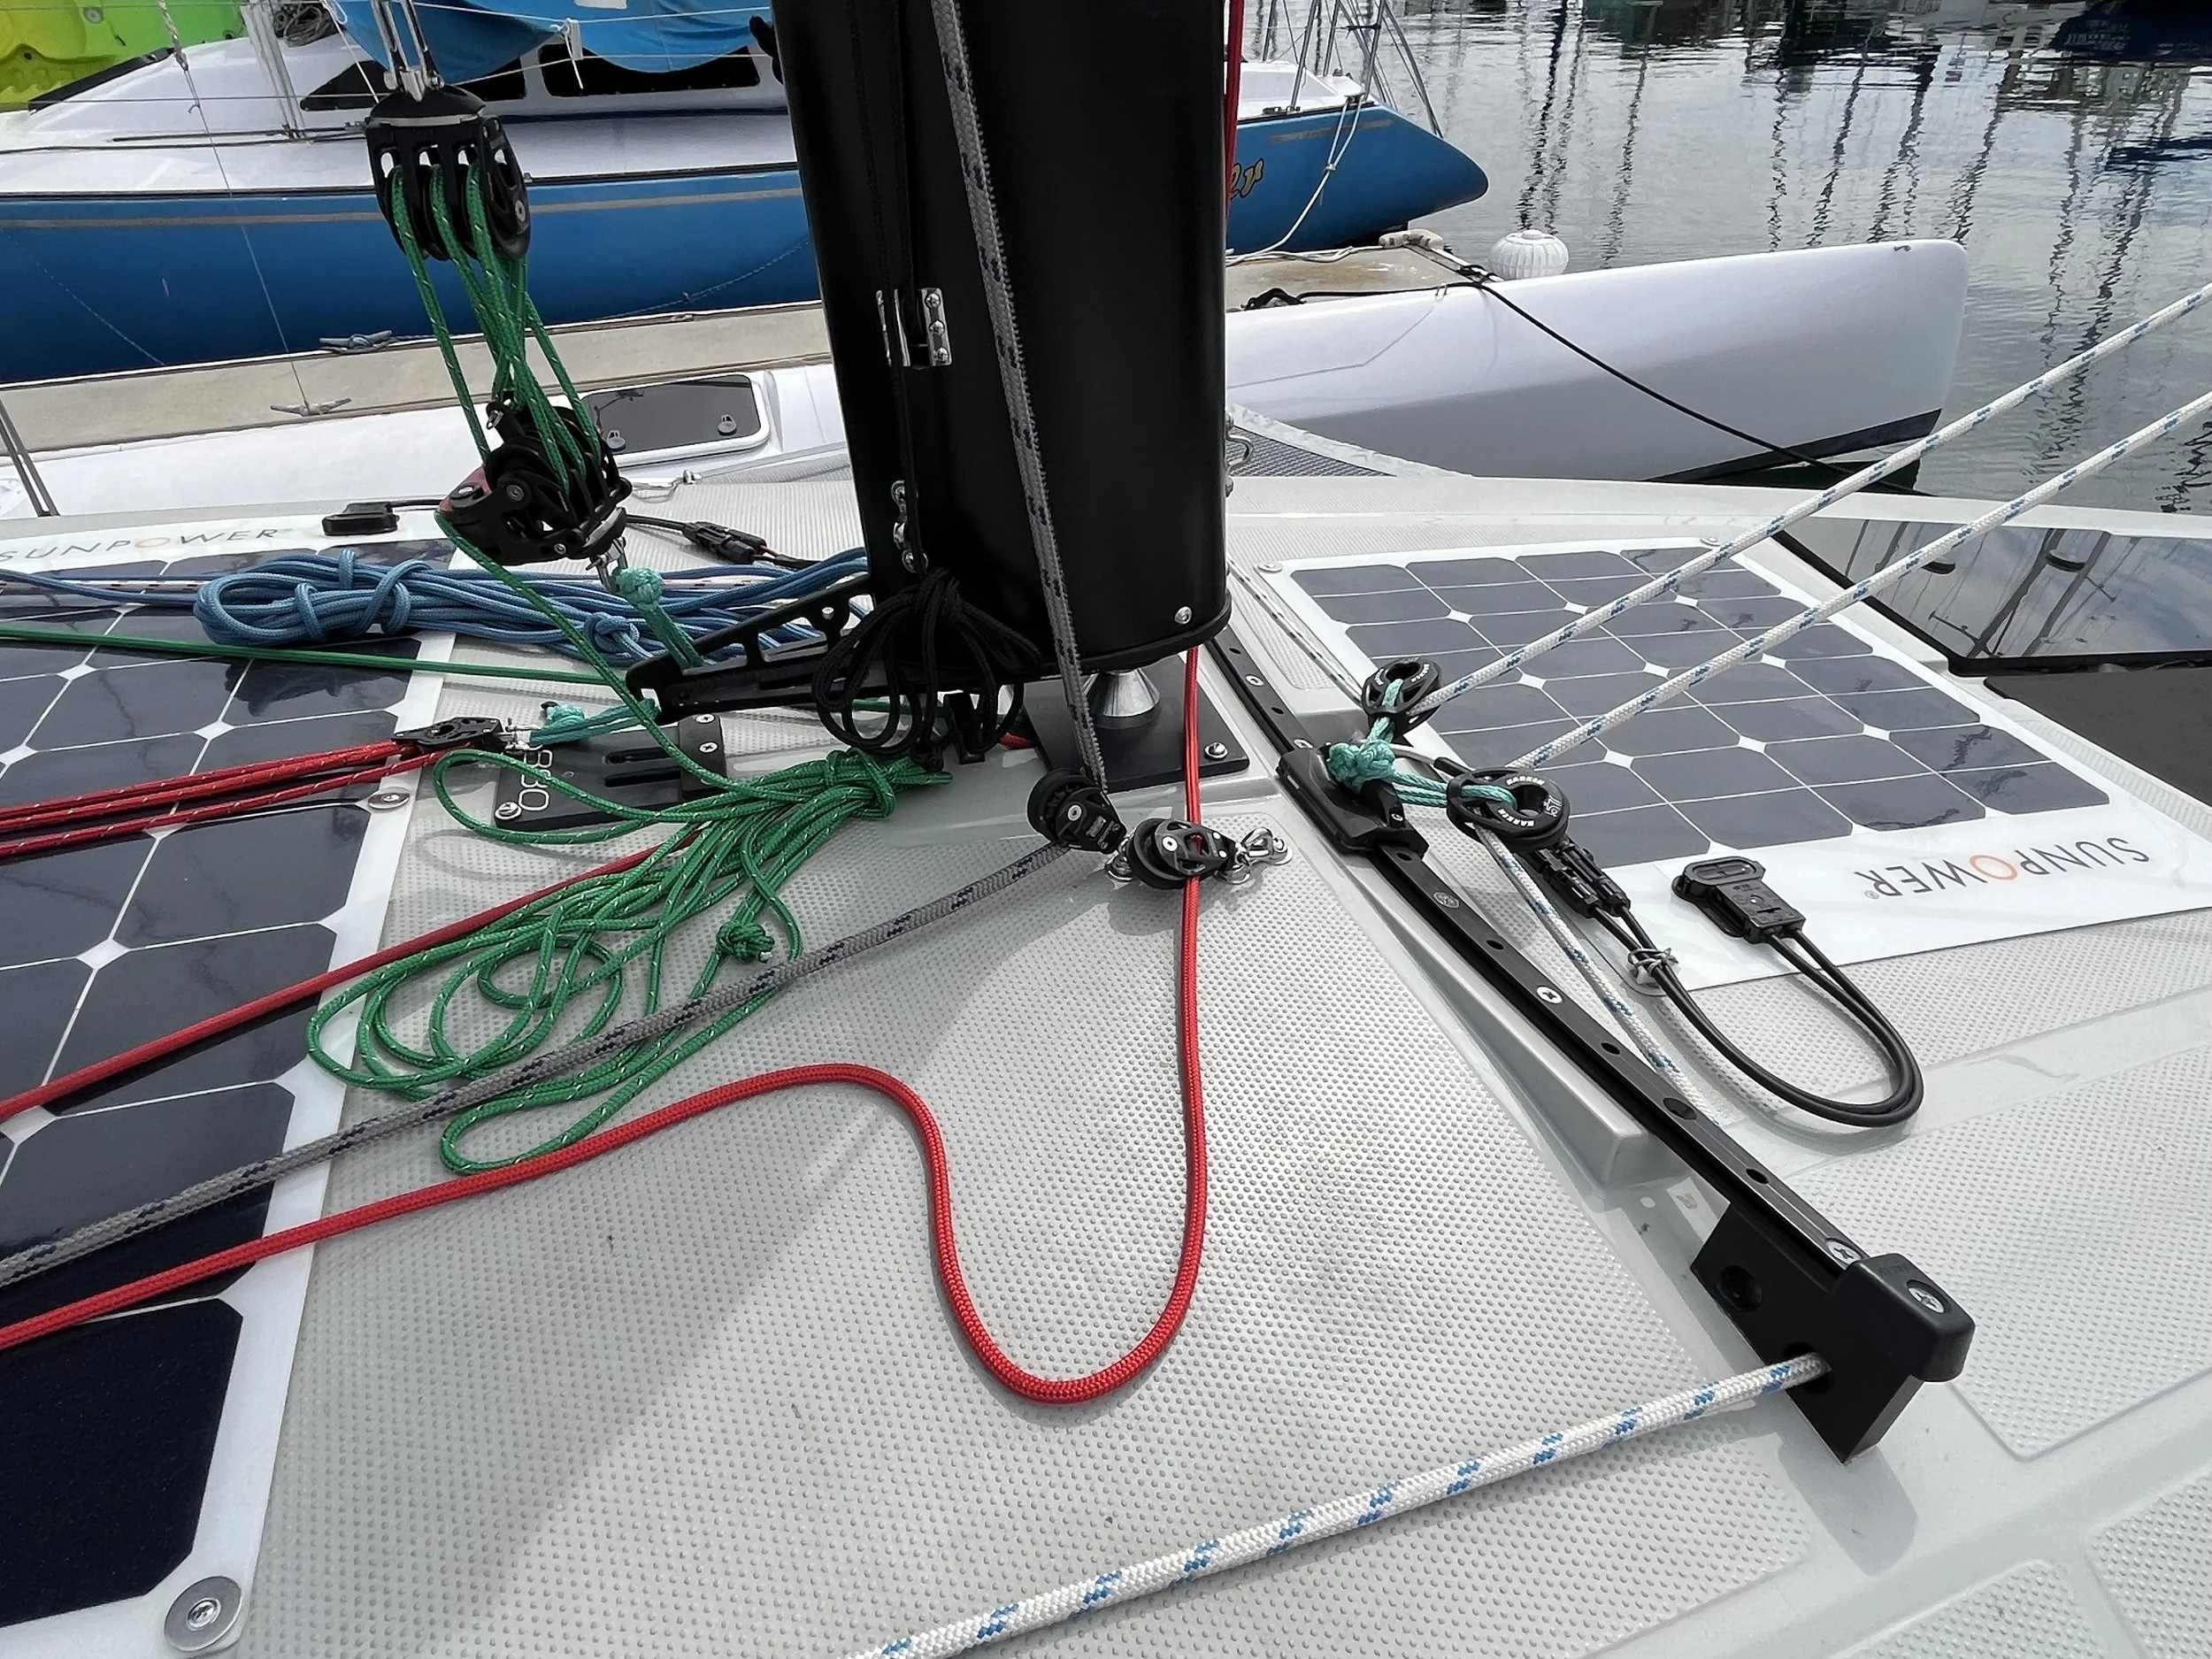
  • The mast is deck-stepped, one-person job, also much easier for one person to raise and lower without extra equipment or assistance.

What are some of the optional creature comforts on the new Corsair 880? 

Corsair 880 option - A 22” Television
Watch your favorite films from the comfort of your cabin. Majestic Global was the world's first company to develop and produce a 12 Volt LCD TV over 14 years ago. Fast forward the company's growth and technology advances, Majestic remains a global leader in designing specific TV's that can handle the harsh Marine environment and survive the tough outback conditions. The Majestic products are built with the highest possible standard and used by some of the world's best-known Boat Manufacturers such as Regal Boats, Rinker Boats, Four Winns, Ranger Tugs and many more. You can be assured the quality and reliability as Majestic covers every product with a 3 Year International Warranty. 

The World’s first 22" Full HD 12 Volt LED TV with built-in Global HD Tuner that works in over 150 countries. The New Majestic LED222GS is the latest addition to the range with state of the art engineering from Majestic. The LED222GS is packed with new technology such as built-in DVD Player, PVR on DVB-T Signals, Majestic Link, ARC, USB for Multi Media and MMMI for iOS and Android capable devices to give you full HD video interface.

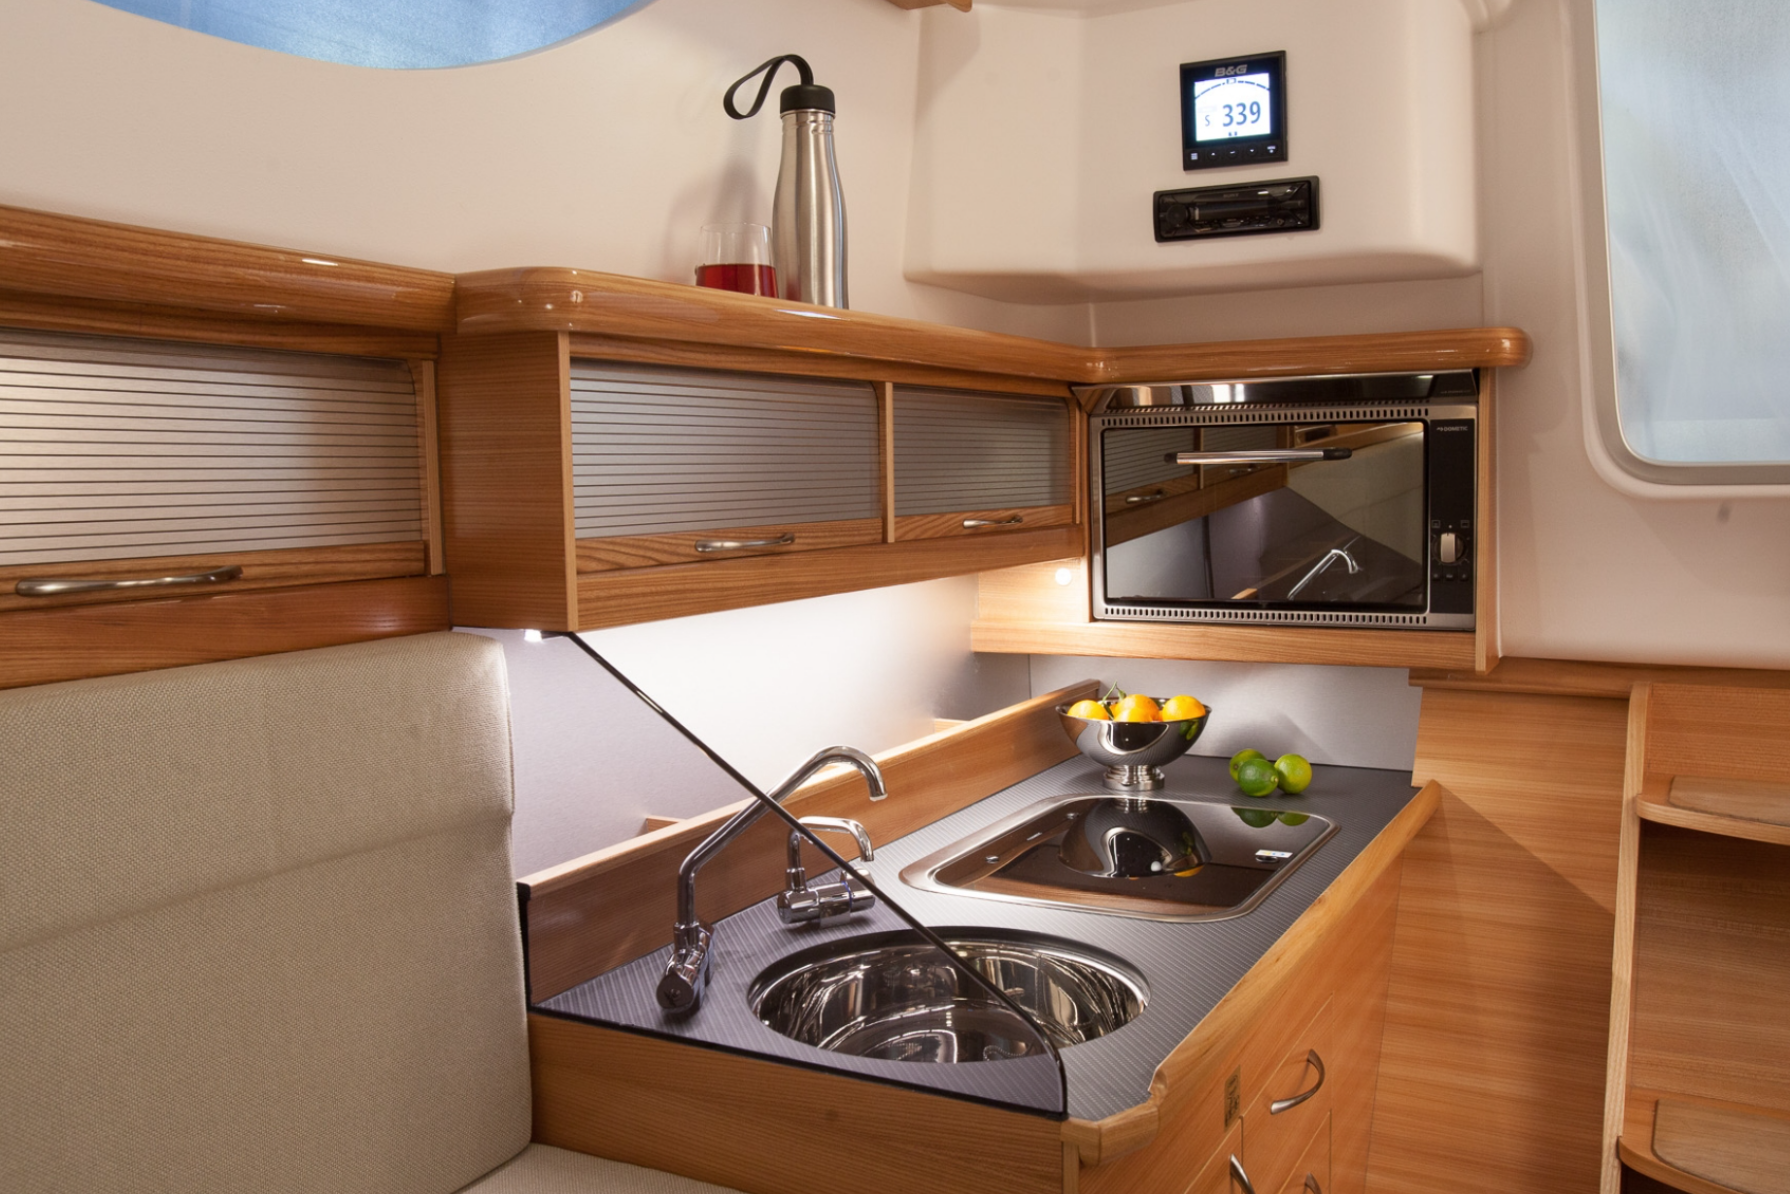
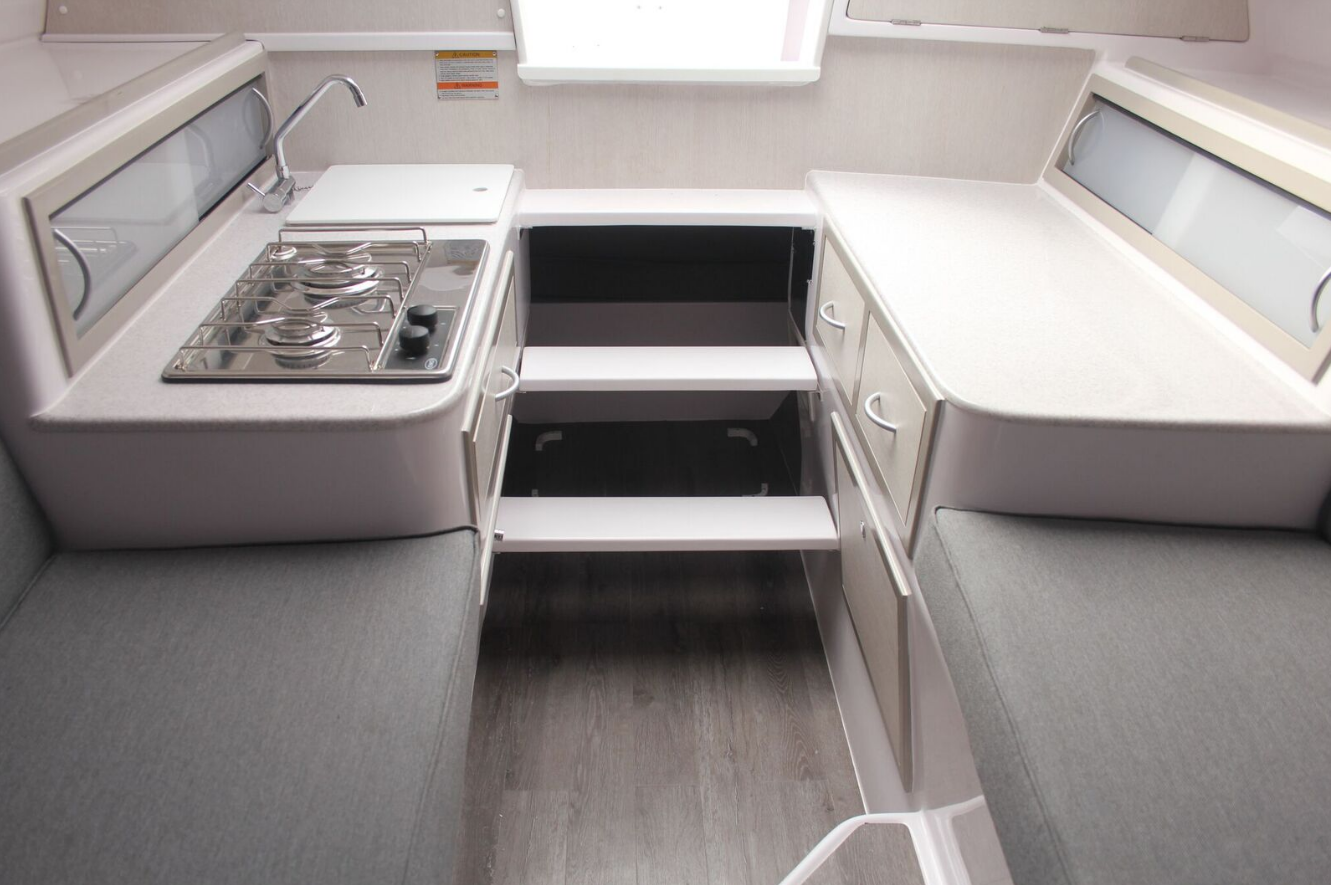
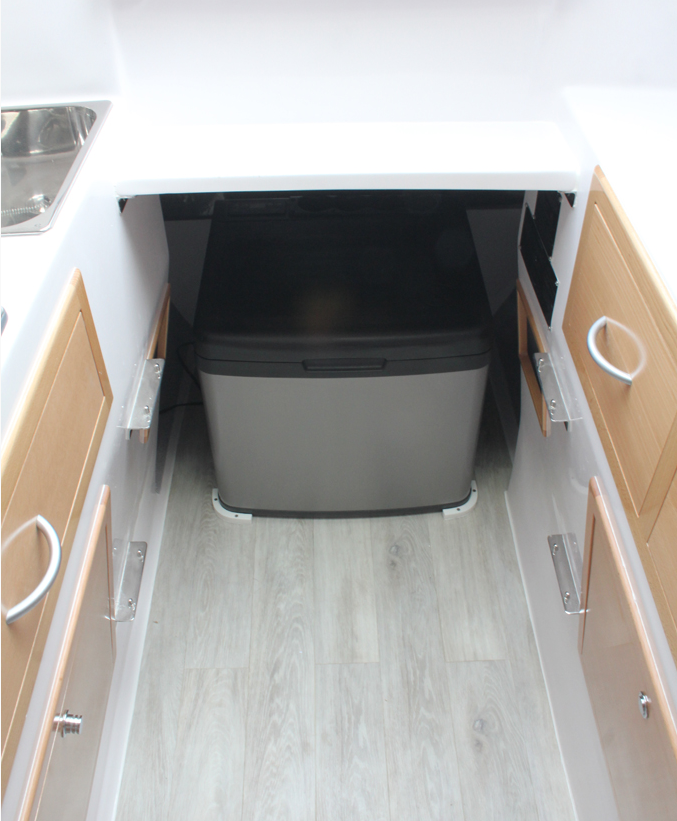
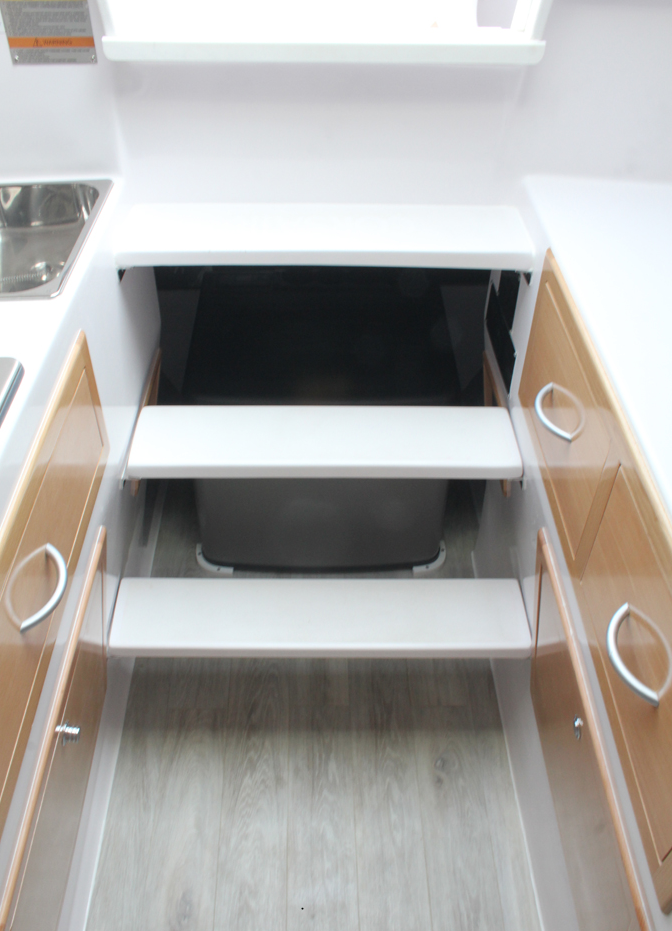
Corsair 880 option - A 30L Drawer Fridge
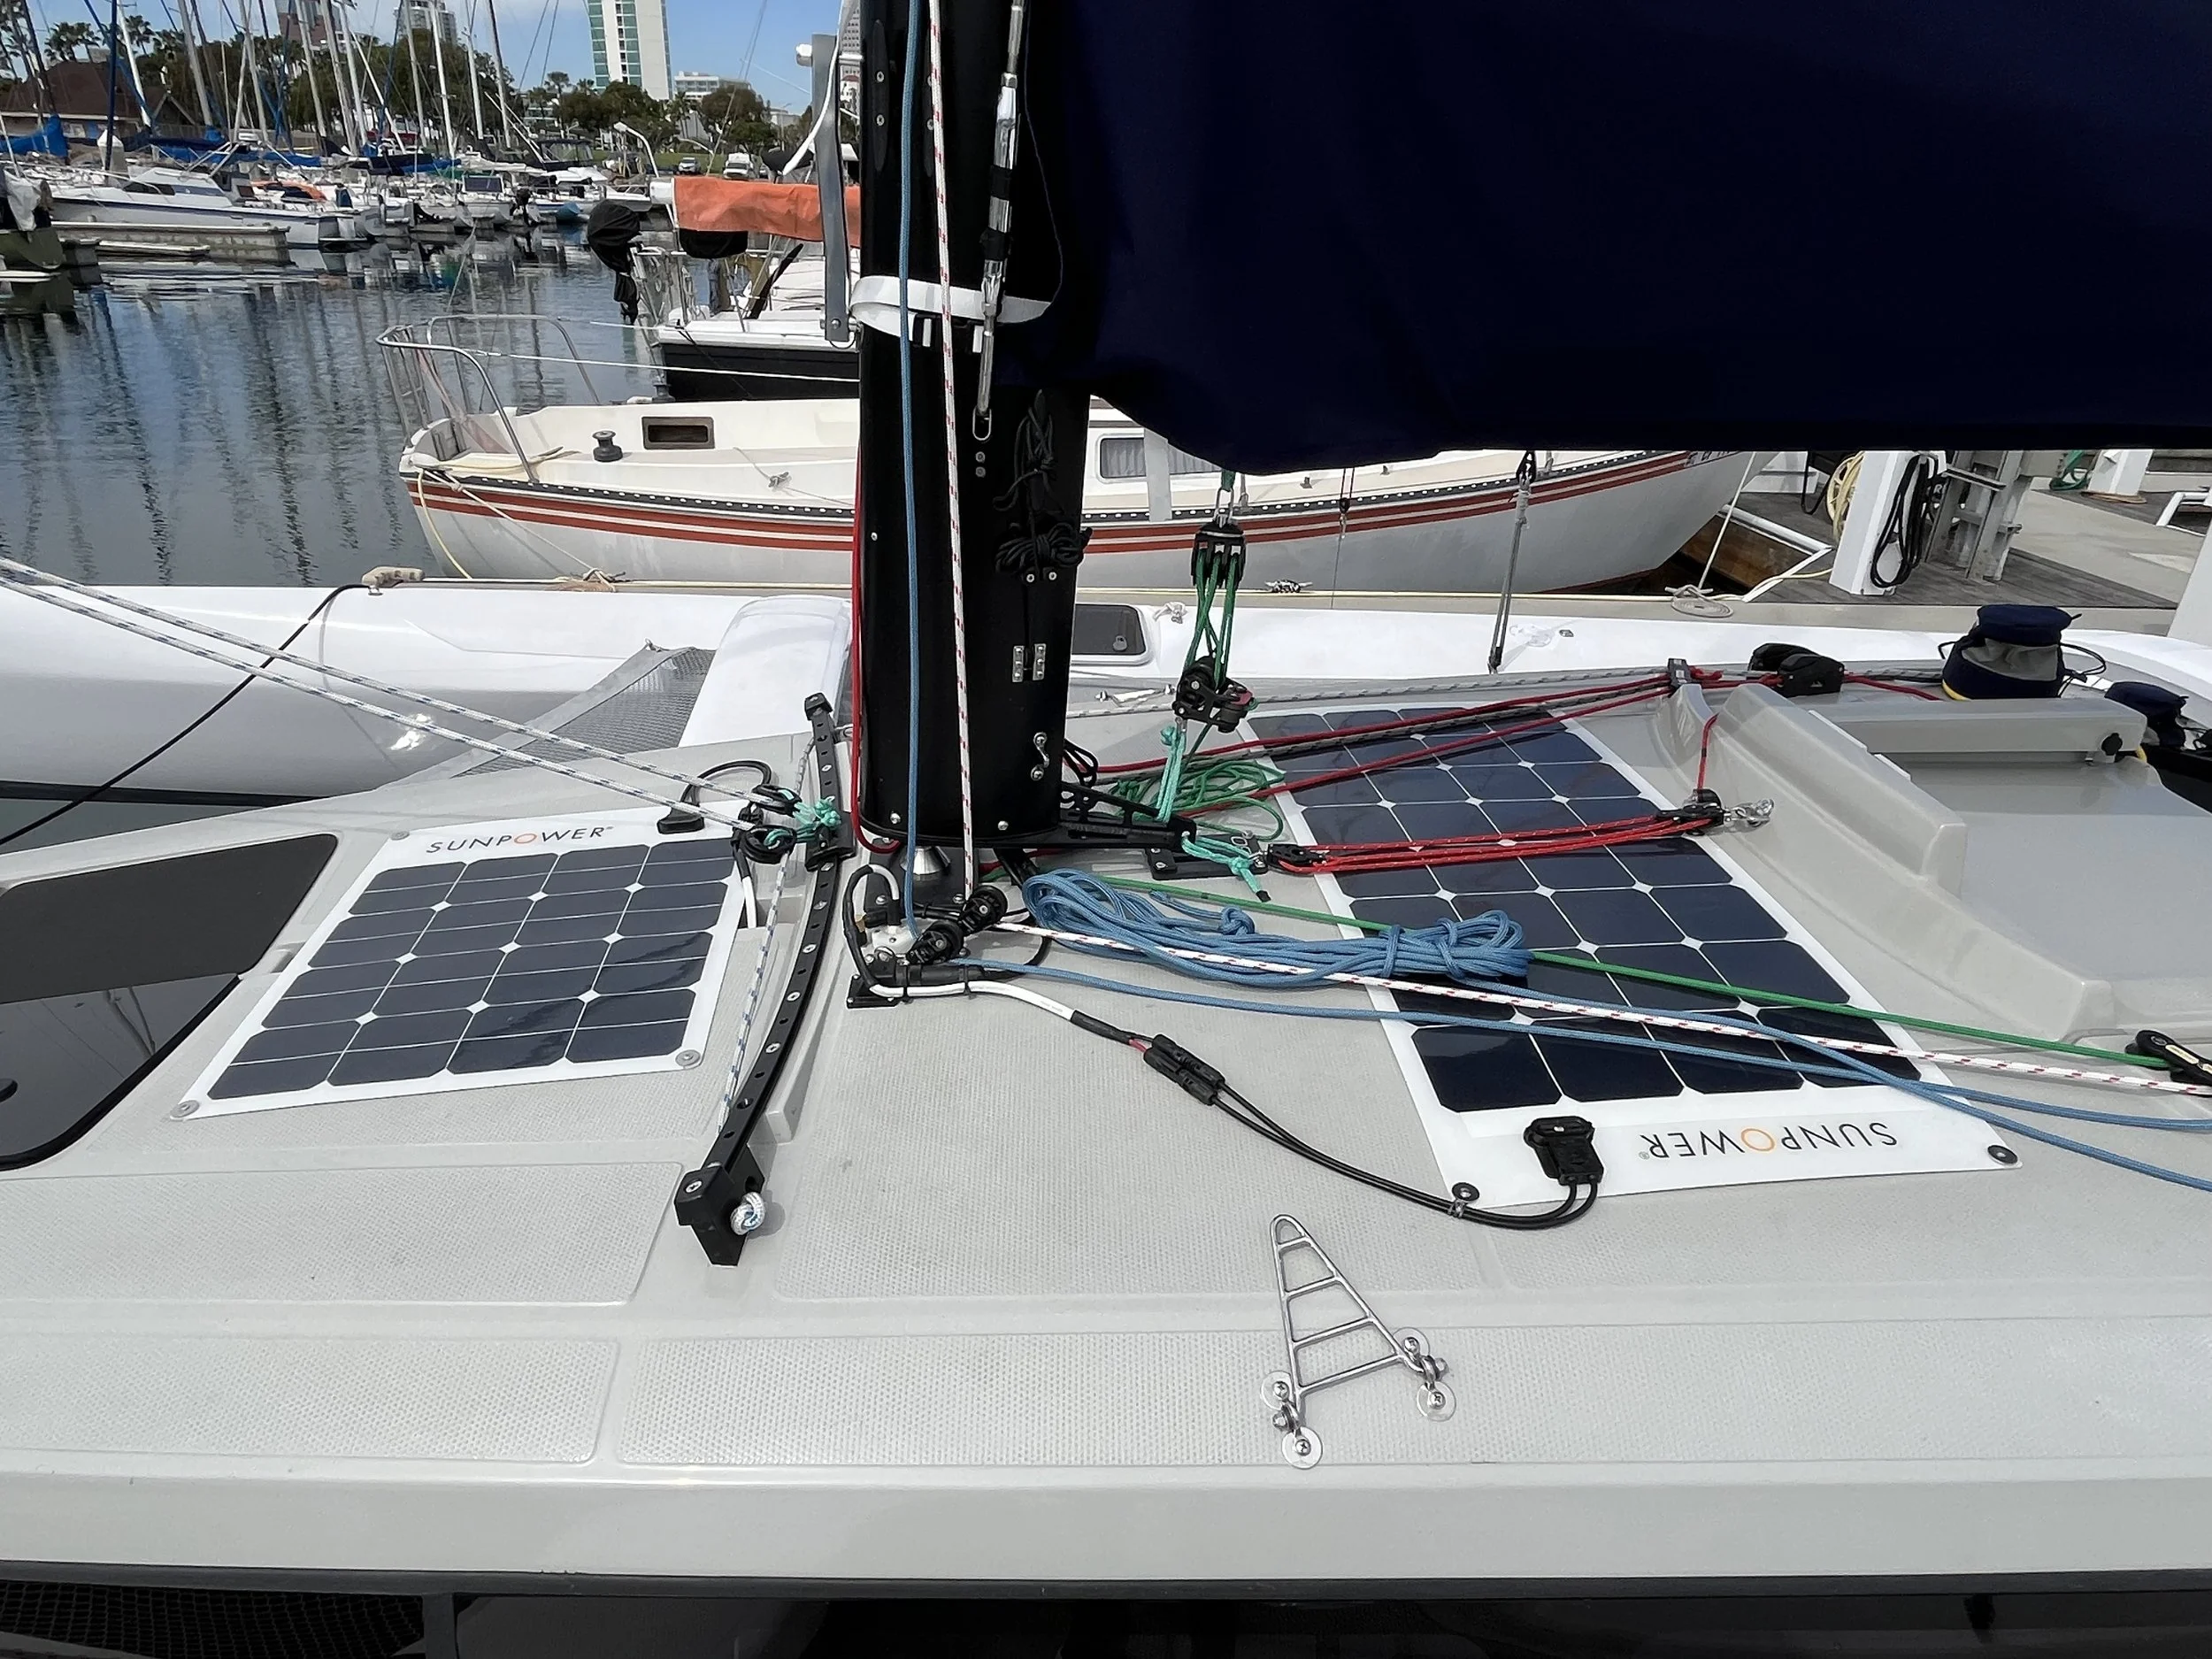
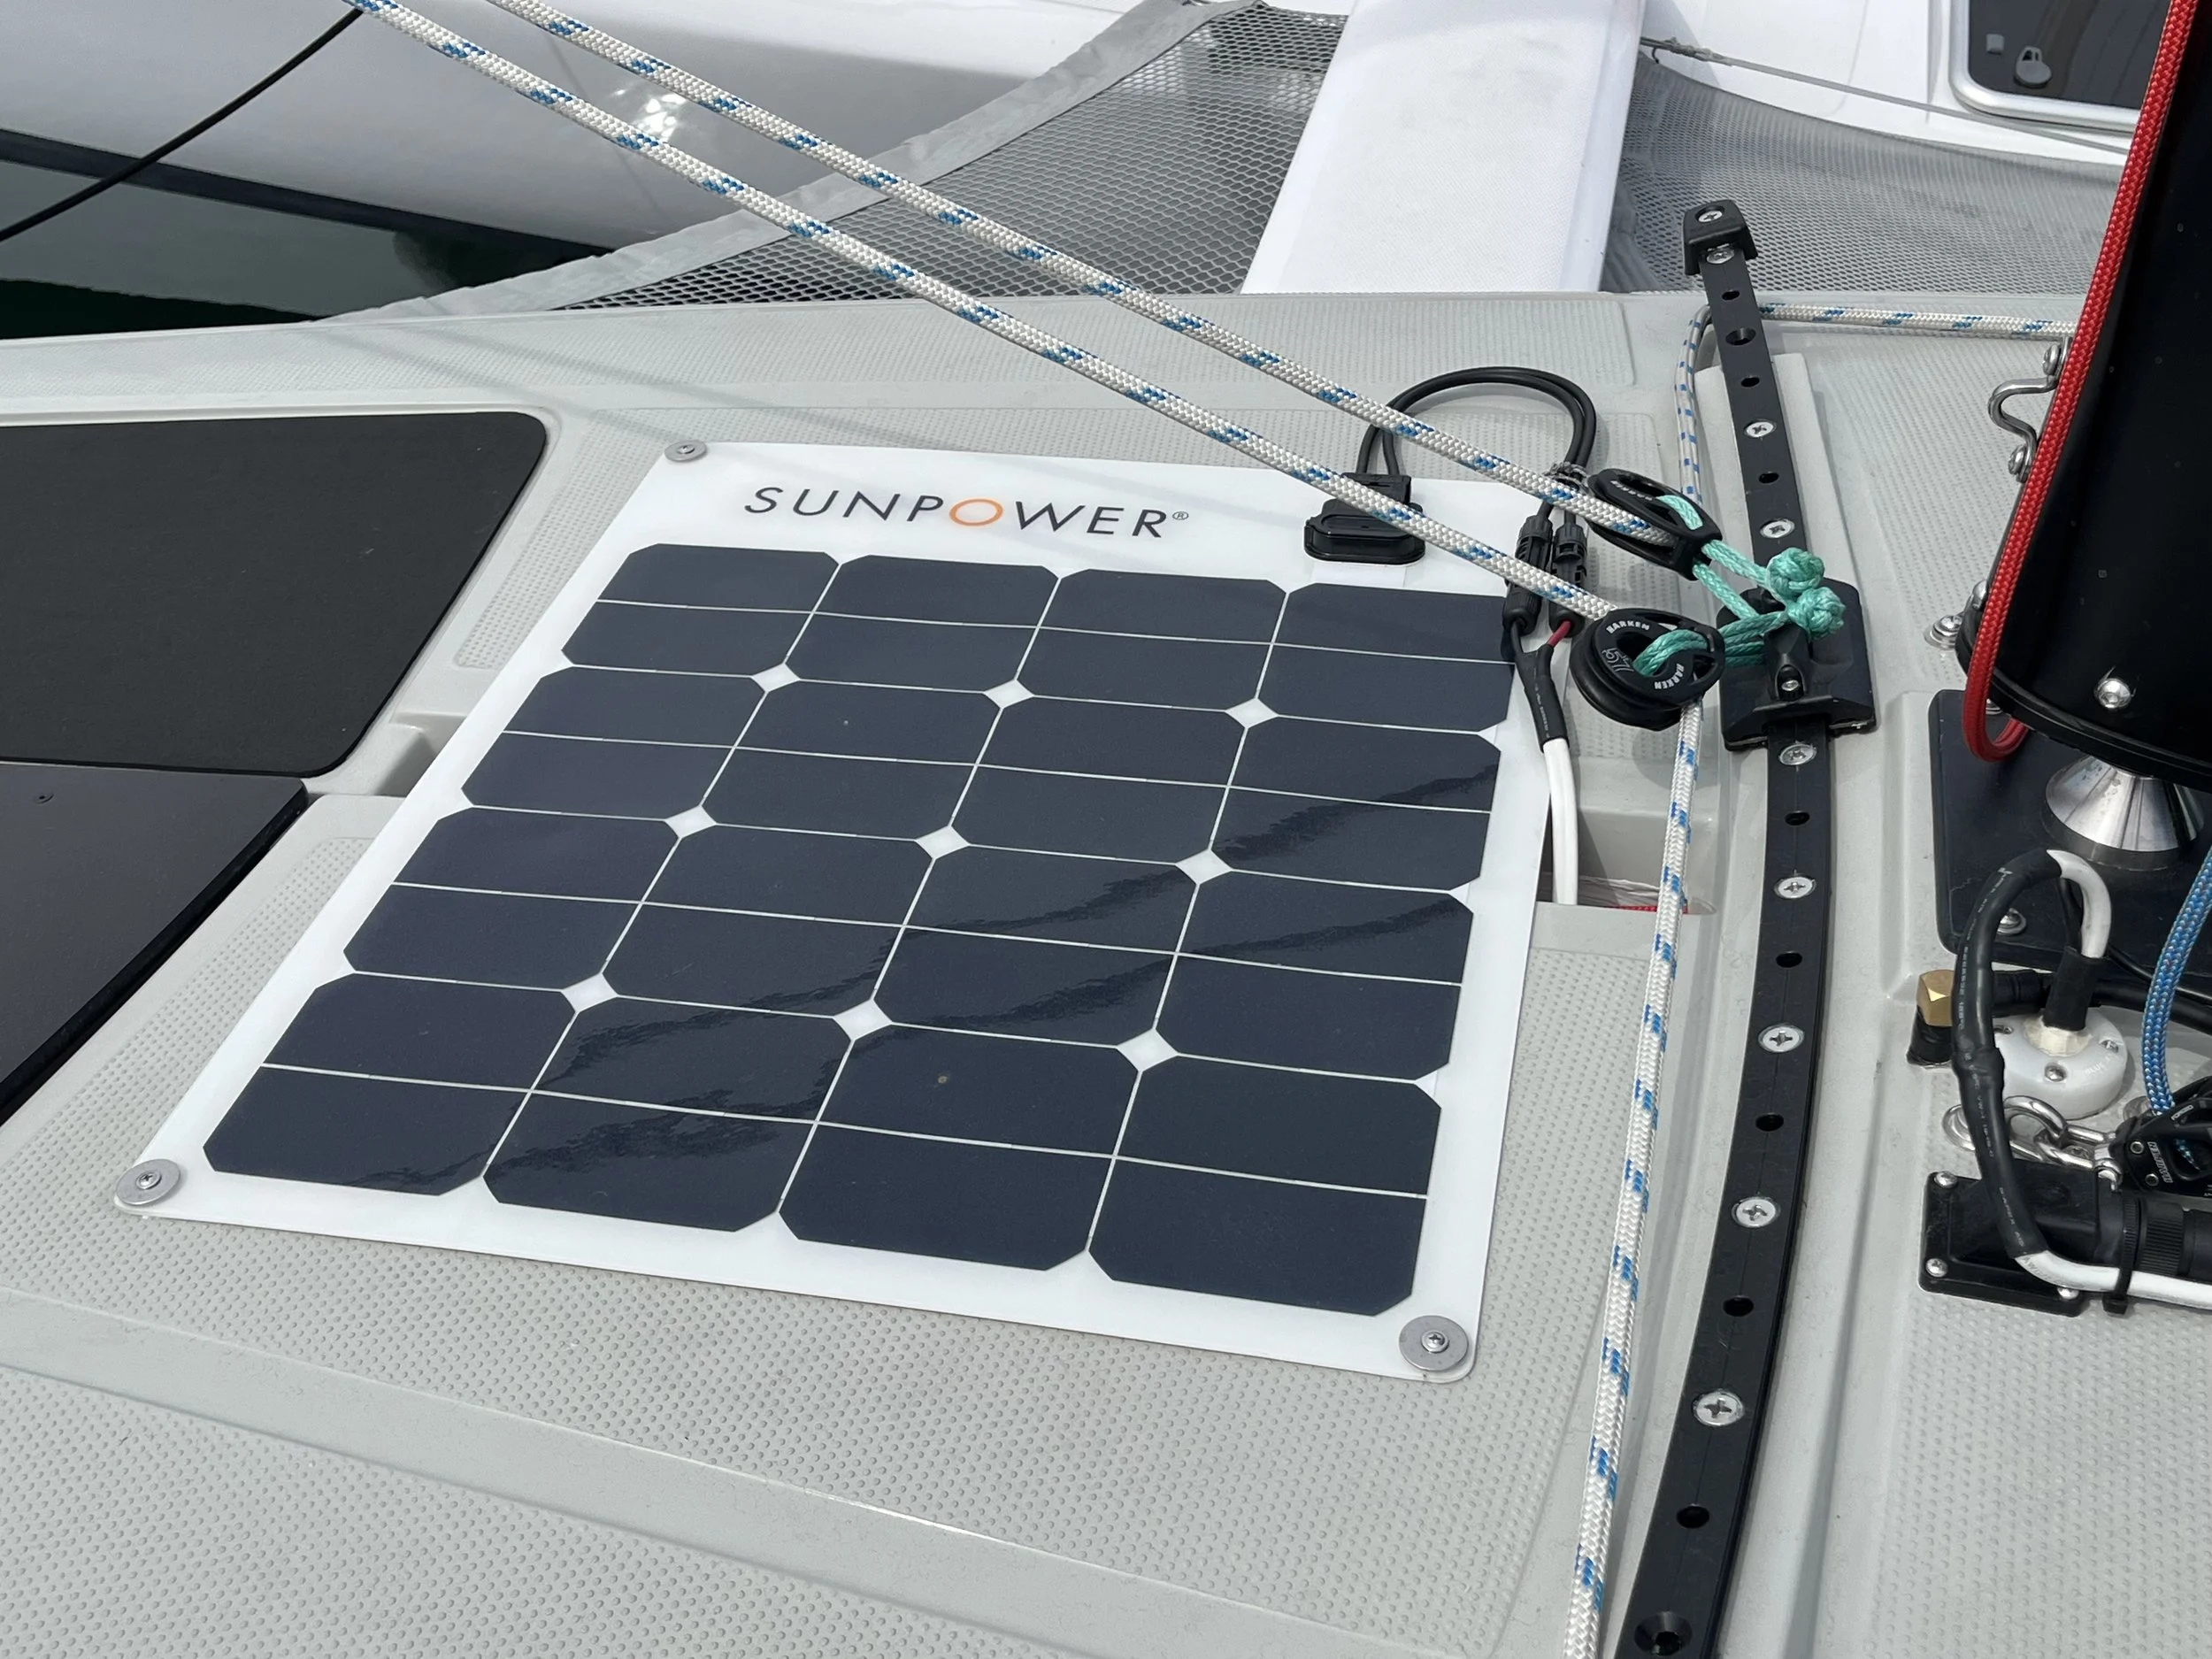
Keep your favorite foods fresh and secure even in the roughest conditions!  Equipped with high-tech compressors, the well-proven Dometic Coolmatic CD 30 refrigerator provides outstanding energy-efficient refrigeration for mobile applications. Its operation is reliable even in tilted positions and high ambient temperatures working economically, quietly and are ideal to run with solar panels.

Corsair 880 option - Air Conditioning
Stay cool onboard your Corsair this summer with the 2,730BTU  (12V) air conditioner from Cold Chilli.

Cold Chilli marine air-conditioning units are specially designed for boat and yacht use. The units are produced out of the finest materials regardless of marine use. The condenser is made of CuNi alloy in monolithic structure to avoid galvanic corrosion. The unit is enclosed in a powder-coated and sound insulated INOX casing. Powering directly from the service battery bank eliminates the need for AC generator or shore power. Very silent operation of the unit allows people to sleep in the same room with the unit running. The cold chili air conditioner weighs just 30 kg and is perfect when combined with a 35a charger and portable generator, allowing extended cruising even in the warmest climates.

DVD Player, PVR on DVB-T Signals, Majestic Link, ARC, USB for Multi Media and MMMI for iOS and Android capable devices to give you full HD video interface.

Am I correct in assuming that requires either running a generator or connection to shore power?
Yes, you need a generator or shore power. Interior fridge is available too or an electric ice chest in the cockpit for the first time!

Corsair 880 option - Hot Water Heater
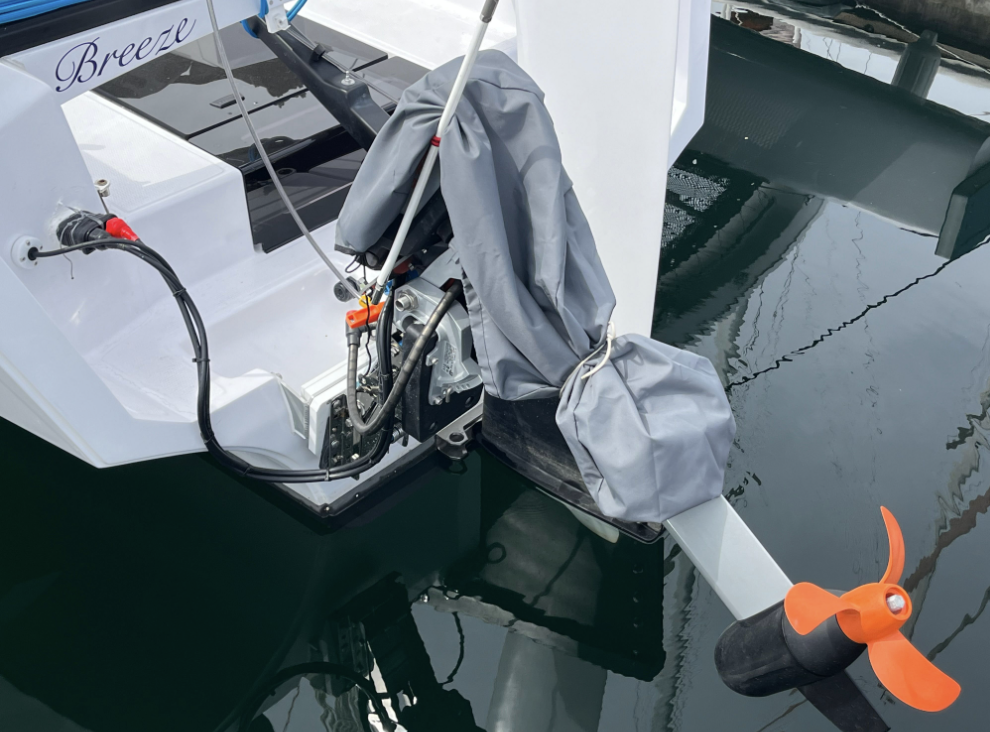
Unique 12V Water Heater - Hot Water On The Go For Outboard Boats. at just 6.8kg the S360EW is an electric-only 12V Water Heater brand new to the marine industry. Ideal for outboards the water heater connects to 12V power supply meaning there is no need for a generator, inverter or shore power. The neat design of the water heater means it can fit in compact spaces and electric-only means installation is no longer tied to the engine room. Rather the water heater can be fitted in the galley, transom or other storage spaces simplifying installation and allowing for more space on board.

The Water Heater has a rapid heat-up time with hot water in less than an hour and is highly efficient with heat retention of up to 10 hours. The heater is ideal for use with deck showers and warming wetsuits providing 3 Gals of hot water at a time.

With all Whale Water Heaters, safety comes to the forefront and the 12V water heater is no different with integrated temperature and pressure valve plus a thermal cut-out and heat Indication output. The heater also has an integrated anode for longer life and the relay allows for switching at the helm for ease of use and control.

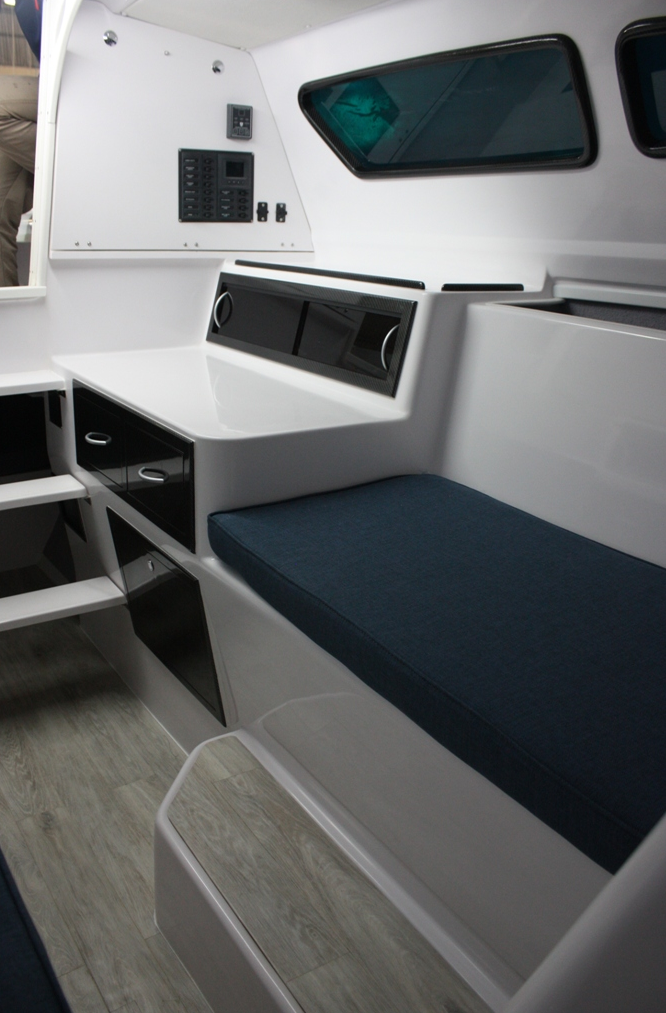
Corsair 880 option - Bluetooth Stereo
Enjoy the flexibility in audio control options with Bluetooth audio streaming, AM/FM radio, USB and AUX audio connections available, providing incredible audio reproduction and smooth frequency response with Fusion’s Digital Signal Processing (DSP). Voice prompts guide operation of the stereo, and the versatility of three simple mounting options available lets you install your stereo where it is best suited.

The Fusion Panel-Stereo is a seriously versatile solution for quality in-cabin audio entertainment.

FEATURES
HI-FI AUDIO REPRODUCTION THROUGH DSP: Digital Signal Processing optimizes the entire audio chain, ensuring the speaker components always receive premium quality audio for an efficient, incredibly smooth frequency response and Hi-Fi audio reproduction at every volume level.

PLUG & PLAY ALL-IN-ONE AUDIO ENTERTAINMENT SOLUTION: With built-in Class-D amplification, stereo source selection of Bluetooth, AM/FM radio, USB and AUX, two 3” speakers and a large surface bass radiator all combined in a perfectly tuned enclosure, the Panel-Stereo provides a one-product solution for in-cabin audio entertainment. All the acoustic parameters have been calculated by our acoustic engineers and taken into consideration when designing the enclosure to ensure quality audio reproduction wherever the Panel-Stereo is installed. 

SIMPLE, VERSATILE AND COST-EFFECTIVE INSTALLATION: Designed for easy installation, the Panel-Stereo only requires 12V dc power, ground and AM/FM antenna connections. With three mounting options available to create a professional finish with a maximum of only one cut-out required, the Panel-Stereo is a seriously versatile solution. The 43mm (1.69in.) surface mounting spacer allows installation directly onto any flat surface with no cut-out required, and its shallow depth allows for installation in a shallow wall cavity, either installed flush or flat for a premium finish.

BLUETOOTH WIRELESS TECHNOLOGY: Stream your family’s favorite soundtrack from any compatible Bluetooth enabled device with Bluetooth audio streaming. Control is available from either the Panel-Stereo or the connected device.

VOICE PROMPTS: Audible feedback is given as you cycle through music sources, change stations and save presets. This voice prompts are available in English, French, German, Dutch, Italian, Japanese, Mandarin, and Spanish.

FUSION-LINK™ CONTROL: Enjoy the freedom of wireless control of your audio entertainment from your compatible Apple or Android device with the free Fusion-Link app via Bluetooth. Download the free Fusion-Link Lite app to enable wireless control via ANT technology from your compatible Garmin watch

Enjoy the flexibility in audio control options with Bluetooth audio streaming, AM/FM radio, USB and AUX audio connections available, providing incredible audio reproduction and smooth frequency response with Fusion’s Digital Signal Processing (DSP). Voice prompts guide operation of the stereo, and the versatility of three simple mounting options available lets you install your stereo where it is best suited.

The Fusion Panel-Stereo is a seriously versatile solution for quality in-cabin audio entertainment.

READ MORE FAQ’S ON THE CORSAIR 880 >>

Screen Shot 2020-04-07 at 2.08.46 PM.png

180 Marine is a distributor...serving performance-minded sailors, as a Corsair Trimaran dealership. We're most active in the Western United States, and Mexico. 180 Marine strives to make sailboat ownership more exciting and enjoyable, as we expand our vital community of sailors who love adventure and sailboat racing.

Contact Richard Allen for the latest news on the Corsair 880 standard or the Corsair 880 Sport. info@180marine.com

Mast lowering on the Corsair 880 Sport

There are many stages to follow when recovering your 880 and lowering the mast.

We hope you’ll find this information helpful, be very careful and ask for expert assistance!

Corsair 880

Retrieving the boat

Whenever possible align the trailer in the direction of the wind to make it easier to motor onto the trailer when the daggerboard and centerboard are raised.

Corsair 880

Tie down tips

Use soft dock lines and padding, loop around the trailer frame and use the winches. smaller diameter line is not a great idea, more likely to rub and cause damage.

Corsair 880

Tie down tips

Use the 880 ladder or a 6-foot ladder to continue tie down tasks. Be sure to secure the bow to the trailer and the trailer to your vehicle so it doesn’t tip with added weight in the stern.

Motor tips

Use the motor support to take pressure off the tilt mechanisms. The road is much harder than water.

Corsair 880

Mast support

Be sure to use all supplied mast support lines as instructed and secure the bitter end.

Corsair 880

Mast drop preparation - be a pro

Look at the big picture…take your time. What will save time? What will cause problems? Get a good process and follow the steps the same way every time to become an expert.

Corsair 880

Teamwork pays

When possible use one or two crew on the ground and one person stays on the deck working in concert to confirm each other’s tasks and steps

Corsair 880

Prepare the halyards

Use TWO halyards, the jib and screecher halyard in tandem, to become your temporary forestay to lower the mast.

Corsair 880

Limit failure points

Tie a bowline in each of the halyards as the attachment point. Avoid using the halyard termination hardware to eliminate one potential failure point.

Corsair 880

Prepare the trailer winch

Your 880 is equipped with a custom winch fitted with a clutch. You must actively wind or unwind

the line to use it safely for your mast lowering.

Corsair 880 Sport

Connect the halyards

Finish the connection by tying another bowline in the winch line to connect to your two halyards.

Corsair 880 Sport

Clear the mast in stages

Start by removing the boom handle and stow in the boat.

Corsair 880 Sport

Clear the mast in stages

Remove the mainsheet from the end of the boom and stow it carefully in the cockpit without twisting the lines.

Corsair 880 Sport

Clear the mast in stages

For longer distances, remove the mainsheet from the traveler connection and stow it in a cockpit locker ready to use again.

Corsair 880 Sport

Clear the mast in stages

Leave the topping lift attached to support the rear of the boom and slide the front into the cabin.

Disconnect the topping lift to carry it all the way into the front cabin.

Corsair 880 Sport

Clear the mast in stages

Pad the folding seats and secure them to the beam folding struts so they don’t rub and

rattle. Shock cords are great for this, and use the same dedicated travel lines and shock

cords in the same positions every time.

Corsair 880 Sport

Clear the mast in stages

Secure the topping lift to a free mounting point on the base of the mast, begin to secure

ALL halyards to the base and running ends are free from the turning blocks.

Corsair 880 Sport

Clear the mast in stages

Pro-tip: Just coil the lines and stow them in the anchor locker. No need to tie all this

loose line on the mast when transporting.

Clear the mast in stages

Disconnect the downhaul (cunningham) and stow it in the cabin.

Corsair Timaran Sport

Attach the mast raising gin pole

Insert the stainless steel rod in the front of the mast in the stainless socket where the

boom and boom handle used to be attached.

Attach the mast raising gin pole

The gin pole uses two side stays and one stay attached to the mast to help support it.

Corsair 880 Sport

Attach the mast raising gin pole

If the mast support is out of reach you may step on the pole CLOSE to the mast, it will support your weight there to reach up.

Corsair 880 Sport

Attach the mast raising gin pole

Close the hooks, tension the purchase equally and use white tape to secure each hook!! Don’t want them coming loose.

Corsair 880 Sport

Attach the mast raising gin pole

Use white tape at your set point each time to confirm tension.

Corsair 880 Sport

Halyard raising lines

Use the jib and screecher halyards, two for redundancy and bowlines in all three lines as

shown.

Corsair 880 Sport

Halyard raising lines

Tension the trailer winch and the halyards on the mast until the end of the trailer line is

18 inches from the end of the gin pole to ensure knots won’t interfere.

Corsair 880 Sport

Halyard raising lines

Tension the halyards equally and close the clutches. Put the halyards on the horn cleats

too, again for redundant safety.

Corsair 880 Sport

Lowering the mast

Pro Tip: Notice the alignment of the halyards and the gin pole. Are the halyards tracking

straight back? Is the pole straight forward? The halyards MUST land in the gin pole V.

If they are not, just back up a step and confirm why they are not aligned. Wind direction?

Corsair 880 Sport

Lowering the mast

Each Corsair 880 has a bow roller. This one vibrated loose and is missing. Be sure to take

yours off and stow it whenever you are not using it to lower the mast. It’s not designed

as an anchor roller or anything else.

Corsair 880 Sport

Lowering the mast

Communication is key with your partner. Decide based on experience who should help

guide the mast and watch for problems and who should manage the clutch-equipped

winch.

Corsair 880 Sport

Moment of truth

When you are satisfied that all is ready, put a little winch tension on the halyards to

relieve tension on the forestay. Then remove the pin and put it in a safe place.

Corsair 880 Sport

Lowering the mast

Manage the forestay to prevent damage to the aluminum extrusion. It can help to tie a

loose loop around the forestay and secure it to the gin pole. This eases it down to the

horizontal position without scratching the drum or other parts.

Lowering the mast

Guide the furler and drum rearward to avoid scratching the deck. Doesn’t hurt to wrap it in a towel with a bungie for this step.

Corsair 880 Sport

Trick Question

If you made it this far, what did you forget? Is the mast rotation bar connected to the

deck yet? If you forgot this preparation step, put tension back on the halyards

and start again.

Corsair 880 Sport

Deck fittings

Now that we have your full attention, there are three parts. the deck plate, a retaining

bolt and a quick-connect pin that holds the rotation bar to the deck plate.

Corsair 880 Sport

Deck fittings

Slide the base plate into the deck fitting. Wiggle it to be sure nothing is binding.

Corsair 880 Sport

Deck fittings

Next screw the retaining bolt into the base plate but NOT all the way tight. On some

mast rake settings it must hold the base plate securely but NOT cause the pin to bind on

the rotation bar.

Corsair 880 Sport

Mast on the rear support

That step should go smoothly, and the person on the deck can gently guide the mast to

the port or starboard holding the diamond wires to align the mast in the rear support.

Corsair 880 Sport

Secure the bow

You can leave that extra winch line loose if you choose, so you don’t need to wind and

unwind it next time. Just be sure to secure the bow of the boat before anyone moves on

the stern of the boat, and be sure the trailer is secured to a vehicle.

Corsair 880 Sport

Moving the mast forward

On the 880 Sport the mast is long enough that it now has negative pressure when it is all

the way down and pivoted on the deck mount. Don’t pull the pin until you are SURE you

can handle the negative upward push of the mast base. A spotter is a really good idea.

Corsair 880 Sport

Moving the mast forward

Pad the bow pulpit before you place the mast there. use carpeting or even a Yoga Block

to raise the mast higher at the front and lower at the back.

Moving the mast forward

As suggested, use one person’s body weight above the mast to hold it securely, and a

second person can pull the pin and be ready to assist. As soon as it’s rolled forward

about 2 feet the weight goes neutral, and it’s more manageable as you roll it forward

on the dual support rollers.

Corsair 880 Sport

Moving the mast forward

Pro Tip: Last one…the spreaders are WIDE to handle the power of this sail plan. you

most hold the diamond wires firmly as you pull the mast forward. Rotate the mast about

30 degrees so the spreaders can pass through the beams: one low and one high. Be

watchful about hitting the winches with the diamond wires. Just roll it back and forth to

clear any issues.


If you’re interested in knowing more about the new Corsair 880 Sport or Standard or any trimaran… contact Richard Allen / The 180 Marine trimaran expert. richard@180marine.com
Learn more about 180 Marine >>

The US offshore wind industry is ready for take off!

Top 10 things you didn’t know about offshore wind energy.

Offshore Wind Resources Are Abundant:
Offshore wind has the potential to deliver large amounts of clean, renewable energy to fulfill the electrical needs of cities along U.S. coastlines. The National Renewable Energy Laboratory estimates that the technical resource potential for U.S. offshore wind is more than 2,000 gigawatts of capacity, or 7,200 terawatt-hours per year of generation.

Offshore Wind Turbines Can Be Extremely Tall:
In order to capture the abundant wind resources available offshore, offshore turbines can be scaled up to one-and-a-half-times the height of the Washington Monument, with blades the length of a football field.

In order to capture the abundant wind resources available offshore, offshore turbines can be scaled up

Offshore Wind Components Are Getting Larger: Offshore wind turbine components are transported by ships and barges, reducing some of the logistical challenges that land-based wind components encounter, such as narrow roadways or tunnels. These components enable offshore wind developers to build larger turbines capable of producing more electricity; however, working at sea presents its own challenges

Offshore wind turbine components are transported by ships and barges, reducing some of the logistical challenges that land-based wind components encounter, such as narrow roadways or tunnels.

The U.S. Offshore Wind Industry is Ready for Takeoff: The U.S. Department of Energy (DOE) works collaboratively with industry and academia to address research challenges that are unique to U.S. offshore wind (like hurricanes), and to understand and address market barriers such as environmental impacts, logistical challenges, siting and permitting, and infrastructure development. Finally, DOE is also working to demonstrate advanced technologies.

Electricity produced by offshore wind turbines travels back to land through a series of cable systems that are buried in the sea floor.

Offshore Wind Farms Use Undersea Cables to Transmit Electricity to the Grid: Electricity produced by offshore wind turbines travels back to land through a series of cable systems that are buried in the sea floor. This electricity is channeled through coastal load centers that prioritize where the electricity should go and distributes it into the electrical grid to power our homes, schools, and businesses.

The bulk of the nation’s offshore wind resources, about 60 percent, are in areas where the water is so deep that conventional foundations—large steel piles or lattice structures fixed to the seabed—are not practical.

The Majority of U.S. Offshore Wind Resources Are in Deep Waters: The bulk of the nation’s offshore wind resources, about 60 percent, are in areas where the water is so deep that conventional foundations—large steel piles or lattice structures fixed to the seabed—are not practical. U.S. offshore wind projects are developing a variety of different foundations suited to unique conditions at each site.

Illustration by Josh Bauer, NREL 49054

Offshore Wind Turbines Can Float: Several companies are developing innovative floating offshore wind platforms for use in deep waters. Three kinds of floating platforms are spar-buoy, tension leg platform, and semi-submersible. About 75% of projects plan to use semi-submersible platforms.

Why a Corsair Trimaran?

Q&A

Why is it so great to have the option of a folding trimaran?
A: It’s great because it’s foldable so therefore trailerable. When folded up it is easy and very convenient to berth. Basically, it’s great because of it’s convenience and cost efficiency due to its incredible versatility.

Corsair 760 folded

Can I sleep with my family/friends aboard a Corsair trimaran?
A: Absolutely. Not only can you sleep aboard one of our boats but you can pull it right up to any beach or just off the beach giving you access to the best of both worlds, on the water and convenient access to the land.

Corsair trimaran 760 interior

Is the Corsair trimaran high enough performance to race?
A: Corsair models are renown for their high performance capabilities and in all sorts of conditions! In fact, even on a gentle puff of wind they move quite quickly. As well as being high performing and super competitive, they also provide you and your crew with the necessary room, comfort, handling and structural reliability.

Corsair 880 at the starting line

2021 San Diego NOODS / Corsair 880 Sport

Where can I keep my trimaran?
A: On a mooring; beached at your favorite secret spot or anchored there as well; folded in a berth or on a trailer at home! Due to its versatility, it’s really up to you!

Corsair 760 trimaran beached

Corsair 760 in the woods

Is there a warranty on my newly purchased Corsair?
A: Yes – All new Corsairs come with a 5 year structural warranty.

What about the re-sale value?
A: Corsair Marine trimarans have an excellent reputation and are in high demand throughout the world in particular the USA and Europe but increasingly in Asia and the South Pacific. Used Corsairs have sometimes sold for a higher value than their original price making them an excellent investment for their owners.

Corsair 880 Sport 2021 at the San Diego NOODS

I know trimarans are safe but what do they offer me over a mono hull or a catamaran?
A: Corsair designs have an excellent safety record due to their stability, unsinkability and conservative rigging. A Corsair trimaran unlike a monohull or a catamaran offers you versatility with its uniquely patented folding design, accessibility to places boats with fixed keels and fixed dagger boards/rudders could not access (resulting in true solitude and escape), beachability for those who enjoy stepping directly onshore and best of all, affordability. Everything you could possibly want in a ‘form follows function’ design.

Corsair 880 Sport

Corsair Marine has a global network of dealers ready to assist you and answer questions you may have from the beginning of your purchase through to the delivery and even launch of your new Corsair trimaran. Our experienced dealers own Corsairs and are constantly in the process of buying one or even several. They have raced or cruised them, organized sailing clinics and regattas with them. Everything you need to know about buying and owning a Corsair, your dealer is there to help you.

180 Marine is your source for both new and used Corsair trimarans.

Corsair 880 Tips - Docking

Here’s a good write up from our friend Christopher Wentland a long-standing Corsair trimaran dealer with vast experience across all models. Christopher is based in Germany.

Basic preparations for docking a trimaran in the harbor:

Number 1: The boat is very light, so you should think in advance even more than usual. Know where the wind is coming from and know where the current is going.  A performance trimaran will be taken by the wind more easily.

Have your daggerboard down.  The boat pivots on the daggerboard so you need it to turn correctly, and especially if there is some wind the daggerboard is crucial. With anything like a strong wind the boat simply won’t turn, it will just drift, so the daggerboard must be down.

You’re planning in advance, so don’t dock bow-in even into the wind. When the wind is coming from the dock, you’ll ideally plan on docking stern-in. The boat follows the power of the engine every time in a lightweight trimaran. So keep the power at the leading end of the boat (stern-in in this situation). It’s also far easier to dock stern-in for beginners, especially as they can see the engine. If you’re tying up side-to, do the same thing: move along-side the space and shimmy (or drift) onto the dock using the engine to keep you in place, and the engine+rudder to control the lateral movement toward the dock.

Corsair trimaran 880.png

The wind is blowing you off the dock

And if the wind is from behind or blowing you onto the dock?

Exactly the opposite. The engine needs to act like an anchor – it needs to be to the wind. So the bow goes into the dock, and you use the engine to control your speed and angle. Move-in slowly and just be aware of your bowsprit.

Corsair trimaran 880.png

The wind is blowing you onto the dock


2.  What are the big differences between docking the different Corsair models?

The big differences between docking the various models are between the aft-cockpit models, and the aft-cabin versions. In the aft-cockpit versions ranging from the Pulse 600, to 760’s, and older-versions like the 28, there is no outboard linkage between outboard and rudder. So YOU must be that link – literally you have the outboard in one hand and the rudder in the other.  You need to move them simultaneously. This means docking stern-in is even more important. And you’ll need to be standing to dock.

The new Corsair 880 has a generational improvement on the outboard linkage (see image). That will make docking the new 880 easier as the helm will feel in control. You have a more elevated position and a bigger place to put a big fender at the stern (perhaps tied on the dock). So although the stern of the boat looks taller and flatter in a completely modern trimaran like the 880, the docking situations we’re talking about are where it comes in really handy.

Corsair trimaran 880png

Handling the new 880 will be made easier with an updated engine-tiller link

Now you’re approaching the dock so I’m thinking about some of the pitfalls! It’s also important to know that the stainless steel eyes used for tying the bow nets and wing nets are NOT used for docking lines – especially on the smaller models. You might use them for extra fenders – that can be useful because fenders on trimarans can ride up the dock and pop out. So it is useful for some extra fenders (anyway, be aware of that when attaching fenders). But don’t use the stainless eyes for docking lines – they’re meant to tension the nets where the forces are applied from a completely different angle, and I regularly see them damaged from misuse as a dockline fixing point. It is especially true on the smaller models where the eyes are obviously smaller as well.


3.  What about mooring?

The key difference between mooring a Corsair trimaran and something like a Seawind catamaran is in the use of the bridle.  A really heavy trimaran might not do this, but a Corsair is light enough to make forward motion just due to the windage of the boat itself! It will literally move forward over the bridle, anchor, mooring line, or whatever you’re tied to – sometimes resulting in loosening the anchor and starting to drift. So make sure the bridle is asymmetrical so that the boat wants to sit on a “tack” – this prevents the forward progression.  Also, take the daggerboard up. The daggerboard provides lift, so enables the boat to sail itself forward more efficiently. If you don’t know the waters, the sea bottom, and conditions, then do the opposite – Almost! Put about 20-25cm of daggerboard down because if the boat does drift and run aground it's better for the daggerboard to run aground and catch on the bottom than for the boat hull to run aground. Allow the daggerboard to take the punishment because replacing that is a lot cheaper and easier.


4  And Mooring alone?

Well in advance of approaching a mooring field, I take my own (the boats) bow mooring line and attach it through the clew at the bow. I run it outside the shrouds back to the cockpit. Then I maneuver the boat stern-toward the mooring and pick up the mooring line. I then feed the bowline through the eye of the mooring line, keeping the line in hand, and put the engine in neutral. Then I walk the line forward and attach the line to one of the floats – in effect making a bridle. This is a maneuver that, once you’ve done it a few times, really takes the stress out of mooring. With a second person, obviously they can do some of this running around. Even still I often do the initial stern-in maneuver because the routine is now perfected. It allows me to approach the mooring from the correct angle, with the engine and rudder in easy reach. And even better it allows me to slowly ease the boat into the mooring position I want – because the boat and engine did all of the work in advance.


If you're interested in knowing more about the Corsair 880 or the Corsair 880 Sport contact USA trimaran expert Richard Allen

Richard is a long-standing Corsair trimaran expert with vast experience across all models. 180 Marine will be receiving the first Corsair 880 (hull #3) into the U.S. August 2020.

Pricing on the Corsair 880 >>

Multihulls are getting to the age where they are deemed worthy of restoration!

trimaran san francisco bay

Arthur Piver of Mill Valley Modern Trimaran

Isn’t it great that multihulls are getting to the age where they are deemed worthy of restoration? Just think, that old Piver rotting out back of your marina might be the equivalent of finding a Duesenberg in your grandfather’s barn. Well, maybe not a Duesenberg, but certainly a Model T.

It’s probably time for an Arthur Piver retrospective. Truly a multihull pioneer, Piver’s gift for promotion, design and adventure certainly put the idea into every man’s head that the sailing life wasn’t just for the rich or the wood shop wizards anymore. A stack of plywood and some extra hours of labor and presto! The yacht of your dreams could be carrying you to Tahiti.

Piver had many detractors back in the day but I give him credit for igniting the multihull fire that still burns today. Back in the ‘60’s, the allure of multihulls wasn’t just that they were fast or stable, but that they were within economic reach. “Getting the lead out” was a metaphor for more than just boats, and they suited the spirit of the times. It was really something that a backyard builder could nail together a boat that would out perform the most expensive establishment keelboats on the bay.

Searching the web for pics, I see that both Jim Brown and Gary Dierking are former Nugget owners, an experience that only urged them on with their own multihull discoveries.

As multihulls have gained the mainstream, they’ve also collected the mainstream baggage. Cats and tris are now far more expensive than monohulls for the most part, and even the America’s Cup, the most established of the establishment, is racing in cats.

As multis grow ever more complex, carbonized and expensive, I wonder if there is any room left for guys like Piver. Guys who showed us that an intelligent frugality was as good as dollars, and quite possibly, even better.

Still sailing a 1967 Piver 25 Trimaran

Highway transporting your Corsair Trimaran

Corsair 880

Preparing a boat for interstate travel is just as important as preparing it for blue water delivery.

Preparing a Corsair for interstate travel is just as important as preparing it for blue water delivery. Severe weather and bumpy road conditions can take a toll on any boat and its inventory if unprepared.

Insurance Coverage

The owner of a boat is responsible for her as well as her trailer and potentially any damage either may cause to persons or property during transit. Double-check your coverage – especially if a third party will be towing your boat. Confirm commercial transporters carry commercial liability and property damage insurance.

Check out these tips and call us if you have questions.

Aspen Open.png

Weight & Gear

Be smart about the gear and weight you’re hauling in the boat. Too much gear is going to increase the chances of damage and will without question add to the weight and fuel costs.

Having weight in the wrong place in the boat can cause the trailer to sway back and forth. The rule of thumb is to have about 10-15% of the GTW (gross trailer weight) on the hitch. If the trailer is swaying, gear can be moved forward inside the boat to help reduce or eliminate this, as can adjust the height of the drawbar and hitch ball. 

Secure gear as low as possible in the boat – the heaviest items the lowest- just as on the water. 

Any fragile items should be wrapped or removed. Think about the trailer and boat bouncing through potholes and over rough railroad crossings. Could it break? Then wrap it and pack it appropriately.

Prevent chafe and scratches. Any items with sharp edges should be wrapped or otherwise protected from damaging other gear or the boat’s interior.

Empty your tanks! No fuel (if possible, and if transporting into other countries, it may not be allowed), no gray, black, or freshwater either. 

Batteries and outboard motors should be removed or properly secured.

Remove any perishables and any unsealed food. No one wants insects, vermin, or even bears in their boat (it’s possible where we often trailer boats)!

Use quality painters’ tape or bungees to secure doors, cabinets, folding tables, and other large movable bits open or closed if necessary.

180 Marine transporting info.png

Secure Openings

Secure all hatches and opening ports, and seal any through-hulls or other external openings with colored 3M vinyl tape. Why tempt wasps or other creatures from crawling in there? This tape won’t leave a residue if it’s removed within a few days. It’s also great for securing rigging that you don’t want to stow (see next section). Use it “inside out” if you’re planning to leave it wrapped in place for any period of time so the adhesive isn’t left behind on your boat. 

180 Marine transporting info.png.png

Boat & Systems, Rigging & Foils

Shut off or disconnect batteries, and ensure batteries are strapped down properly. Cover at least the positive terminal securely so no loose metal object can make contact with it. Battery tie-down brackets are often made from plastic and are broken. Also, check to ensure the screws are tight. Now is a good time to replace and/or re-bed them if the screw holes are stripped.

Winterize engines and plumbing if it’s that time of year. When in doubt, check the manual for any systems you’re unsure about. 

All stays and shrouds are best removed, coiled, and stowed in the cabin - preferably in a box or old sail bag. Stainless rigging can mar gel coat and it’s often dirty enough to stain fabric cushions. Fiber rigging is fine to be left out on deck as long as it is coiled and secured though it may get unnecessarily filthy if there is any rain during your road trip. 

Masthead instruments (Windex, anemometer, antenna, etc.) removed and stowed. Close or otherwise cover plugs and terminals to prevent water ingress. 

Ensure the mast and boom secured to avoid any chips, scrapes or scratches. The same goes for the floats. Coil your halyards and sheets and secured any of these left on deck to prevent vibration and banging as well as chafing. Stow fenders and dock lines in the cabin, and tie up the nets securely or remove them if the boat will be on its trailer for an extended period. 

Consider sand, gravel, and other road debris. Install mud flaps and chip protection. It’s easier and cheaper to peel off some stretch or shrink-wrap (or even masking tape) than making gel coat repairs. 

Properly secure the daggerboard by allowing its weight to be supported by the trailer bunk and then snug the hoisting and lowering lines as applicable. Remove the rudder and cassette and store separately in padded backs on the cabin sole. 

Remove any extra gear, equipment, and electronics from the mast, boom, nets, pulpits, and stanchions as appropriate. 

Finally, secure the boat firmly to the trailer in a minimum of five points of connection, e.g. bow strap plus two ratchet straps or tie-down lines. Please refer to your boat’s owner’s manual. 

180 Marine transporting info.png.png

Know your Dimensions

  • Overall height, width, length, and approximate all-up weight

  • Confirm the tow vehicle is up to the task

  • Ensure that no more than about 5 feet of the mast is extending beyond the transom.

    Tires and Wheels 

  • Spare tire and wheel mounted to the trailer?

  • Do you have the proper lug wrench and jack to lift the trailer and remove the wheels?

Screen Shot 2021-07-09 at 4.11.19 PM.png

Is the tread good and air pressure correct per the info on the tire’s sidewall? Is there any dry rot or signs of damage?

Trailer  

  • Bearings inspected and greased? If not, think about the miles since the last service. If you’re unsure, check them. It’s a lot easier to do in the driveway deal with a problem on the side of a highway. A failed bearing can destroy an axle and in some cases cause the wheel to come off while driving.

  • Lights tested?

  • Brakes tested?

  • Is the brake pad thickness OK?

  • Lugs torqued to spec?

  • Tongue weight OK? Too little and the trailer may sway; too much puts unnecessary wear on the tow vehicle’s suspension.

Safety chains with suitable attachments including emergency break-way when required?

Fine Print
Please read your owner’s manuals for other tips and instructions. We don’t provide any guarantees that this list is all-inclusive or will prevent any problems. It’s just a guide. Use it at your own risk, and contact us if we can help answer your questions. 

180 Marine.png

Colligo Marine lashing tie off instructions

At 180 Marine we only use Dyneema. This is a great illustration from Colligo Marine on lashing the side stays.

Is Dyneema stronger than Kevlar?
You've probably heard about these fibers' strength-to-weight ratio before. Kevlar® states it is 5 times stronger than steel on an equal-weight basis and Dyneema® boasts an impressive 15 times stronger. ... Kevlar® has a tensile strength of 3620 MPa and Dyneema® has 3600 MPa of tensile strength.

This image shows a nicely finished off lashing using our CSS71 Line Terminator and CSS61 Chainplate Distributor using 5 mm or 3/16” Dyneema line.

You can see the critical hourglass shape that gets tighter as the shroud tension gets tighter. It is very secure but is also allows for easy unlashing. Without the hourglass shape you would need to place the knot at the bottom of the lashing which makes it very painful to lash and unlash.

There is a series of individual half hitches that form the attractive spiral configuration of the lashing. This also creates redundant security ensuring that your lashing will not shake out.

Tensioning
Prior to lashing off please tension the shroud or stay to the desired tension. Tensioning can be achieved in several ways:

1. The best method is to take your boat sailing and adjust the leeward shroud, letting the wind blow the rig to leeward and do the work for you. Tack back and forth in low to moderate winds and keep adjusting the leeward shrouds. Always keep the mast straight and in column. In the end, you want your leeward shrouds to just come loose at your wind reef point, usually about 15-20 knots of wind speed.

2. You can also bring a halyard down and tie it off to your lashing line and use a winch for tensioning. This method will probably mean that you would need to help the lashing line thru all the holes in the line terminators and distributors while at the same time adding tension with the winch. When you are tensioned up and ready, use the following directions to tie off your lashing very securely

Lashing Off
Please note the lashing is started at approximately 1/3 or less of the total lashing distance up from the bottom. This is critical as the knot will not slide down the lashing system due to the hourglass configuration. There are side forces tending to hold the knot up. If this is too high the knot will slide down and your shroud or stay will loosen.

For more great information go to Colligomarine.com

Corsair 880 trimaran weight study and key stats

Here we have a comparison to anticipate how the 880 will perform compared first to other Corsair models, and ultimately with other trimarans. See what you think, compared to the 24' Corsair 760, the previous 28' C28, and the current 32' Corsair 970.

Corsair weight study

Corsair weight study


Corsair 880 key stats

Corsair 880 key stats

Corsair 760 SPORT Training on San Francisco Bay

“LOOK MA NO HANDS!”

Sailing in San Francisco Bay in mid-January was great! Winds were mild in the South Bay so we were able to fly the spinnaker and turn the autopilot on.

Our training days are extremely comprehensive. We strongly believe that the best way to learn how to sail is by actually sailing! The training we offer is designed to provide the essential foundations of sailing skills on a Corsair trimaran. Learn either how to sail a Corsair trimaran much better, or sample what a Corsair trimaran is like to sail.

We’ve been sailing and racing Corsair trimarans for over 20 years, and happy to share our experience.

Sailing in San Francisco South Bay / Mid January

Sailing in San Francisco South Bay / Mid January

Corsair 760 Sport.jpeg

Customer Experience

"Richard and Leslie are the power couple of their industry. My wife and I flew to Denver from Southern California, where we choose to have our boat delivered and so thankful we did. The lake provided perfect conditions to see the performance of the Corsair 760. Richard and Leslie were extremely understanding, accommodating to our needs, worked at our pace, and guided us through each step of the process. When we left Denver, we felt as if we were leaving friends we’ve known and sailed with forever. We look forward to new adventures with this dynamic duo.”

“This was my first boat purchase and I had done my research and then still had many questions. Richard is extremely knowledgeable about all the Corsair models. I decided to purchase a Corsair 760 for the family. Working through many of the details like financing, boat performance, and training was easy and smooth with Richard. He is a good communicator.”
— Hoku M


180 marine.com.png

“It means so much to us to hear back from our customers, many of whom have become good friends and partners. We look forward to supporting each and every one of you on your adventures in sailing and living the best life possible!”
— Richard and Leslie, 180 Marine

Corsair Trimaran Folding System

Folding and unfolding a Corsair trimaran takes only a few minutes.

With only 4 bolts to remove, it is easily managed by one or two persons and is normally done while afloat. Simply raise (to fold) or press down (to unfold) the inboard end of one cross beam. Only a little force is needed due to the folding system’s carefully balanced geometry and the movement of the float being mostly horizontal.

Screen Shot 2020-05-24 at 6.28.32 PM.png

STEP 1: Remove Beam Bolts

Remove all four beam bolts, using a spanner or the provided speed wrench. As these are installed firm but not overly tight, this is a simple task requiring minimal physical effort.

STEP 2: Loosen Shroud Tension

If required, ease out some length on the cap shroud. This is made easy by the use of Dyneema shrouds and synthetic lashing. NOTE: smaller models such as the Corsair 760 do not require this step as tension is maintained in both folded and unfolded positions.

STEP 3: Fold

By pulling up on the inboard beam straps the beam will begin to lift as the floats gradually make their way inboard. As the floats are supported, there is very little weight on the beam allowing this process to be easily performed by one or two people.

Corsair 760.png

The folding system on a Corsair trimaran takes only minutes

The folding system on a Corsair trimaran is easy.
With just 4 bolts to remove, it is easily managed by one person and is normally done while afloat. Simply raise (to fold) or press down (to unfold) the inboard end of one cross beam - meaning it can be done from the safety of the cockpit. Only a little force is needed due to the folding system’s carefully balanced geometry and the movement of the float being mostly horizontal.

The solid aluminum folding struts have absolute control over the motion and prevent flexing or racking. A stainless steel bolt on the inboard end of each beam secures the floats for sailing. Crucially, wingnets remain attached during the folding process - their frictionless fixing tension themselves appropriately. Folding can be done even while motoring.

Folding system on a Corsair trimaran 1

Folding system on a Corsair trimaran 1

Folding system on a Corsair trimaran 2

Folding system on a Corsair trimaran 2

Folding system on a Corsair trimaran 3

Folding system on a Corsair trimaran 3

Folding system on a Corsair trimaran 4

Folding system on a Corsair trimaran 4

Folds in minutes, just 4 bolts to remove.
Solid lower struts provide unparallelled safety and stiffness.

Corsair trimaran expert from 180 Marine Richard Allen training in San Francisco Bay

Corsair trimaran expert from 180 Marine Richard Allen training in San Francisco Bay


180 Marine.png